Add Row
Add Element
UPDATE
Add Element
  • Home
  • Categories
    • Cleaning & Moving
    • Maintenance / Repairs
    • Remodeling & Construction
    • Landscaping / Outdoor
    • Security & Technology
    • Sustainability, Health & Safety
    • Interiors / Décor
    • Expert Interviews
    • DIY Home Projects
Home Wise News!
Wise Insights, Reliable Contractor Advice & Hands on DIY Know How for Savvy Homeowners
June 01.2025
2 Minutes Read

Budget-Friendly DIY Decor Ideas to Refresh Every Room in Your Home

Eclectic living room with budget-friendly DIY decor ideas.

Transform Your Home on a Budget: DIY Decor Ideas

Decorating your home doesn’t have to come with a hefty price tag. With a pinch of creativity and some accessible DIY projects, you can rejuvenate every room without breaking the bank. Whether you are an experienced DIY enthusiast or simply looking for easy, budget-friendly ways to enhance your living space, these ideas are sure to bring personality and style to your home.

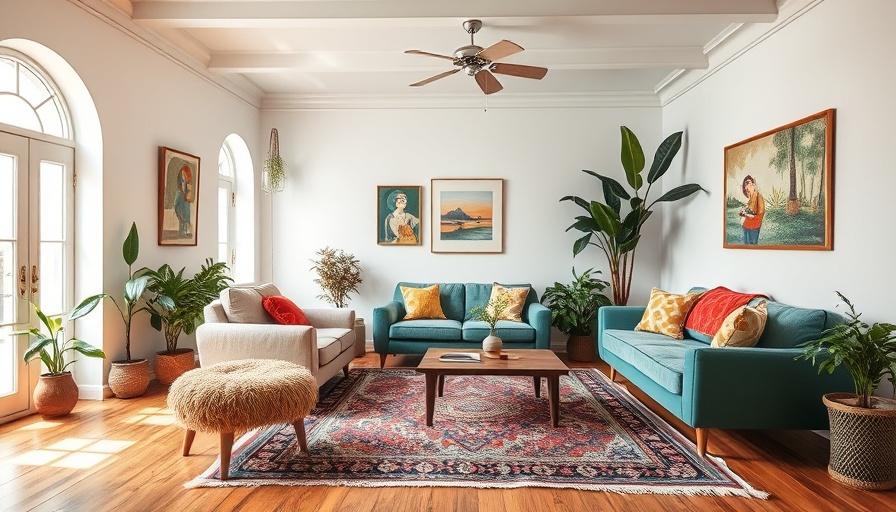
1. Living Room: Spruce Up with a Gallery Wall

A gallery wall can quickly make a dull space come alive. You don’t need to splurge on expensive artwork; instead, collect free downloadable art or quotes from online resources, and use magazine clippings or pages from old books. Mixing and matching frames from thrift stores, painted in the same color, contributes to a cohesive aesthetic. Arrange your framed favorites in a grid or freeform style to create a stunning focal point.

2. Kitchen Charm: Create a Chalkboard Wall

Consider adding a playful yet functional chalkboard wall or menu board in your kitchen. Use chalkboard paint on a small section of the wall or the side of a cabinet. Alternatively, frame wood or glass for a removable board. This piece is perfect for jotting down grocery lists, cooking plans, or even positive affirmations, adding a rustic café feel to your kitchen.

3. Bedroom Refresh: New Pillows and Linens

Updating your bedding doesn’t have to cost you a fortune. Dive into DIY by sewing or using fabric glue to create new pillow covers. Old shirts or fabric remnants work wonders here! For those who might not sew, adding iron-on designs or stencils can inject new life into pillowcases. Or for a quick solution, tie fleece edges to make a no-sew blanket. These small touches can significantly rejuvenate the sleeping space.

4. Bathroom Organization: Creative Storage Solutions

The bathroom is often overlooked but can be an area to showcase your creativity. Repurposed mason jars or tin cans serve as perfect organizers for everyday items such as toothbrushes and makeup brushes. Consider creating floating shelves with reclaimed wood to enhance storage. A simple coat of paint or mosaic tiles on an old mirror can also give it a stylish update.

5. Welcoming Entryway: DIY Key Holder

Your entryway is the first impression of your home, so keep it organized with thoughtful DIY decor. Craft a wall-mounted key holder using a small wooden board and hooks. Mounted magazine holders can function as mail sorters. A small storage bench or crate with a cushion adds both seating and storage, creating a welcoming atmosphere.

With these simple yet effective DIY décor ideas, refreshing your home is not just possible; it can also be enjoyable! Embrace your creative side and start transforming your space today!

DIY Home Projects

Write A Comment

*
*
Related Posts All Posts
09.13.2025

Restore Your Hardwood Floors: 4 Easy Ways to Erase Scratches

Update Scratches and Scuffs: A Common Hardwood Floor WoeHardwood floors, while stunning and timeless, often bear the brunt of daily life. From pet claws to furniture mishaps, scratches can appear seemingly out of nowhere. Understanding how to address these blemishes can save you time and money, extending the lifespan and beauty of your flooring.4 Foolproof Techniques to Erase ScratchesHere are four of the most effective methods to return your hardwood floors to their illustrious past:1. The Magic of CrayonsCan you believe that a simple crayon can help? Choose a crayon that closely matches your floor's color. Gently rub the crayon into the scratch, and use a soft cloth to buff it out. Not only is this method easy, but it’s also child-friendly—who can resist a little DIY with the kids?2. Olive Oil and VinegarFor a more natural approach, a mixture of olive oil and vinegar works wonders. Combine one part vinegar with two parts olive oil, and apply it to the scratched area with a soft, lint-free cloth. This solution nourishes the wood and may help conceal minor scratches while providing a natural shine.3. Furniture Markers to the RescuePurchasing a furniture marker can be a game-changer. These markers are specifically designed for wood, and they come in various shades to match most finishes. Apply the marker directly to the scratch, let it dry, and buff it with a clean cloth.4. Embrace the Power of Rubbing AlcoholFor more stubborn scratches, rubbing alcohol might be your best bet. Dampen a cloth with some alcohol and gently rub the scratched area. This can lift the stain or scratch without damaging the wood beneath. But tread carefully—always test a small, inconspicuous area first!Why Caring for Hardwood is EssentialProper maintenance of hardwood floors not only enhances their aesthetic appeal but also preserves the value of your home. Scratches, if left unattended, can lead to more significant damage over time, necessitating costly repairs or replacements. Regular upkeep helps maintain your floors in pristine condition, which is crucial if you're considering selling your home in the future.Tools for the Trade: Investing WiselyBeyond the immediate fixes, consider investing in tools that promote long-term maintenance. High-quality mops designed for hardwood floors can help prevent buildup that leads to scratches in the first place. Plus, keeping furniture pads under heavy objects can minimize future scratches—consider them your floor’s best friends!Understanding the Lifespan of Your FlooringHardwood floors are a long-term investment, often designed to last decades with proper care. While the methods above will help treat minor issues, understanding your flooring, its finish, and its wear can guide you in making better decisions—from routine cleaning to when to contact a professional.Future-Proofing Your FloorsIn a world where technology integrates into every aspect of home management, consider “smart floor cleaners” that can help maintain your hardwood floors effortlessly. These advanced tools often come equipped with various settings for different floor types and features that recognize stains or scratches, ensuring that your floors look impeccable with minimal effort.So, roll up your sleeves and give your hardwood floors the care they deserve. They’ll not only look better, but your home will too—and remember, a little proactive care can save you from future heartaches!

09.11.2025

Transform Your Home with DIY Baseboard Installation: A Comprehensive Guide

Update Mastering Baseboard Installation: A Step-by-Step Guide Transforming your home isn’t just about large renovations; sometimes, it’s the small details that can make a significant impact. Installing baseboards is a perfect way to enhance the look of your rooms while showcasing your DIY prowess. This project, manageable even for novice DIYers, requires a few tools and materials, as well as patience and attention to detail. Let’s dive into how you can successfully tackle this project and the benefits of doing it yourself. Why Baseboards Matter: The Importance of Aesthetic Appeal Baseboards are more than just functional trim that covers the joint between the wall and the floor. They serve both aesthetic and practical purposes: Finish Off Your Décor: Properly installed baseboards can complement the style of any room, from contemporary to traditional, adding an elegant touch and enhancing your overall decor. Protect Your Walls: They provide a barrier against damage from furniture, cleaning equipment, and foot traffic, keeping your walls in pristine condition. Hide Imperfections: Baseboards can cover up uneven flooring edges or flooring transitions, giving your space a polished look. Preparation: Gathering Tools and Materials Before you begin, make sure you have everything you need. To install baseboards effectively, you’ll need: Tools: 18-gauge brad nailer, caulk gun, hammer, measuring tape, miter saw, nail set, utility knife. Materials: Baseboards, 2-inch 18-gauge nails, wood filler, primer, paint, paintable caulk, fine-grit sandpaper, clean shop rags. Having these items ready will save you time and make the process smoother. Step 1: Measuring Your Walls Start by carefully measuring the linear feet of the walls that will be receiving baseboards. To ensure you have enough material, buy about 10% more than your measurement accounts for, considering possible mistakes. Additionally, consider painting the baseboards before installation. It saves time and allows for easier touch-ups later, ensuring a clean finish without the hassle of painting on your hands and knees. Step 2: Create a Cut List To keep the process organized, create a detailed cut list. Start your baseboard installations at a doorway and work around the room. Each entry should include the cut length, any angles needed, and the type of cuts (miter or butt) required. Remember, for a seamless effect, use 45-degree angles to camouflage seams. Tools and Techniques to Elevate Your Installation Skills Once you're ready to install, it is crucial to know how to use your tools effectively. If you're new to using a miter saw, practice on some scrap wood to gain comfort. Precision is vital: a miscut can ruin your entire project. Take your time, and don’t rush through this step. Tips for a Professional Finish One of the most important aspects of DIY projects is achieving a professional look. To enhance your results: Filling and Sanding: After the baseboards are nailed into place, fill any nail holes with wood filler. Once dried, sand the areas smooth to ensure even paint application. Caulking: Use paintable caulk to fill gaps between the baseboard and wall or floor, ensuring a cleaner, more finished appearance. Final Touches: After everything is painted, step back and check for any touch-ups that might be needed. This final evaluation ensures that your work meets your expectations. Cost-Effective DIY: Budgeting for Your Project One of the benefits of a DIY project is knowing how much it can save you. Installing your baseboards might cost between $100 and $200, significantly less than hiring a professional. This not only adds value to your home but also enhances your skills as a homeowner. Final Thoughts: Empowering Yourself Through DIY Home Repairs Embracing DIY projects like baseboard installation allows homeowners to gain confidence in their abilities while improving their living spaces. The satisfaction derived from completing such a task not only comes from saving money but from having created something with your own two hands. So, gathered your tools, measured your walls, and armed yourself with knowledge and dedication. Are you ready to transform your space with brand new baseboards? If you are eager to dive into this or other home repair projects, remember that practical resources are available, from detailed guides to hands-on tutorials that empower you further. Every step you take toward mastering home repairs is a step toward enhancing your home's integrity and value.

09.11.2025

Why Homeowners Love Red Lion Water Pumps: Reliability and Innovation

Update Discover the Reliability of Red Lion Water Pumps If you’re a homeowner who struggles with water issues, you might have heard of Red Lion water pumps before. Renowned for their durability and effectiveness, these pumps are often the go-to solution for both rural and residential setups. What sets them apart from the competition? Built to Handle the Toughest Tasks Red Lion water pumps are not just designed for show; they deliver under pressure. Last summer, when my own well pump failed during an intense heatwave, I sought advice from my neighbor, who swore by his Red Lion pump for irrigation. Upon his recommendation, I decided to invest in a cast iron model. Its performance far exceeded my expectations and outperformed what I had used previously. Last year, I saw firsthand how well these pumps can handle real-world demands when my uncle used his shallow well jet pump to deal with flooding in his garage. Running it overnight, he drained the water effectively without the worry of premature motor failure, something he experienced with industrial brands. Why Homeowners are Loyal to Red Lion One key reason homeowners love Red Lion pumps is their simplicity. Most homeowners prefer not to hire professionals for installation, and the ease of setup is a huge plus. An acquaintance managed to install his pump in under an hour, guided solely by online tutorials. The provided instructions are straightforward, making it accessible even for those less adept at DIY projects. Another significant factor is their durability. Many users have reported these pumps lasting for years. For example, one user shared his experience of a pump running continuously for seven years without a hitch. These pumps are resistant to corrosion and extreme weather, which makes them ideal investments for anyone managing water on a property. Features that Make a Difference Many water pumps can come with a myriad of features, some of which look great on paper but are rarely utilized. Red Lion stands out with features that genuinely enhance usability. The high flow rate can significantly reduce the time spent moving water, a boon especially during dry seasons when efficiency is critical. Additional safety features like thermal overload protection can prevent potential damages, such as overheating during power surges. Practical Applications for Every Homeowner Whether you’re maintaining a garden, draining a pool, or managing water flow to various parts of your property, Red Lion pumps are robust enough to handle diverse demands. My cousin has successfully used his pump for off-grid living, drawing water from a creek while maintaining consistent pressure, even with elevation changes. Overcoming Common Myths about Water Pumps There are plenty of misconceptions surrounding water pumps. One common myth is that all pumps are equally complicated to install and maintain. In reality, Red Lion water pumps are designed with the average homeowner in mind, offering a user-friendly experience that doesn’t require advanced technical skill sets. Making the Right Choice: A Summary of Benefits Investing in a Red Lion water pump means choosing reliability, efficiency, and user-friendliness. Their solid construction and practical features make them popular among homeowners. Not only do they save time and money, but they also empower you to manage your property more effectively. Act Now for Efficient Water Management! If you're considering upgrading or fixing your water management system, now is the time to explore the variety of Red Lion water pumps available through Kendisco. Investing in a dependable pump can solve many of your water-related issues. Don’t wait until you face a flood or a dry spell—choose reliability with Red Lion!

Terms of Service

Privacy Policy

Core Modal Title

Sorry, no results found

You Might Find These Articles Interesting

T
Please Check Your Email
We Will Be Following Up Shortly
*
*
*