Add Row
Add Element
UPDATE
Add Element
  • Home
  • Categories
    • Cleaning & Moving
    • Maintenance / Repairs
    • Remodeling & Construction
    • Landscaping / Outdoor
    • Security & Technology
    • Sustainability, Health & Safety
    • Interiors / Décor
    • Expert Interviews
    • DIY Home Projects
Home Wise News!
Wise Insights, Reliable Contractor Advice & Hands on DIY Know How for Savvy Homeowners
May 27.2025
3 Minutes Read

The Ultimate Guide on How to Use Bleach in Your Laundry Safely

Using bleach in laundry: open washing machine with detergent bottle nearby.

The Essential Role of Bleach in Laundry

Bleach is often viewed as a must-have weapon in the laundry arsenal, touted for its ability to whiten whites and sanitize fabrics. But using it requires a delicate touch and understanding. If you’ve ever wondered how to wield this cleaning power safely and effectively, you’re in the right place!

Understanding Bleach Types: Liquid vs. Powder

When it comes to laundry bleach, knowledge is power. There are two primary types: liquid bleach and oxygen bleach, which comes in powder form. Liquid bleach, typically sodium hypochlorite, is potent and can remove tough stains but can also damage certain fabrics if misused. Oxygen bleach, on the other hand, is gentler and safe for colorfast fabrics, making it a versatile option for those seeking both effectiveness and fabric care.

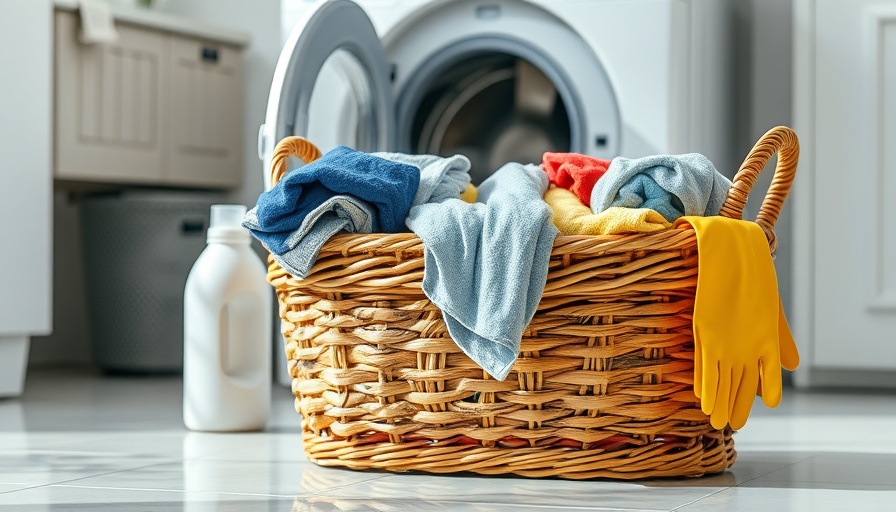
Safety First: Handling Bleach with Care

Let’s face it, bleach is powerful but can also be hazardous. Adopting safety measures helps to keep your laundry experience from turning into a mishap. Always wear gloves when handling bleach, and ensure you’re in a well-ventilated area. Avoid using bleach in conjunction with other cleaning agents, particularly ammonia, as this can produce dangerous gases. Remember, the aim is to clean, not poison!

Step-By-Step Guide to Using Bleach in Laundry

Using bleach in your laundry isn’t a free-for-all; there’s a better way to integrate it into your routine:

  • Step 1: Pre-Check Your Fabrics: Always check the care labels on your garments. Some fabrics are bleach-friendly, while others are not.
  • Step 2: Dilute the Bleach: Mix bleach with water before adding it to your wash. Generally, the rule is 1 cup of bleach in 1 gallon of water.
  • Step 3: Add at the Right Time: If using a washing machine, wait until the water has filled and the detergent has mixed before introducing your diluted bleach solution.
  • Step 4: Rinse Well: Ensure you rinse your clothes thoroughly to eliminate any bleach residue. A second rinse cycle is recommended for peace of mind.

Best Practices for Storing and Using Bleach

Store bleach in a cool, dry place, away from sunlight. Always keep it tightly sealed to prevent spillage and accidental contact. Avoid leaving bleach-soaked rags lying around, as they may damage surfaces or fabrics if not handled properly.

Common Misconceptions about Bleach

Many people fear using bleach, believing it’s only for hardcore cleaning. However, when used correctly, bleach is an excellent ally against mold and mildew and effective in prolonging the life of your textiles through proper sanitation. Plus, it can minimize bacterial presence in especially dirty laundry!

Balancing Sustainability with Efficient Cleaning

In our evolving awareness toward environmental responsibility, finding a balance is key. Bleach serves its purpose, but alternatives like baking soda and vinegar can also tackle many cleaning challenges. Explore eco-friendly options—these not only reduce chemical exposure but are gentle on your fabrics!

Conclusion: Bringing It All Together

Embrace bleach for its cleaning potential while handling it with care and knowledge. As we adapt to modern cleaning methods, being mindful of our choices—both for our health and the environment—is more important than ever. Ready to tackle your laundry with a confident burst of clean? It’s time to get started!

Cleaning & Moving

Write A Comment

*
*
Related Posts All Posts
09.02.2025

Unlock the Secrets of Home Cleaning: A Guide to Different Wall Types

Update Your Walls, Your Style: A Guide to Cleaning Different Wall Types Our walls are the silent guardians of our homes, showcasing cherished memories through family photos and reflecting our unique styles. However, with time, they tend to gather dust, fingerprints, and scuff marks that can tarnish their beauty. A thoughtful cleaning session can rejuvenate these surfaces, bringing about a fresh, inviting ambiance. In this article, we’ll explore effective cleaning methods tailored for various wall types to ensure your home remains a welcoming space. Understanding Your Wall Types The first step in ensuring effective wall cleaning is understanding the different types of wall finishes and their specific cleaning needs. A blanket cleaning approach may lead to damage instead of restoration. Here are some of the primary wall finishes along with suitable cleaning methods: Effective Cleaning Tips for Oil-Based Finish Walls Oil-based paints are known for their shiny, durable properties, making them popular in high-traffic areas. To clean these walls without stripping paint: Prepare a Cleaning Solution: Combine a few drops of mild dish soap with warm water in a bucket. Wipe in Sections: Use a soft sponge or cloth, wring it damp (not dripping), and clean small sections top to bottom. Rinse Thoroughly: Wipe away soap residue with a clean, damp cloth. Dry the Area: Prevent streaks by drying each section with a clean towel. Cleaning Latex Finish Walls Smoothly Latex, or water-based paint, is widely used due to its ease of application. While it’s versatile, it’s also more susceptible to damage. To clean latex walls: Use a Gentle Cleanser: A solution of one part white vinegar to three parts water works effectively. Test Before Full Application: Always test a small area first to ensure the wall color remains intact. Use a Soft Cloth or Sponge: Apply your solution gently, using a circular motion. Maintaining the Charm of Wallpapered Walls Wallpaper adds character but can be delicate. Here’s how to clean with care: Dust Regularly: Use a soft brush attachment on your vacuum to remove dust. If Necessary, Spot Clean: For stains, mix water with a tiny amount of mild detergent and apply with a soft cloth. Rinse Gently: Ensure you do not saturate the wallpaper to prevent peeling. Cleaning Concrete and Brick Walls: Beyond the Surface Concrete and brick walls, often found in basements or exteriors, can benefit from occasional deep cleaning: Use a Pressure Washer: This is effective for tough grime buildup on exterior surfaces. Soft Scrub Technique: For interior cleaning, using a brush and mild cleaning solution will suffice. Tools and Materials to Make Wall Cleaning Effortless Investing in the right cleaning tools can enhance your wall cleaning experience. Here are must-have cleaning supplies: Soft sponges and cloths Mild cleaning solutions (dish soap, vinegar) Bucket and spray bottles Vacuum with brush attachment Embracing Professional Cleaning as a Solution For those who find wall cleaning overwhelming or are limited on time, hiring a professional cleaning service can be a rewarding alternative. Professionals like Hellamaid not only bring expertise but also and can ensure a meticulous finish without the risk of damage. A clean home is within reach, and a little effort can go a long way in preserving your walls' charm. By understanding your wall types and applying the right methods, you can create a vibrant living space that feels fresh and welcoming. Ready to refresh your walls? Explore additional home cleaning solutions and techniques by checking out trusted resources for maintaining your living space.

09.01.2025

Break These 9 Cleaning Habits for a Healthier Home Environment

Update Reassessing Our Cleaning Routines As we navigate the ever-evolving world of home cleaning, it's essential to acknowledge that not all cleaning habits serve us well. Recent insights from professionals reveal that some common practices can do more harm than good. With the promise of a cleaner home at stake, let's explore the nine cleaning habits you might want to break for a more efficient and healthier living space. 1. The Overuse of Cleaning Products Many of us have been conditioned to believe that more product equals a cleaner home. However, experts argue that overusing cleaning solutions can lead to negative health effects due to toxic chemicals lingering in our living environments. Instead, consider using eco-friendly alternatives that are not only safe for your family but also effective in maintaining cleanliness. 2. Mixing Chemicals Is a No-Go In our quest for cleanliness, it might be tempting to mix several cleaning products to tackle tough stains. This may create dangerous reactions rather than a pristine surface. Professionals recommend sticking to one product at a time to avoid unintended consequences. Make sure to check labels and follow the manufacturer's instructions closely. 3. Ignoring Microfiber Cloths If you're still using traditional sponges or paper towels, it's time for an upgrade. Microfiber cloths not only reduce waste, thanks to their reusability but also trap more dirt and bacteria. Their effectiveness makes cleaning a breeze—just dampen the cloth, wipe down surfaces, and see the magic happen. 4. The ‘One Size Fits All’ Approach It’s a common scenario: using the same cleaner on all surfaces. However, different materials require tailored care. Experts advise employing specific products suited for wood, stainless steel, or glass. This targeted approach extends the lifespan of your surfaces and results in a thorough clean. 5. Neglecting the Power of Vacuuming Many homeowners often overlook the importance of regular vacuuming. It's essential not just for aesthetics but also for health, as dust, allergens, and pet dander can accumulate and affect indoor air quality. Schedule regular vacuum sessions, and don’t shy away from using attachments to reach those pesky corners. 6. Disregarding the Importance of Organizing Before Cleaning Cleaning is not synonymous with tidying up. Before you wield your mop, take the time to declutter your space. By organizing items first, you’ll make your cleaning more efficient and effective, sealing the deal for a truly clean home. 7. Avoiding the Seasonal Deep Clean While regular maintenance is critical, professionals emphasize the necessity of deep cleaning the home seasonally. This practice helps remove build-up and offers a chance to assess your cleaning routine. Develop a schedule for each season to tackle areas often forgotten, like behind appliances and in furnishings. 8. Skipping the Dryer Vent Cleaning Your laundry room might not seem like a source of concern, but ignored dryer vents can pose serious hazards! Clogged vents can lead to reduced efficiency and even fire risks. Cleaning out your dryer vents regularly is a simple yet vital step in home maintenance. 9. Using the Wrong Vacuum Lastly, choosing the right vacuum for your home is crucial. From canisters to upright to robotic vacuums, each has its strengths. Assess your needs, such as floor types or pet hair, and select a vacuum tailored to maximize your cleaning efforts. If you're currently entrenched in outdated cleaning habits, it might be time for a refresh. Not only will breaking these habits lead to a cleaner home, but they may also pave the way for a more environmentally responsible lifestyle. So grab those microfiber cloths and reevaluate your approach—your future self will thank you!

08.31.2025

Transform Your Home: Easily Clean Window and Door Tracks in Minutes!

Update Why Clean Your Window and Door Tracks? When you think about cleaning your home, window and door tracks might not be the first thing that pops into your mind. However, they play a significant role in keeping your home safe and functional. Dirty tracks can lead to problems with sliding windows and doors, potentially damaging them over time. In this article, we’ll delve into the importance of maintaining those oft-forgotten spots, ensuring they not only function well but also look good. Quick Overview of the Cleaning Process Cleaning window and door tracks can be done easily, and doesn’t require a plethora of cleaning products. In fact, with just a few steps and items you likely already have at home, you can make your tracks shine like new. As the saying goes, 'a clean house is a happy house,' and that includes those hidden areas! What You’ll Need To begin this cleaning endeavor, gather a few basic supplies: A vacuum with a narrow attachment A damp cloth or sponge White vinegar or a mild all-purpose cleaner A soft brush or an old toothbrush A microfiber cloth for drying By using these common household items, you’ll be able to tackle those pesky dirt and grime buildup in no time. Step 1: Prepare Yourself and the Area Start by removing any obstacles near your windows and doors. This might mean relocating plants, furniture, or any decorations blocking your access. Not only does this create a safe workspace, but it also gives you a chance to check for any weather stripping that might need replacement. And let’s be honest: nobody wants to work in a cluttered space! Step 2: Vacuum Thoroughly Dust and debris can accumulate in the window and door tracks, so use your vacuum with the narrow attachment to suck up all the loose dirt. This step is essential as you don’t want to just spread that grime around when you start scrubbing. If your vacuum has a brush attachment, that’s even better for getting into the nooks and crannies. Step 3: Scrub Away It’s time to bring out the cleaning solutions! Dip your soft brush into the vinegar or all-purpose cleaner, and start scrubbing those tracks. The acid in vinegar helps break down tough residue, while the softness of your brush will prevent scratching. Spend a few moments working on each track, focusing on corners and edges. If your tracks have not been cleaned in a while, you might need to put a little muscle into it. Channel your inner cartoon character and have fun while scrubbing! Step 4: Dry and Shine Once you’ve done an excellent job scrubbing, grab your damp cloth and wipe down the tracks one final time. This step helps remove any remaining grime and leaves behind a clean surface. After that, use a microfiber cloth to buff it dry. The result? Gleaming tracks ready for action! Keep It Up! To keep your window and door tracks from falling back into that neglected state, consider adding this task to your seasonal cleaning checklist. Not only does regular maintenance prolong the life of your windows and doors, but it also helps improve overall home safety. Plus, you’ll impress guests with your sparkling clean tracks! The Tech Connection Now, if you're looking to take cleaning a step further, think about incorporating smart home technology. Smart vacuum cleaners can help keep your tracks clear of dander and dirt with scheduled cleanings, ensuring that you enjoy a spotless home without lifting a finger—or scrubbing a track. Exploring the latest smart gadgets could provide the tech-savvy homeowner with even more convenient solutions. Final Thoughts Cleaning your window and door tracks may sound tedious, but with these straightforward steps and an occasional chuckle, it transforms into a manageable task. And remember, maintaining a clean home contributes to a healthier, happier living environment.

Terms of Service

Privacy Policy

Core Modal Title

Sorry, no results found

You Might Find These Articles Interesting

T
Please Check Your Email
We Will Be Following Up Shortly
*
*
*