Add Row
Add Element
UPDATE
Add Element
  • Home
  • Categories
    • Cleaning & Moving
    • Maintenance / Repairs
    • Remodeling & Construction
    • Landscaping / Outdoor
    • Security & Technology
    • Sustainability, Health & Safety
    • Interiors / Décor
    • Expert Interviews
    • DIY Home Projects
Home Wise News!
Wise Insights, Reliable Contractor Advice & Hands on DIY Know How for Savvy Homeowners
June 22.2025
3 Minutes Read

8 Innovative Ways to Keep Your Upstairs Cool Without Overworking the AC

Woman adjusting a thermostat, learning how to keep upstairs cool.

Beat the Heat: Transform Your Upper Floors into a Cool Oasis

Summer is here, and with it comes the sweltering heat that often has us retreating to our lower floors like refugees in our own homes. If you’ve ever felt like your upstairs is a neglected sauna while your air conditioning struggles to maintain a comfortable temperature, you're not alone! Luckily, there are various innovative solutions to not only keep your upstairs cool during the summer but also help reduce your reliance on that hard-working air conditioning unit. Let’s dive into some easy and effective methods.

Understanding Why Upstairs Gets Hotter

Before we can tackle the problem, it’s essential to understand the science behind your upstairs warmth. Heat naturally rises. This simple principle means that the upper levels of your home can feel significantly warmer than the lower levels, especially in a one- or two-story home with an attic. Additionally, your roof absorbs a considerable amount of heat from sunlight, further heating your top floors.

Insulation: The Unsung Hero

Good insulation isn’t just for winter! Improving your home’s insulation can keep the hot air from sneaking in and the cool air from escaping. Foam board insulation in your attic or solar reflective barriers can make a world of difference. Properly insulating your attic or upper floors may cost a bit upfront, but the payoffs in comfort and energy savings during the relentless heat can be quite impressive.

Upgrade Your Ceiling Fans for Better Air Circulation

Using ceiling fans can drastically improve airflow and make your upper floors feel more comfortable. However, simply having them isn’t enough! Ensure your ceiling fan blades are set to rotate counter-clockwise during summer months to create a breeze. Quietly whirring while you enjoy those dollops of cool air will be a welcome escape as the heat sizzles outside.

Window Treatments: The Power of Shade

Windows are an often-overlooked source of heat gain. Blackout shades, cell shades, or reflective blinds can prevent that scorching sun from streaming in, keeping your upper floors cooler. Additionally, consider treating your windows with sunscreen film. Not only does this provide UV protection, but it also limits the amount of heat entering your home.

Creating Outdoor Shade: Harness Nature’s Cool

Have trees in your yard? Fabulous! The shade they provide can significantly decrease your home's overall temperature. Planting trees near windows or setting up outdoor awnings can also help block the sun and keep your space cooler. Think of your upper floors as the cherry on top of your cooling cake.

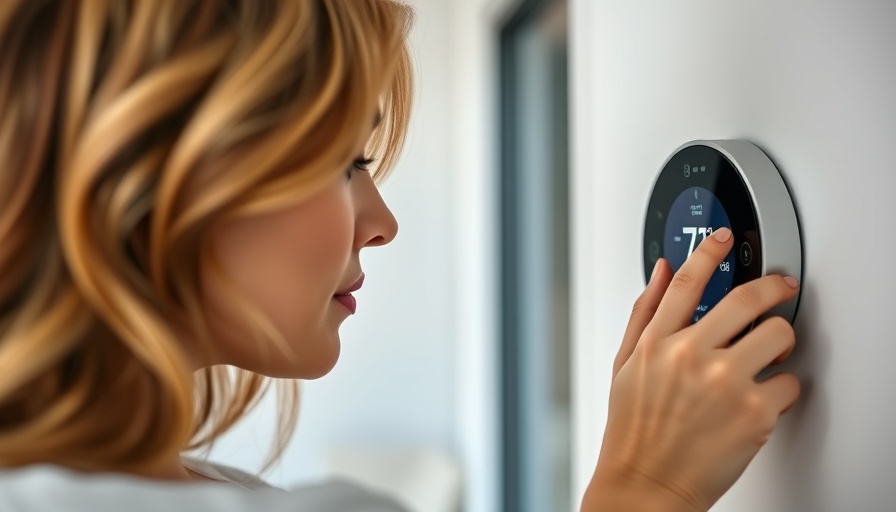
Smart Thermostats: A Technological Upgrade

Embracing technology is another fantastic way to keep those upper levels from heating up faster than your pizza in the oven. Smart thermostats can now monitor temperatures in various parts of your home. By adjusting the cooling output based on where you spend the most time, you’re less likely to waste energy and keep your upstairs from boiling over.

Strategic Ventilation for Ultimate Comfort

Another underrated tip is considering the airflow between floors. Opening your interior doors can encourage airflow from lower cooler rooms to the upper hotter ones. Additionally, installing wall or window fans can propel cool air upwards, further balancing the temperature within your home.

Final Thoughts: Make the Change Today!

Incorporating these methods can be a game-changer. Whether it’s using smarter technology or simpler home improvements, beating the summer heat is achievable. So slap on that sunblock, keep the ice tea close, and prepare your home to be the coolest it can be—one chilled upstairs at a time!

Maintenance / Repairs

Write A Comment

*
*
Related Posts All Posts
10.18.2025

Essential Tips on How Often to Test Your Sump Pump to Prevent Water Damage

Update Understanding the Importance of Sump Pump Maintenance Have you ever thought about your sump pump? If you are like most homeowners, it hums quietly in the background, performing a vital role in preventing water damage in your basement. While we may overlook its significance, understanding how often to test your sump pump is key to avoiding minor inconveniences turning into costly disasters. How Does a Sump Pump Work? A sump pump serves as your home's guardian against water accumulation. Installed typically at the lowest part of your house, it functions by pulling water into a sump pit where it can be pumped away from your home before it causes damage. The pump activates when water in the pit reaches a certain level, and once the water level drops, the pump automatically shuts off. It’s a simple yet effective mechanism that reduces the risk of flooding, mold growth and property damage. When Should You Test Your Sump Pump? According to industry experts, performing routine maintenance on your sump pump is not just recommended, it’s essential. It’s suggested that homeowners check and test their sump pumps at least once a month. To do this, simply pour a bucket of water into the sump pit to raise the float switch. If the pump activates, you’re in good shape. If not, it’s time to investigate. Quarterly and Annual Maintenance: A Must! While monthly tests are advisable, seasonal checks will ensure that your sump pump operates effectively when you need it most. Dust, dirt, and debris can accumulate over time, obstructing the pump’s inlet screen. Cleaning this component at least four times a year can prevent malfunctions. Moreover, an annual inspection allows for deeper care. Each year, remove the pump from the pit to check for clogs, clean the inside of the pit, and inspect the entire system's working components. Don’t forget to check the backup power source because a hefty storm could render your primary pump useless—and that’s when a battery-powered backup comes into play! Signs It’s Time for Repair or Replacement Even your beloved sump pump can falter. Be on the lookout for signs like continuous running, unusual noises, or a pump that shuts off too soon. If your sump pump is pushing a decade of service, consider a proactive replacement, as older pumps are less efficient and more prone to failure. Why You Should Care: Avoiding Costly Water Damage Water may be a vital resource, but in your basement, it can cause chaos! Protecting your home’s foundation and your belongings from water damage is paramount. Issues like flooding can lead not only to extensive repair bills but also create an environment ripe for mold growth, which could affect your family’s health. A Funny Yet Vital Reminder Remember, it’s better to be proactive than reactive! Think of your sump pump like a car’s check engine light—ignoring its signals can lead to a breakdown. You don’t want to be that person who discovers their sump pump isn’t functioning during a surprise rainstorm. So, maintain it, check it, and if needed, love it! The Bottom Line A small dose of preventative maintenance can save you thousands down the road. Your sump pump may live under your house, but trust me, it deserves your attention! Dedicate a few minutes each month to test it and ensure it’s functioning correctly, and you’ll keep your home safe from the unexpected. For those ready to take their sump pump maintenance to the next level, we highly recommend calling in the pros for that annual check-up. Not only can they provide peace of mind, but they can also catch potential issues before they snowball into costly repairs.

10.16.2025

Practical Tips to Keep Skunks Out of Your Yard for Good

Update Skunk Encounters: More Common Than You Think Little do many homeowners know, skunks are rather common guests in our yards—especially as the seasons change. These nocturnal critters thrive in suburban environments, often making homes beneath decks or porches. If you've spotted circular depressions in your lawn or caught a whiff of that infamous odor, it’s a sign they may have set up camp too close for comfort. Understanding the habits and preferences of these creatures can arm you with the necessary knowledge to take measures against unwanted skunk visits. Know the Signs: Identifying Skunk Activities The first step in keeping your yard skunk-free is to recognize their presence. Look for telltale signs such as small, conical holes in your garden, which are skunks’ attempts to forage for their favorite food—grubs. On particularly warm evenings, watch for their characteristic outline as they scuttle around. Skunks are more active during the twilight hours and can roam around freely if they feel safe and protected. Creating Barriers: How to Secure Your Property Effective skunk prevention involves proactive steps to limit access and appeal. Consider installing underground fencing around vulnerable structures like porches, decks, and sheds. A barrier several inches underground will thwart even the most determined digger. Additionally, make sure any foliage or structures in your yard that might provide cover are well-maintained and organized. Food Sources: A Skunk's Weakness Did you know that skunks are opportunistic eaters? This means they’re attracted to any potential food sources. To deter these furry foragers, securely store all outdoor pet food, seal garbage cans tightly, and clean up leftover scraps after outdoor meals. Even fallen fruits from trees can tempt these pests, so keeping your yard clean is essential to avoid unwanted visits. Defensive Measures: Utilizing Motion Detection While skunks are primarily nocturnal, they can become accustomed to their surroundings quickly. Thus, employing motion-sensor lighting can disrupt their natural routines. Sudden blares of bright light can dissuade them from feeling comfortable enough to roam freely. But, like all good strategies, results may vary as skunks can sometimes show remarkable bravado. Natural Deterrents: Spicy Solutions to Try If you want to take a more natural approach, consider capsaicin-based repellents, which is derived from chili peppers. This safe but potentially unappetizing substance can be applied in granule or liquid form around the yard, effectively using taste and smell to keep skunks away. The good news? It isn't harmful to them—just unappealing! When to Call in the Professionals If you observe consistent skunk behaviors or believe a family has moved into your yard, seeking professional help may be best. Wildlife experts can evaluate the situation and assess any potential offspring in lodges, ensuring the skunks are handled humanely and effectively. Tampering with a den yourself could lead to accidental skunk sprays—a risk few want to take! Final Thoughts: Wisdom for Skunk-Free Living While skunks are often viewed as pesky intruders, their presence can inspire more ecological awareness. They play a vital role in controlling pest populations in gardens and yards. Nevertheless, when they're too close for comfort, modifying the environment to suit both parties is essential. So adopt these strategies, create a skunk deterrence plan, and keep your yard both an inviting and secure sanctuary. Now that you’re equipped with this information, it’s time to spring into action and safeguard your outdoor space from those unwelcome visitors. You'll be amazed at how conservation and prevention can coexist in harmony!

10.15.2025

Repairing Cracked Stucco: Comprehensive Guide for Homeowners

Update Understanding Stucco: The Good, the Bad, and the Cracked Stucco, known for its durability and timeless appeal, is a favored exterior finish amongst homeowners. However, just like any material, stucco is susceptible to wear and tear, particularly in regions with significant weather fluctuations. Cracks and water damage are common issues that can arise over time. Many homeowners often overlook these signs of deterioration, potentially leading to more extensive structural problems down the line. What Causes Cracks and Water Damage in Stucco? The initial step in effective stucco repair is to identify the root causes of cracks and water damage. Temperature changes can lead to stucco expansion and contraction, resulting in fine cracks that worsen if not addressed. Poor installation practices, such as inadequate curing or incorrect material mixing, also contribute to stucco's vulnerability. Additionally, water damage often occurs due to faulty flashing, gaps around windows, or roof runoff that seeps behind the stucco's surface. Once moisture infiltrates, it can compromise the wooden lath or framing beneath it, necessitating thorough repairs rather than mere surface patching. The Critical Inspection and Preparation Process Before commencing repairs, a thorough inspection of the stucco surface is essential. Skilled contractors look for signs indicating moisture damage, such as staining or soft spots, often using moisture meters for a more precise assessment. This step prevents superficial repairs that might mask deeper issues. Proper preparation involves removing loose or damaged material and ensuring that adjacent areas, such as windows and seals, are inspected and fortified to prevent future moisture infiltration. Effective Techniques for Repairing Cracks When it comes to repairing cracks, the method of repair varies according to the size and severity of the crack. Hairline cracks can be effectively filled with flexible caulking or elastomeric sealants that accommodate the natural expansion and contraction of stucco. Larger cracks, however, require more extensive measures, including chiseling out a section and applying a fresh stucco mix to ensure that the repair adheres well. For water-damaged areas, complete removal of the stucco may be necessary to expose the underlying lath, and any compromised wood framing must be replaced before reapplication. Long-Term Solutions to Prevent Future Damage Repairing stucco is not merely about addressing visible damage; it also includes implementing strategies that mitigate future risks. Contractors often recommend preventive measures, such as proper sealing around windows and adequate roof drainage systems, to combat the likelihood of water infiltration. Regular inspections and maintenance can significantly enhance the longevity and performance of stucco installations. Tools and Materials Required for Stucco Repair Understanding the essential tools and materials required for stucco repair can empower homeowners to approach such projects with confidence. A drywall knife, trowels, galvanized metal lath, and a variety of cement mixes are often necessary. Having the right equipment not only ensures a higher quality repair but also enhances safety during the repair process. Weather Conditions and Their Impact on Repairs The success of stucco repairs is often contingent upon external weather conditions. Freezing temperatures can adversely affect the integrity of wet stucco, while hot, dry climates may draw moisture out too quickly, preventing optimal curing. Thus, it’s essential to time your repairs when conditions are favorable. Your Next Steps in Maintaining Stucco To retain the beauty and durability of your home's stucco, regular maintenance is crucial. After completing repairs, it’s advisable to wait at least a week before applying any paints or finishes to allow the stucco to fully cure and achieve maximum strength. A pigmented coating can provide added protection while also seamlessly blending the newly repaired areas with the existing surface. By understanding the complexities of stucco repairs, homeowners can make informed decisions, ensuring their homes remain structurally sound and visually appealing for years to come.

Terms of Service

Privacy Policy

Core Modal Title

Sorry, no results found

You Might Find These Articles Interesting

T
Please Check Your Email
We Will Be Following Up Shortly
*
*
*