
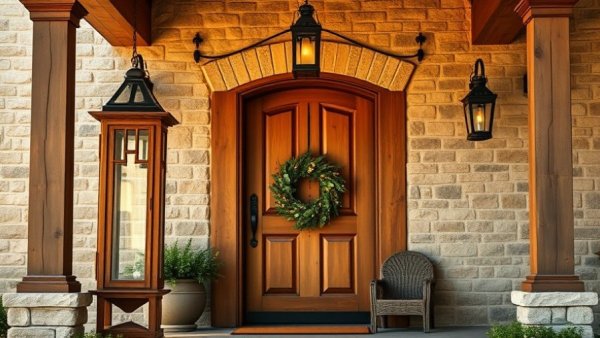
Transform Your Home with DIY Oversized Wood Lanterns
As the holiday season approaches, many homeowners are looking for ways to enhance their outdoor decor. This year, a fantastic project to consider is building oversized wood lanterns that add warmth and charm to your front porch. Not only will these unique pieces be a stunning focal point, but they also serve as a personal touch to your home festivities. In this article, I'll guide you through creating these impressive lanterns!
Why Go Oversized? The Benefits of Larger Lanterns
Oversized lanterns can dramatically change the atmosphere of your porch. They draw the eye and create a welcoming space for family and friends during the chilly winter months. Larger lanterns not only offer greater visibility and light but also provide an opportunity to style them according to your personal taste. Imagine using flameless candles inside these lanterns, casting a soft glow that brings holiday cheer to your front yard. Additionally, their larger size allows for more creative opportunities: you can fill them with festive decorations, such as faux snow, evergreen sprigs, or even seasonal ornaments, adding layers of visual interest.
Getting Started: Materials You Will Need
Before you begin, gather the necessary materials based on your design plan. For one 24" lantern, here's what you'll need:
- (2) 8′ 1×2 piece of pine
- (1) 6′ 1×6 piece of pine
- (1) Wood Post Cap
- Miter Saw (or Miter Box + Hand Saw)
- Wood Glue
- Nail Gun + 18-gauge nails
- Wood Filler
- Paint
- Flameless Candle
These materials make starting your project straightforward, even for beginner woodworkers. Feel free to join forces with family members or friends who are eager to learn from the experience. Sharing the workload can turn this project into a delightful bonding activity while bringing joy and festive spirit into your home.
Step-by-Step Guide: Building Your Giant Lanterns
Building oversized wood lanterns may sound daunting, but with careful preparation and attention to detail, it is an achievable task. Follow these steps for a successful project:
Step 1: Cutting the Wood
First, determine the dimensions for your lanterns. I typically opt for two sizes: 36" and 24". After measuring, cut three pieces of 1×6 wood to 5.5" each (to form the sides) and four pieces of 1×2 wood corresponding to your height choice. Don't rush this step; precise cuts will make assembly much easier. Consider investing in a clamp to hold wood pieces securely while cutting, which contributes to overall safety and accuracy.
Step 2: Assembling the Frame
With the wood cut, start assembling. Use wood glue generously between joints, attaching the long 1×2 pieces between the top and bottom sections, effectively outlining the shape of the lantern. Remember, the glue is the main adhesive here; the nails just temporarily hold them together. Make sure everything is level and aligned as you go; this will ensure that your finished project looks neat and symmetrical.
Step 3: Adding a Base
Now that the frame is in shape, it’s time to add a sturdy base. Attach another piece of 1×6 wood to the bottom. After securing it, create a decorative frame using the remaining 1×2 pieces, which will improve the lantern’s aesthetics and structure. This decorative touch not only reinforces the lantern but also elevates its visual appeal, making it more refined for holiday displays.
Step 4: Finishing Touches with the Top
Finally, don’t forget the post cap for a polished finish. This element not only enhances the lantern's appeal but also acts as a protective cover, aiding in the longevity of your project. Take the time to paint and seal your lanterns for weather resistance; these additional steps contribute to a beautiful finish that can withstand the elements throughout the season.
Enhancements and Customizations: Make It Your Own!
Feeling adventurous? Beyond the basics, consider adding paint or stencils to contribute a holiday theme that reflects your style. Whether you opt for vibrant colors or a rustic finish, let your creativity shine! Incorporating greenery around the base or adding lights can give your oversized lanterns an extraordinary touch. Think about tying in other decorations from your yard or front porch for a cohesive look—like wreaths and ribbons.
FAQs: Common Queries Answered
Q: How do I ensure my lanterns are weather-resistant?
A: Use water-resistant wood varnish to protect your lanterns from rain and snow. Consider touching them up each year to keep them looking their best.
Q: Can I use real candles inside?
A: It’s safer to use flameless candles to prevent fire hazards, especially if the lanterns are placed near flammable materials. Real candles could pose a risk if the wind blows or if decorations around them catch fire.
Conclusion: Get Crafting!
The project of building oversized wood lanterns is an excellent way to unleash your creativity while enhancing your home’s outdoor aesthetic. With just a few easy steps and simple materials, you can create these charming decorations that will impress your guests throughout the holiday season. So gather your supplies, follow this guide, and let's get crafting!
Now that you're equipped with the know-how, it's time to roll up your sleeves and transform your front porch into a welcoming holiday haven. With oversized wood lanterns lighting up your space, you'll create lasting memories for your family and visitors alike. Happy crafting!






Write A Comment