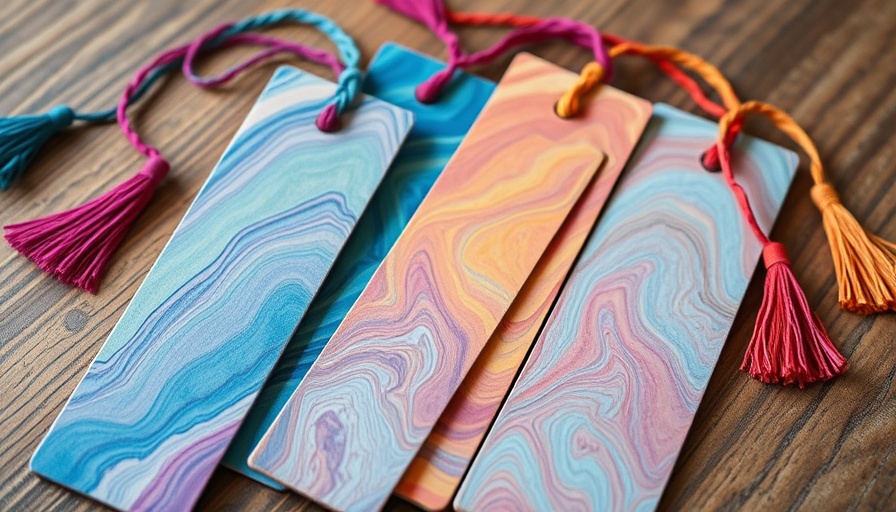
Transform Your Reading Experience with DIY Bookmarks
As book lovers and homeowners alike understand, keeping track of a good story can be a challenging adventure, especially when you habitually misplace your bookmarks. Instead of resigning yourself to dog-eared pages, why not create your own decorative bookmarks? These DIY bookmarks not only save your page but also add a personal touch to your reading experience.
Why DIY Bookmarks?
In a world dominated by digital devices, there's something comforting about physical books. Many homeowners relish the tactile experience of flipping through pages and the satisfaction of setting aside their current read. Elegant bookmarks can enhance that experience, allowing you to personalize your library. Creating your bookmarks can even serve as a family bonding activity, making it a fun project for all ages.
Quick and Easy Steps to Craft Your Own Bookmarks
Creating your own DIY bookmarks is straightforward and can be done in just a few minutes. Below is a step-by-step guide to aid you in crafting personalized bookmarks that reflect your style.
Materials Needed:
- Blank acrylic bookmarks
- Acrylic paint in your favorite colors
- Parchment paper
- Mod Podge
- Small craft paintbrush or foam brush
Step-by-Step Process for Crafting DIY Bookmarks
Step One: Prepare Your Bookmark
Start by peeling off the protective film on your acrylic bookmarks. This will allow the paint to adhere properly. As you embark on this creative endeavor, gather your chosen paint colors.
Step Two: Drizzle and Play with Paint
On a sheet of parchment paper, drizzle your chosen acrylic paints. The magic of this project lies in experimenting with different surface designs, whether drops, swirls, or lines.
Step Three: Apply and Create Patterns
Lightly press the bookmark into the paint-covered parchment, turning it to ensure the entire surface is coated. This creates unique patterns that reflect your artistic expression.
Step Four: Seal for Durability
Once the paint is dry, seal your design with Mod Podge to ensure longevity. After painting a couple of thin coats, remove the plastic cover from the back of your bookmark.
Additional DIY Craft Ideas to Explore
If you enjoyed making your bookmarks, consider branching out into other DIY projects. Crafts such as pinch pots or decorative coasters can further enhance your home’s decor and provide more fun activities to do together with family and friends.
Fostering Creativity and Connection
In today's fast-paced world, the simple act of crafting can foster not only creativity but also connection. Gather your children or significant other and make it a delightful evening of crafting. This opportunity not only yields beautiful bookmarks but also creates shared memories—a great heartwarming aspect of DIY home projects. With every page you turn, you’ll be reminded of the time spent together creating them.
Let’s Get Crafting!
Now that you have everything you need to start crafting, get those acrylic paints out and make DIY bookmarks that showcase your unique personality. Whether you keep them for yourself or gift them to fellow book lovers, these bookmarks are sure to be cherished.
Begin your creative journey today and transform your reading experience into something special with these easy-to-make DIY bookmarks!
 Add Row
  Add
Add 


Write A Comment