Add Row
Add Element
UPDATE
Add Element
  • Home
  • Categories
    • Cleaning & Moving
    • Maintenance / Repairs
    • Remodeling & Construction
    • Landscaping / Outdoor
    • Security & Technology
    • Sustainability, Health & Safety
    • Interiors / Décor
    • Expert Interviews
    • DIY Home Projects
Home Wise News!
Wise Insights, Reliable Contractor Advice & Hands on DIY Know How for Savvy Homeowners
July 08.2025
3 Minutes Read

DIY Kitchen Countertop Installation Made Easy: A Comprehensive Guide

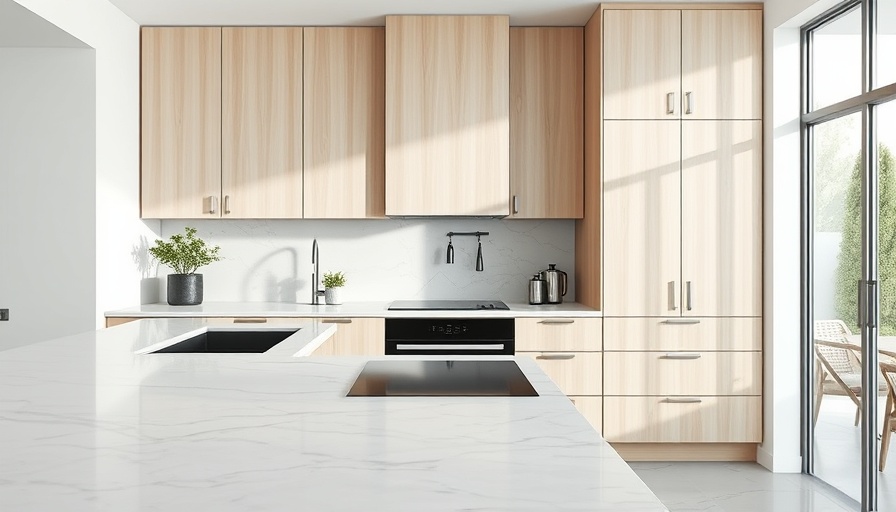
DIY kitchen countertop installation with marble finish and wooden cabinets.

Transform Your Kitchen: The Delight of DIY Countertop Installation

When it comes to updating your kitchen, few projects deliver as immediate and impactful results as installing new countertops. The prospect of replacing them may seem daunting, but with the right tools and tips, this common DIY project can be both fulfilling and manageable. Whether you opt for laminate or wood, the beauty of self-installation lies in the sense of accomplishment and the tailored aesthetic you bring to your home.

Understanding Your Space: The Key to Successful Installation

Before diving into the installation process, take a moment to assess your kitchen layout. A few simple checks can save you headaches later on. Start by confirming that your cabinets are level. Use a two or four-foot level to ensure that the tops of your cabinets align perfectly, as uneven surfaces can complicate your project. If corrections are necessary, adjust the cabinets or use shims where needed. This foundational step is crucial for achieving that seamless and professional-looking finish.

Planning Your Cuts: Precision Makes Perfect

Once your workspace is ready, lay out the countertop pieces to check their fit. It’s essential to mark where cuts will be made, especially in corners and along walls that likely won't be perfectly straight. Employ a straightedge to identify irregularities; this helps you create markings for adjustments, ensuring tight seams and minimizing visible gaps. Remember, taking the time to get these details right will enhance both the appearance and functionality of your kitchen.

Tools of the Trade: What You’ll Need for the Job

The right tools make all the difference in any DIY project. Here’s a quick rundown of essential equipment you’ll need for this countertop installation:

  • Level (2-ft. or 4-ft.)
  • Drill
  • Saws (track saw, circular saw, or jigsaw)
  • Caulk gun
  • Painter’s tape
  • Pre-drill bit
  • Framing or drywall square
  • Rags for cleanup

Having these tools on hand will help streamline the process, allowing you to focus on the details that matter most.

Step-by-Step Guidance: From Dry Fit to Final Touches

Here’s a brief step-by-step breakdown of the installation process. Each step is vital for ensuring a successful outcome:

  1. Check Cabinet Levels: Ensure your cabinets are leveled before proceeding.
  2. Dry Fit Your Countertops: Place the countertops on the cabinets and check their fit and alignment.
  3. Scribe for a Perfect Fit: Mark the contours and imperfections of your walls for accurate cuts.
  4. Make the Cuts: Use your saw to carefully make the cuts as per your markings.
  5. Install the Countertops: Position the countertops on cabinets, securing with screws as needed.
  6. Final Adjustments: Apply caulk around the edges for a polished finish.

Each of these steps involves critical attention to detail, making your countertop replacement not just a DIY project, but a work of art that enhances your kitchen's charm.

Frequently Asked Questions: DIY Countertop Installation

Still have questions about your project? Here are some common concerns:

  • Can I install countertops myself? Absolutely! With careful planning and the right tools, DIY installation is quite feasible.
  • What types of countertops are best for beginners? Laminate is often recommended due to its cost-effectiveness and ease of handling.
  • How long does the installation take? This varies based on experience, material choice, and kitchen size, but most homeowners find they can complete the task in a weekend.

With the right approach, you can turn a potentially complicated task into an enjoyable home improvement project. Embrace the challenge and take pride in the transformation you create.

Ready to embrace your DIY spirit? Now is an excellent time to gather your materials and start planning your kitchen countertop replacement. Not only will this project enhance the look of your home, but it will also empower you with newfound skills in home maintenance and repairs. Remember, each successful task is a step towards becoming a more confident DIYer!

DIY Home Projects

Write A Comment

*
*
Related Posts All Posts
08.30.2025

Explore the Latest 2026 Home Color Trends from Sherwin-Williams

Update 2026 Color Trends: Start Your Next Painting Project Right The Sherwin-Williams bi-annual color report serves as an exciting harbinger of the home color trends set to dominate in 2026. Whether you're revamping your living room, refreshing a bedroom, or tackling a full home restoration, understanding these color palettes is essential. Not only do these trends guide your paint choices, but they also breathe new life into your spaces, creating a vibrant synergy that resonates with your personal style. A Dive into the Sherwin-Williams Bi-Annual Color Report Every two years, Sherwin-Williams compiles insights from its Trendsight Team, which analyzes shifts in design preferences and consumer sentiment. This delicately curated packet not only uncovers the predicted color families but also specifies distinct shades that can elevate your DIY projects. With the right knowledge in hand, you can embark on your painting adventure with confidence. The Four Color Families for 2026 to Enhance Your Home In the 2026 forecast, Sherwin-Williams has spotlighted four primary color families: frosted tints, sunbaked hues, restorative darks, and foundational neutrals, each exuding a unique vibe that can transform your space. Frosted Tints: The Cool Calm of Icy Hues The frosted tints bring a breath of fresh air to anyone looking to create serene and tranquil spaces. With shades ranging from icy blue and mint green to soft lavender, these colors set an ambiance that's reminiscent of winter retreats. Ideal for bedrooms or leisure areas, frosted tints encourage relaxation and evoke a sense of peace, making them perfect for a calming home environment. Sunbaked Hues: Ignite Warmth and Nostalgia If you're yearning for the essence of summer, sunbaked hues are your go-to. With rich undertones inspired by the sun-kissed earth, these colors—think warm terracotta, buttery yellows, and deep reds—bring back memories of sunlit afternoons. These hues can be used creatively in family living spaces or kitchens, inspiring communal warmth and joyous energy. Restorative Darks: Create a Sanctuary Restorative darks beckon with a promise of comfort, enveloping spaces in rich, deep tones. Ranging from midnight blues to forest greens, these colors create a sophisticated backdrop that invites relaxation and tranquility. Consider using restorative darks in libraries or study rooms where focus and restfulness go hand in hand, allowing you to disengage from the outside world. Foundational Neutrals: The Versatile Cornerstone Every DIY project benefits from foundational neutrals. Crossing the spectrum from light tans to sleek silvers, these hues act as a perfect complement to both bold and subtle design choices. As you ponder trim colors or accent walls, remember that a well-placed neutral can serve as a framework for more expressive colors, adding depth and structure to your homes. Diverse Perspectives: How These Trends Influence DIYers Each color family caters to personal expression, and their value isn't just aesthetic. Integrating trending colors informs DIYers about the market's direction, guiding not only paint purchases but broader design choices as well. As communities evolve and personal styles transform, embodying these palettes extends a unique opportunity to stand out while in tune with current aesthetics. Practical Tips for Implementation When selecting colors for your next DIY project, consider the intended atmosphere of each room. Balance bolder shades with neutrals for an inviting space. Take time to gather samples of your top choices before committing; painting swatches on walls helps visualize how light interacts with each color. Remember to factor in existing furniture and décor to maintain a harmonious aesthetic that's not just trendy but truly represents you. Inspiration Awaits: What Colors Resonate With You? The upcoming Sherwin-Williams color trends offer a fantastic opportunity to breathe new life into your living spaces. As the articles indicate, the most effective paint jobs begin with inspiration. Consider how each color family aligns with your preferences and the ambiance you wish to cultivate. Don't hesitate to mix and match colors from different families to create a personalized palette that reflects your unique style. Join in the conversation about home color trends and share your own painting projects. By tailoring your DIY endeavors with the latest insights from Sherwin-Williams, you are poised to transform not only your home but also your overall living experience. Dive into your next project with confidence and creativity!

08.30.2025

How to Build a Stable Shed on a Sloped Garden and Save Time

Update Transform Your Sloped Garden into a Functional Shed Space Are you dreaming of a shed but discouraged by the slope of your garden? Fear not! A sloped garden can be an excellent canvas for a stable and functional shed with just a bit of planning and ingenuity. By treating the slope as an asset instead of a stumbling block, you can ensure your shed remains level, dry, and functional. Step 1: Map Out the Slope Like a Pro Creating a plan starts with understanding your slope. Using two stakes, twine, and a line level, stretch the twine across your desired shed footprint to identify the drop. This initial step helps determine whether a stepped platform or a continuous plane suits your garden best. While mapping, pay attention to rainfall patterns; your base should enhance drainage to avoid water accumulation, making your shed more durable. Step 2: Choose the Right Foundation Strategy When working on a sloped surface, the foundation choice is crucial. Here are some options: Stepped Sleepers: Create small, level pads using timber or masonry suited for steeper slopes. Adjustable Pedestals: Ideal for quick setups that allow slight adjustments. Ground Screws: Minimal excavation with strong support—great for temporary sheds. Modular Plastic Grids: Excellent for airflow and drainage, perfect for portable constructions. The Efficient Solution for Quick Setup If time is of the essence, consider using shed bases that provide a lightweight solution, perfect for creating effective drainage without the mess of pouring concrete. They lay flat quickly and keep moisture at bay, ensuring your shed's longevity in a sloped terrain. Step 3: Prioritize Drainage Water can wreak havoc on your shed, so implementing proper drainage is essential. Aim for a crowned sub-base to guide water away, incorporate gravel layers to enhance drainage, and consider installing a French drain if needed to redirect any potential runoff. Step 4: Building on a Slope Requires Precision Finally, when constructing your shed, ensure you remove any soft topsoil before compacting the sub-base. Follow the 3-4-5 rule to square your layout accurately, and always double-check levels when laying the platform. Anchoring your shed is critical to protect against wind and ground shifts, ensuring stability for years to come. With these actionable steps, you'll transform your sloped garden into a sturdy, practical shed space that enhances your outdoor area. Don't let the terrain dictate your dreams; embrace the challenge and build something special!

08.29.2025

Unlock Amazing Amazon Labor Day Deals Under $50 Before They're Gone!

Update Uncovering the Best Labor Day Deals Under $50 As everyone gears up for the long Labor Day weekend, savvy shoppers rush to uncover deals that would make even the tightest budgeters rejoice. This year, Amazon has unleashed an impressive array of discounts, particularly for those looking for quality items without breaking the bank. With numerous products available for under $50, it’s the perfect opportunity to scoop up essentials while enjoying savings that feel like a mini vacation for your wallet. What's on Sale? Smart Picks & Gadgets First off, let’s dive into some of the standout categories you’ll want to make a beeline for. Household gadgets are receiving a robust discount this Labor Day; imagine upgrading your living space or outdoor area for a fraction of the price. For the tech-savvy or those looking to ease their daily chores, Amazon has slashed prices on smart speakers, smart plugs, and kitchen gadgets that promise to enhance your lifestyle. Practical Insights About Shopping Smart Shopping smart doesn’t just apply to picking the right items; it’s also about timing. Labor Day often sees a surge in deals, which means competition can be fierce. Monitor prices in the weeks leading up to this holiday, as Amazon frequently adjusts prices based on demand. A pro tip: set alerts for items on your wishlist and snag them as soon as prices drop! Family Essentials at Unbeatable Prices One area where shoppers can find excellent value is in family essentials. Whether it's home cleaning products or outdoor gear for family gatherings, many items you buy every day are going on sale. Look for discounts on items like eco-friendly cleaning products and everyday household items. By buying these necessities during a sale, you can stock up while saving significantly. How to Utilize Amazon's Bargains Effectively Utilizing Amazon’s sale often means more than just browsing their featured deals page. Join Prime membership if you haven’t already. Prime members frequently receive special discounts during sales periods. Additionally, consider the advantages of consumer reviews; browsing through verified buyer feedback can help you identify which deals are truly worth pursuing amid the plethora of options. Concluding Thoughts With all these thoughtful online deals at your fingertips, this Labor Day is your chance to revamp your home and lifestyle without spending a fortune. Keep in mind that the best shopping is about being informed, strategic, and, most importantly, ready to take action when investment opportunities arise.

Terms of Service

Privacy Policy

Core Modal Title

Sorry, no results found

You Might Find These Articles Interesting

T
Please Check Your Email
We Will Be Following Up Shortly
*
*
*