Add Row
Add Element
UPDATE
Add Element
  • Home
  • Categories
    • Cleaning & Moving
    • Maintenance / Repairs
    • Remodeling & Construction
    • Landscaping / Outdoor
    • Security & Technology
    • Sustainability, Health & Safety
    • Interiors / Décor
    • Expert Interviews
    • DIY Home Projects
Home Wise News!
Wise Insights, Reliable Contractor Advice & Hands on DIY Know How for Savvy Homeowners
August 21.2025
3 Minutes Read

Transform Your Space with These Essential End-of-Summer Cleaning Tasks

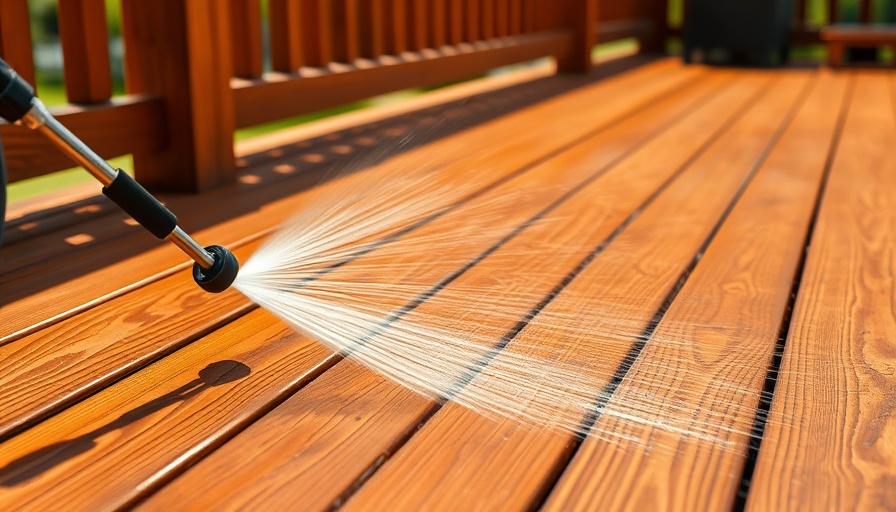
Pressure washing wooden deck as part of end-of-summer cleaning tasks.

Why End-of-Summer Cleaning is Essential

As summer winds down, many of us switch gears from beach days and barbecues to back-to-school routines and autumn preparations. But before you say goodbye to the long days of summer, make sure to tackle some important cleaning tasks that can transform your living space into a fresh, organized haven. Not only does it prepare your home for the coming months, but it also creates a welcoming environment for family and friends as you head into the holiday season.

Simple Summer Cleaning Tasks for a Big Impact

Cleaning your home doesn’t need to be a chore; it's a chance to discover and appreciate what you have. Here are ten end-of-summer cleaning tasks that can significantly refresh your space without the need for professional help.

1. Clear Out Summer Gear

Summer can leave behind a trail of items like beach towels, sunscreen, and patio furniture that are only needed for a few more weeks. Take stock of what you truly need and eliminate the clutter. Donate items in good condition to local charities or set up for a garage sale.

2. Clean Your Storage Areas

Your shed and garage likely endured a heavy workload during the summer. Give these spaces a thorough clean. Make it a process: empty out what’s inside, wipe surfaces down, and reorganize with a focus on what will be essential as the seasons change.

3. Revive Your Outdoor Furniture

Has your outdoor furniture seen better days? Dust off your tables and chairs and check for fading or weather damage. A little bit of TLC, such as a fresh coat of paint or new cushions, can significantly enhance your outdoor space for entertaining.

4. Dust Off High-Traffic Areas

Dust accumulates in high-traffic areas like mantels, shelves, and baseboards. A once-over with a microfiber cloth and a safe cleaning spray can help you reclaim every corner of your home. This will also improve air quality, particularly if you or someone in your household suffers from allergies.

5. Deep Clean Kitchen Appliances

Your refrigerator and ovens worked overtime during summer gatherings. Now’s the time to deep clean them. Pay close attention to your oven’s self-clean feature and pull everything out of your fridge for a thorough wipe down. A clean kitchen makes preparing fall meals more enjoyable!

6. Check Your HVAC Systems

Summer can put your HVAC system to the test, working hard to keep your home cool. This is a perfect time to clean or change your filters and ensure your system runs efficiently. Consider professional maintenance for your heaters before they kick in for the colder months.

7. Wash Windows and Screens

Summer can wreak havoc on your windows. Dust and moisture may have built up. Take the time to wash both windows and screens for a clearer view of the beautiful fall foliage.

8. Organize Indoor Spaces

With school starting, it's an excellent opportunity to reorganize your living areas. Declutter kid’s backpacks and check supplies. Implement some fun storage solutions that engage children in keeping their spaces tidy.

9. Clean Out the Pantry

A thorough pantry clean is not just beneficial for aesthetics—it can also help you monitor dates on food products. Toss anything expired and make room for comforting autumn ingredients to fuel those chilly evenings!

10. Ready the Home for Fall

Lastly, prepare your home for the upcoming seasons by candle-lighting, adding warm throws, and strategically placing safe fall decorations. Creating an inviting interior will inspire you to enjoy the harvest time.

Be Prepared: Safety First

While getting things in order, don’t forget the key aspect of safety and security during your cleaning endeavors. Ensure that all chemicals are stored securely, especially if you have pets or children. Additionally, keep track of outdoor tools that could be hazardous if not stored properly.

Conclusion: Clean Spaces Lead to Clear Minds

Cleaning before the end of summer isn’t just about keeping a tidy home; it’s about reclaiming space, preparing for change, and setting the tone for the busy months ahead. Dive into these tasks with a sense of accomplishment and creativity! So roll up those sleeves, put on some music or a podcast, and embrace the transformation within your home. Your future self will thank you!

Cleaning & Moving

Write A Comment

*
*
Related Posts All Posts
08.30.2025

Can You Wash Pillows in the Washing Machine? Essential Guide Inside!

Update Are Your Pillows Ready for a Refresh? There’s something rejuvenating about diving into a freshly laundered bed, isn’t there? But when it comes to maintenance, many of us end up wondering, "Can you wash pillows in the washing machine?" The good news is, you absolutely can! However, before you toss your cherished sleeping companions into the machine, there are some essential guidelines to follow to ensure they come out fluffy and fresh. Types of Pillows: Know Before You Wash First off, it’s vital to identify the type of pillow you own. Most synthetic and down pillows are machine washable, but some specialized ones, like memory foam, require a more delicate approach. Memory foam pillows, for instance, aren’t meant for the washing machine, as high agitation can break down their supportive structure. Instead, spot-clean them with a damp cloth and a gentle detergent. For down and synthetic options, check the label, and if they’re go-ahead approved, you’re set! A Step-by-Step Guide to Washing Your Pillows Here’s the method to the madness: Start by loading two pillows at once into the washing machine. Uneven weight distribution can lead to an unbalanced wash cycle, resulting in a headache rather than a well-cleaned pillow. Next up, use a gentle cycle with warm water and a mild detergent. After this, it’s time to rinse! Ensure all detergent residues are gone by running an extra rinse cycle—trust me; your pillows deserve it. To effectively dry them, toss in some clean tennis balls or dryer balls to beat the fluff back into shape. The Most Common Mistakes When Washing Pillows Did you know that overstuffed pillows can give you more trouble than they’re worth when it comes to washing? They may not even fit well in the washer, rendering your delightful laundering efforts futile! Additionally, using the wrong detergent can lead to irritation, so make sure to choose one that’s gentle. Finally, leaving them damp can invite mold and mildew, which we definitely don’t want. So, drying properly is crucial. How Often Should You Wash Your Pillows? Experts recommend cleaning pillows every 3 to 6 months, depending on usage. If you sleep with pets, suffer from allergies, or accumulate moisture from sweating, you might want to do it more frequently. But fear not—washing is easier than ever with the comfort of being home! Keeping your sleeping conditions hygienic not only enhances your sleep quality but also contributes positively to your health. The Sparkling Benefits of Clean Pillows You might wonder, aside from just aesthetics, what’s the allure of washed pillows? Clean pillows lead to fewer allergens and bacteria, meaning better sleep and fewer disruptions during the night. Moreover, they boost that clouds-in-heaven feeling as you nestle into bed! Time to Dive Into Pillow Cleaning! Now that you’re equipped with pillow-washing wisdom, it’s time to get to work! With just a few simple steps, you will have the peace of mind that comes with cleaner pillows and, in turn, improved sleep quality. So roll up your sleeves, gather your pillows, and let the rejuvenation begin!

08.29.2025

How to Effectively Remove Stains from Your Coffee Pot and Maintain It

Update Understanding the Mystery of Coffee Stains For coffee lovers, that morning ritual doesn’t just come with the aroma of freshly brewed liquid gold—it can also lead to unsightly stains. Whether it's the coffee pot, mugs, or your favorite shirt, those stubborn coffee stains can feel like a curse. But what makes these stains so tough? The answer lies in the oils and pigments in the coffee, which tend to cling to surfaces, especially non-porous materials. When not cleaned immediately, what starts as a small stain can quickly become an embedded mark—one that requires diligent care to remove. Proven Methods to Battle Coffee Pot Stains Fortunately, there are several effective methods to remove those pesky stains from your coffee carafe and cups. A mixture of vinegar and baking soda can serve as a powerhouse combination, creating a fizzing reaction that power-washes the stubborn residue. Simply stir together equal parts baking soda and water to create a paste, then scrub away with a cloth. If the stains are still fighting back, adding a splash of vinegar can work wonders, enhancing the cleaning intensity. For those deep-rooted stains inside thermal pots, boiling water combined with dishwasher tablets can do the trick. Pour the boiling water into your pot, drop in a dishwasher tablet, and let it soak. This method not only removes stains but also refreshens the internal surfaces. Maintain Your Coffee Gear for a Stain-Free Era Consistency is key when it comes to maintaining the aesthetics of your coffee equipment. Regular cleaning—ideally after each use—can prevent stains from building up. Daily washing helps but incorporating deep-clean rituals every once in a while is crucial, especially if you use your coffee pot frequently. Committing to a cleaning routine will save you time and effort in the long run, ensuring your coffee station remains inviting. Creative Solutions for Everyday Stains Your coffee stains don’t just stop at coffee pots; they can leave marks on clothes and surfaces around the house. Using lemon and salt can be a natural and effective solution. Simply sprinkle salt on the stain and squeeze the juice of a fresh lemon over it. Let this concoction sit in the sunlight for a couple of hours before rinsing off. This method not only whitens but also freshens the fabric, lending a pleasant citrusy aroma in the process. Denture tablets are another surprising ally in the war against stains. Fill your sink or a large bowl with water and drop in a couple of diluted tablets. After soaking your stained items, wipe them away with ease. It’s an easy way to eliminate stains without harsh scrubbing or strong chemicals. Future-Proofing Against Coffee Stains Prevention is always better than cure! Here are some tips to future-proof your coffee scenarios: Invest in quality, stain-resistant mugs and carafes—these can resist hard-to-remove coffee rings. Establish a "no coffee at the desk" policy to keep your workspace clean while still enjoying your favorite brew. Place coasters strategically around your house to catch spills before they become stains. By integrating these habits into your routine, you can significantly decrease the likelihood of coffee-related mishaps.

08.28.2025

Transform Your Housework Routine with the 20/10 Rule for Cleaning

Update Understanding the 20/10 Cleaning Rule: A New Approach to HouseworkSimplifying cleaning tasks can dramatically transform how we approach household maintenance. Enter the 20/10 cleaning rule, a straightforward yet effective strategy designed to slice through the anxiety of an overwhelming cleaning process. The rule consists of cleaning for 20 minutes followed by a refreshing 10-minute break, making housework far less daunting.This method has gained traction thanks to Rachel Hoffman’s book “Unf*ck Your Habitat,” where she emphasizes the power of time management in not just cleaning, but cultivating a healthy home environment. By dividing cleaning into manageable intervals, we not only reduce fatigue but also promote a sense of accomplishment.Why the 20/10 Cleaning Rule Is So EffectiveThe secret behind the efficacy of the 20/10 cleaning method lies in its structure and simplicity. Instead of viewing cleaning as an insurmountable task that requires hours of your day, you can break it down into short bursts. Here’s why this method works:1. Reducing OverwhelmOften, the thought of cleaning an entire house seems like climbing a mountain. This rule flips that narrative. When you set a timer for just 20 minutes, it feels achievable. Research shows that about 35% of individuals who use structured intervals for tasks, like the 20/10 method, see significant improvements in their productivity. It’s all about mindset.2. Building Consistent HabitsBeyond just cleaning, the 20/10 rule fosters consistency. Little by little, you establish regular cleaning rituals that help keep clutter at bay. This prevents disarray from accumulating, which can transform a manageable task into a substantial commitment. Each cleaning session becomes a straightforward appointment with your home.3. Boosting Mental and Physical WellnessCleaning can be physically taxing and mentally draining. The built-in breaks of the 20/10 rule allow you to reset both your body and mind. Research indicates that 94% of workers in tidy environments experience higher productivity. Imagine the positive impact of this principle at home! Short cleaning bursts combined with mental rest can enhance your focus and motivation.Putting the 20/10 Rule into ActionTo maximize the benefits of the 20/10 rule, implement a few simple strategies:Start Small: Focus on one area or task. Whether it’s your kitchen or living room, concentrating on one section at a time heightens effectiveness.Set a Timer: Use a timer to keep yourself honest. A phone app or a kitchen timer can do the trick.Stay Focused: Eliminate distractions during the 20 minutes. Put on your favorite music, turn off the TV, and engage fully with the task.Take Full Breaks: Use your 10 minutes wisely. Stand up, stretch, grab a drink—do something that helps you relax.Adapt to Your Needs: Feel free to tweak the timing. If 20 minutes feels too short or too long, adjust it to find your sweet spot.Embracing a New Cleaning MindsetAs you adapt the 20/10 rule into your cleaning routine, you’re not just tidying up your home; you’re shifting your approach to chores altogether. This method encourages a positive relationship with housework, which can lead to a consistently clean home without the stress. Reflect on how you feel when your home is organized—it radiates comfort and peace.Call to Action: Take the First Step toward a Cleaner Home Today!With the 20/10 cleaning rule at your fingertips, you have the perfect opportunity to reclaim your time and simplify your cleaning rituals. Try it out—set your timer, clean with focus, and embrace those breaks! You just might find yourself looking forward to cleaning time.

Terms of Service

Privacy Policy

Core Modal Title

Sorry, no results found

You Might Find These Articles Interesting

T
Please Check Your Email
We Will Be Following Up Shortly
*
*
*