Add Row
Add Element
UPDATE
Add Element
  • Home
  • Categories
    • Cleaning & Moving
    • Maintenance / Repairs
    • Remodeling & Construction
    • Landscaping / Outdoor
    • Security & Technology
    • Sustainability, Health & Safety
    • Interiors / Décor
    • Expert Interviews
    • DIY Home Projects
Home Wise News!
Wise Insights, Reliable Contractor Advice & Hands on DIY Know How for Savvy Homeowners
June 26.2025
4 Minutes Read

Elevate Your Home Aesthetics: Explore Budget-Friendly Wall Moulding Ideas

Budget-friendly wall moulding ideas in cozy bedroom with elegant decor.

Transform Your Home with Wall Moulding: A Budget-Friendly Approach

When it comes to home décor, one of the most impactful ways to infuse personality and style into a room is through wall moulding. Not only does it enhance the aesthetics of your space, but it does so without breaking the bank. If you’re on the lookout for ideas to liven up your walls, read on! Here are some delightful wall trim options that are sure to inspire your next home improvement project.

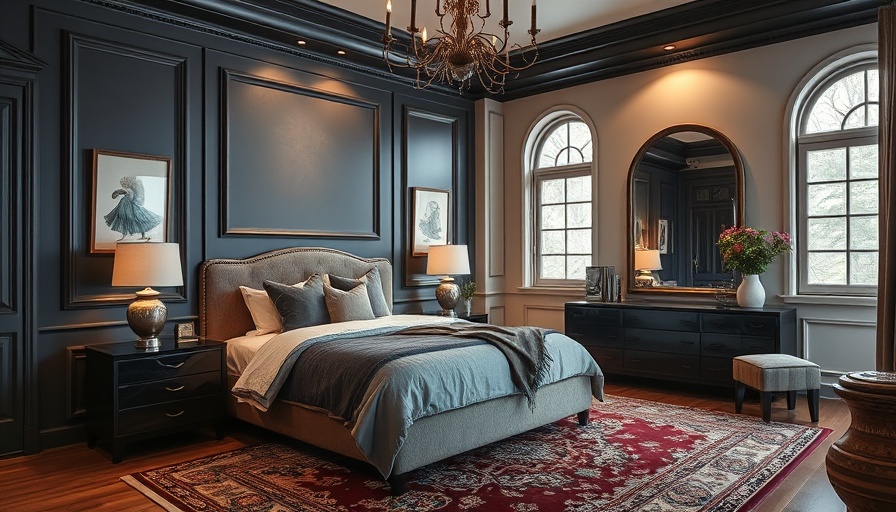
The First Impression: Picture Frame Moulding

Picture frame moulding, a vintage charm that can elevate any room, is crafted from wood trim shaped like squares or rectangles. Traditionally installed both above and below a chair rail, it adds visual intrigue and can serve as a beautiful frame for artwork or family photos. Many homeowners, including myself, have used this technique in bedrooms and bathrooms, turning plain walls into conversations starters.

Installation is a breeze! The key is to ensure that you use a level and some simple tools. Don't be intimidated; this practically DIY project can give your space a luxurious feel in just a few hours.

Weathered Charm with Shiplap

Shiplap isn’t just for farmhouses anymore. This tongue-and-groove board installation can suit various styles, whether you’re aiming for rustic chic or modern elegance. Whether positioning it vertically or horizontally, shiplap can add character to everything from kitchens to living rooms. I’ve seen it grace fireplace surrounds and even ceilings, and each time it adds a lovely dimension to the room.

Shiplap installations are known for their ease, making them accessible for every DIY enthusiast. With basic supplies and a bit of patience, anyone can create a stunning shiplap feature in their home!

Cottage Vibe: Beadboard

If you desire a cozy, cottage-like ambiance, beadboard might just be your ideal choice. This traditional paneling style features vertical grooves, or “beads,” giving a unique character to entryways, bathrooms, or dining spaces. I remember the satisfaction of installing beadboard in my first home’s kitchen; it instantly transformed the space into a charming gathering area.

Home improvement stores carry beadboard panels that you can cut to fit perfectly. With glue or nails, you can have this captivating panelling adorning your walls in no time.

Adding Elegance with Chair Rail Trim

Chair rails have a practical origin—originally intended to protect walls from chairs, they now serve a dual purpose of dividing different wall treatments. Chair rail trim can elevate any space by creating visual interest and a polished look. I’ve employed it in nurseries and kids’ rooms to add a touch of sophistication.

Installing chair rail involves placing a thin strip of trim horizontally across the wall. It’s one of the simpler trimming projects, making it a perfect starting point for novice DIYers.

Freshening Up with Painted Baseboards

Sometimes, the most refreshing change requires little more than a paintbrush. A simple coat of paint can revitalize your existing baseboards, making them feel brand new. Opting for bright colors or contrasting hues can make your space pop with personality. My entry and hallway have benefited immensely from this easy upgrade, with painted baseboards providing a clean, modern look.

The process requires patience and a steady hand, but with an angled brush and some painter’s tape, you’ll master this skill in no time.

Innovative Ideas for Modern Concepts

Explore unconventional approaches to wall moulding by integrating decorative elements like **crown moulding** or **wainscoting**. Crown moulding enhances the area where walls meet the ceiling, adding a stately touch, while wainscoting can dress up lower wall sections with detailed trim that invites touch and admiration.

Consider pairing mouldings with color schemes or textures that align with your theme for a seamless finish. A bold, contrasting color can distinguish different wall levels, while maintaining harmony across the design.

Embracing DIY: Achievements That Inspire

Embracing these creative moulding ideas fosters not only a transformation in your living spaces but also a sense of personal achievement. DIY projects are about more than just the final look; they bring satisfaction, nostalgia, and the joy of crafting a space that’s truly yours.

Throughout my years in project management, I’ve witnessed firsthand how these small enhancements can contribute to the efficiency of home improvement projects, increasing property values while providing a delightful outlet for creativity.

Your Next Step: Choose Your Project!

With so many exciting options for wall moulding, your next DIY project awaits. Try out picture frame moulding for a classic touch, or be bold and experiment with shiplap. The choice is yours! Remember, the key to successful home improvements is to engage your creativity and enjoy the process. Let’s get started on transforming your spaces into beautiful reflections of your personality.

Are you ready to elevate your home decor with these easy wall moulding ideas? Dive into your next DIY project and watch how it enhances your everyday life. You’ve got this!

DIY Home Projects

0 Comments

Write A Comment

*
*
Please complete the captcha to submit your comment.
Related Posts All Posts
04.10.2026

How to Clean Walls Without Damaging Paint: Easy Techniques Every Homeowner Should Know

Update Effortlessly Restore Your Walls with These Proven Techniques Keeping your walls clean is essential for maintaining a pleasing atmosphere in your home, especially since it's one of the first things guests notice. However, the last thing you want to do is damage your freshly painted walls while trying to wipe away dust, grease, or marks. Luckily, thanks to insights from paint experts, there are easy, safe methods to ensure your walls remain pristine without losing their color or sheen. Choosing the Right Approach: Know Your Paint Finish The first step in cleaning painted walls without jeopardizing the finish is to know the type of paint used. For example, walls painted with higher gloss finishes—like semi-gloss or satin—are generally more forgiving during cleaning. In contrast, matte and eggshell finishes require a gentler touch to avoid damage. Benjamin Moore’s Regal® Select Interior paint is known for its stain-resistive properties and cleans well, making it an excellent choice for high-traffic areas. Gather Your Supplies: Preparation is Key What you'll need: Non-abrasive sponges or cloths Lukewarm water Mild dish soap or an all-purpose cleaner Two buckets—one for cleaning solution and another for rinsing Rubber gloves Soft, absorbent towels Before diving into the cleaning, ensure that all necessary tools are gathered. Cover the floors to catch any drips, and dust the walls with a vacuum’s brush attachment to avoid pushing dirt around. Start Simple: The Power of Water Your first line of attack should be warm water. Simply dampen a non-abrasive sponge and wipe gently. If you're dealing with light stains, this might be all you need to restore the wall's beauty. Always wipe from the bottom upward to prevent streaking from running grime. When to Step It Up: Using Mild Cleaning Solutions If warm water doesn’t do the trick, mix together a few drops of mild dish soap with lukewarm water. The soap helps lift the grime without the harsh chemicals found in many cleaners. When applying, work in small sections, using a circular motion to minimize the risk of damaging the paint. What If the Stains Persist? Try Natural Alternatives For stubborn stains that refuse to budge, a paste made from baking soda and water can work wonders. Apply it to the stained areas and scrub gently with a soft cloth. Baking soda acts as a gentle abrasive and can eliminate marks while being safe for painted surfaces. Don't Forget the Final Touch: Drying and Finishing Once you’ve cleaned the walls, don’t overlook the importance of drying them properly. Use a soft and absorbent cloth to ensure all moisture is absorbed, preventing the risk of mildew forming. A clean wall should feel smooth and look fresh—just like when you first painted it! Establish a Routine: Maintenance for Longevity Incorporating wall cleaning into your regular maintenance routine is important. Regular dusting and periodic washes can significantly extend the life of your paint job. Take note that freshly painted walls should typically be left for at least two weeks before any cleaning is done to allow the paint to cure properly. Conclusion: Transform Your Home’s Ambiance with Care Cleaning your walls doesn’t have to be a daunting task. By following these easy, safe methods, you can maintain the charm of your living space without damaging your paint. The next time you notice fingerprints or dirt on your walls, you’ll be well-equipped to tackle the mess and keep your home looking polished! Don't forget to share your experiences or any additional tips you’ve learned along the way!

04.09.2026

Master the Art of Cleaning Saw Blades and Router Bits with Ease

Update Reviving Your Tools: The Importance of Cleaning Keeping your saw blades and router bits clean is not just about maintaining tools but optimizing performance. A blade dulled by pitch and grime can dramatically reduce efficiency and invoke unnecessary wear on motors. The old saying, "A clean tool is a happy tool," rings true! By dedicating a mere hour of your time, you can vastly improve how your equipment performs on DIY projects. Essential Tools and Materials: What You'll Need Gathering the right tools is the first step to a successful cleaning operation. This endeavor requires minimal investment. For cleaning, you'll usually need a brass bristle brush, a nylon brush, a putty knife, and a shallow plastic container for soaking your blades. Essential materials include clean shop rags, dish soap, lubricating oil, paper towels, and a reliable cleaner such as Simple Green. Step-By-Step Guide to Clean Like a Pro The cleaning process can be broken down into seven key steps: Disassemble the Router Bits: Safely remove any movable parts from your router bits. Prepare the Cleaning Solution: Create a gentle but effective solution using Simple Green or dish soap mixed with water. Submerge and Soak: Let your saw blades and router bits soak for approximately 15 minutes. Remove Buildup: Scrub gently using brushes to remove dirt and pitch. Rinse and Dry Well: Thoroughly rinse under water and dry with towels or a hair dryer. Lubricate: Apply oil to the moving parts during reassembly to enhance longevity. This comprehensive approach not only preserves your tools but also ensures optimal functionality on your next DIY project. Exploring Alternative Cleaning Methods For those looking for alternative cleaning options, many industry professionals recommend products such as Boeshield Blade and Bit Cleaner or Rockler’s Pitch and Resin Remover. These specialized solutions can drastically reduce the time spent on this task, as they’re designed to break down tough pitch and resin quickly. Using readily available products such as Nature’s Orange D-Limonene can also do the trick. However, always ensure that the cleaning method chosen won't harm the equipment or leave any residues. A Common Misconception: When to Replace? It’s often presumed that dull blades must be replaced. This misconception can lead to needless spending. Before dumping a so-called dull blade, consider the amount of pitch or grime it might be caked in. Regular maintenance can yield impressive results, transforming a blade you deemed useless back into a tool ready for any project. Many woodworkers swear by this approach, indicating that a little maintenance far outweighs the cost of replacement. The Benefits of Cleaning Your Tools Investing time and effort into cleaning your tools has two main benefits. First, it leads to enhanced performance during cutting tasks, making them quicker and more efficient. Secondly, it extends the lifespan of your blades and bits, saving you money over time. As noted by fellow hobbyists, maintaining a habit of cleaning ensures that you're always prepared for your next creative endeavor. Final Thoughts: DIY with Confidence Now that you’ve learned effective cleaning techniques for your saw blades and router bits, you’re one step closer to being a DIY master! Engaging with your tools and making a habit of cleaning will not only elevate your home projects but also prolong the life of your equipment. Don’t neglect these valuable tips; however, remember to revisit the cleaning process regularly to maintain performance and longevity. With diligence, you'll find cleaning blades just as satisfying as the art of DIY itself!

04.08.2026

Unlocking Your DIY Potential: Master Tile Cutting Tools with Ease

Update Mastering the Essential Tile Cutting Tools for DIYers When it comes to undertaking a tile project, having the right tools at your disposal can make all the difference between a tedious task and a gratifying experience. No matter if you're updating your bathroom tiles or creating a stunning kitchen backsplash, understanding how to correctly cut tiles is vital for a professional finish. This article breaks down the best methods of tile cutting, featuring three popular tools: manual snap cutters, angle grinders with diamond blades, and wet tile saws. Choosing the Right Tool for the Job Before rolling up your sleeves, the first step in your tile cutting journey is to assess the type of tile you're working with and the kind of cuts needed. Each tile cutting tool serves a different purpose: Manual Snap Cutter: Ideal for straight cuts, particularly in ceramic and porcelain tiles up to 1/2 inches thick. Angle Grinder with a Diamond Blade: Perfect for intricate cuts, including curves and unique shapes like around plumbing fixtures. Wet Tile Saw: Best for larger projects, as it enables precise, clean cuts on various materials, including glass and porcelain. Understanding these tools not only boosts your confidence but also equips you to make the right choice for each phase of your project. How to Cut Tile with a Manual Snap Cutter The manual snap cutter reigns supreme for straight cuts, making it user-friendly, especially for newcomers. Simply follow these steps: Measure and Mark: Use a square to determine your tile size and make a clear mark. Position the Tile: Align your tile against the cutter’s fence, ensuring the scoring wheel is on the marked line. Score the Tile: Pull the cutter’s lever while applying moderate pressure to create a visible score. Snap the Tile: Position the breaker foot slightly below the tile's top and apply downward pressure. Smooth Edges: Use a rubbing stone to finish your piece, ensuring no jagged edges remain. By mastering this straightforward method, you'll be prepared for many basic tiling projects ahead. Utilizing an Angle Grinder for More Complex Cuts If your tiling project calls for more than just straight lines, it’s time to introduce the angle grinder into your toolkit. Here’s how: Setup: Ensure you have a diamond blade made for tile and protective gear, including safety glasses and a respirator. Mark Your Cuts: Use a spray bottle of water to keep dust down and mark your cutting line accordingly. Clamp the Tile: Secure the tile onto a piece of plywood to prevent slipping. Make Your Cuts: Steadily follow your marked line without rushing, ensuring cleaner edges and minimal chipping. The angle grinder offers versatility that can adapt to various cutting needs, facilitating customization that’s essential for unique installation environments. Techniques for Using a Wet Tile Saw The wet tile saw is favored for bulk cuts and ensures clean, precise slices. Here’s how to use it effectively: Mark Your Cuts: Indicate the cutting line clearly on your tile. Prep the Saw: Ensure the reservoir has enough water and check that the blade is sharp. Guiding the Tile: Slowly feed the tile into the saw, allowing the tool to do the work without forcing through the material. Smoothing Edges: Just like with the manual cutter, finish off with a rubbing stone for clean edges. Wet saws are excellent for larger projects, allowing for not just precision but also a speed that manual methods lack. Final Considerations for DIY Tilers Regardless of which tool you choose, safety should always be your top priority. Always wear protective gear and take precautions to avoid injury. Furthermore, familiarizing yourself with each tool's capabilities will enable smoother workflow, minimize frustrations, and lead to beautiful tile installations. Equipped with these tips and techniques, you’re now ready to approach tile cutting with confidence. Don't be intimidated; with practice and the right tools, you'll master the art of tiling in no time. So, gather your materials, and let’s get started on your next DIY project!

Terms of Service

Privacy Policy

Core Modal Title

Sorry, no results found

You Might Find These Articles Interesting

T
Please Check Your Email
We Will Be Following Up Shortly
*
*
*