Add Row
Add Element
UPDATE
Add Element
  • Home
  • Categories
    • Cleaning & Moving
    • Maintenance / Repairs
    • Remodeling & Construction
    • Landscaping / Outdoor
    • Security & Technology
    • Sustainability, Health & Safety
    • Interiors / Décor
    • Expert Interviews
    • DIY Home Projects
Home Wise News!
Wise Insights, Reliable Contractor Advice & Hands on DIY Know How for Savvy Homeowners
May 14.2025
3 Minutes Read

Essential Guide: What to Put in an Outside Dog House for Warmth

Spotted dog near snowy dog house, winter setting

Keeping Your Furry Friend Warm in the Winter

The winter months can be especially harsh for outdoor dogs. As pet owners, it becomes our responsibility to keep our canine companions warm and safe. Understanding your dog’s breed and cold tolerance is crucial. Some breeds, such as Alaskan Malamutes and Siberian Huskies, are naturally better suited for colder climates, while smaller dogs or those with thin fur, like Chihuahuas, need extra care. Moreover, noticing symptoms of frostbite or hypothermia—such as blisters or skin discoloration—can be pivotal in ensuring your dog’s health. By being vigilant, we can make informed decisions to protect our pets during the chilly months.

Essential Items for Keeping Dogs Warm

Before deciding what to put in an outside dog house for warmth, consider providing your dog with suitable winter attire. For smaller or thinner dogs, a winter coat or sweater is advisable. Additionally, dog boots can protect their paws from icy surfaces and harmful ice-melting chemicals. Remember, if you’re feeling cold, your dog likely is too. Keeping an eye on the temperature and their behavior helps you react appropriately to their needs.

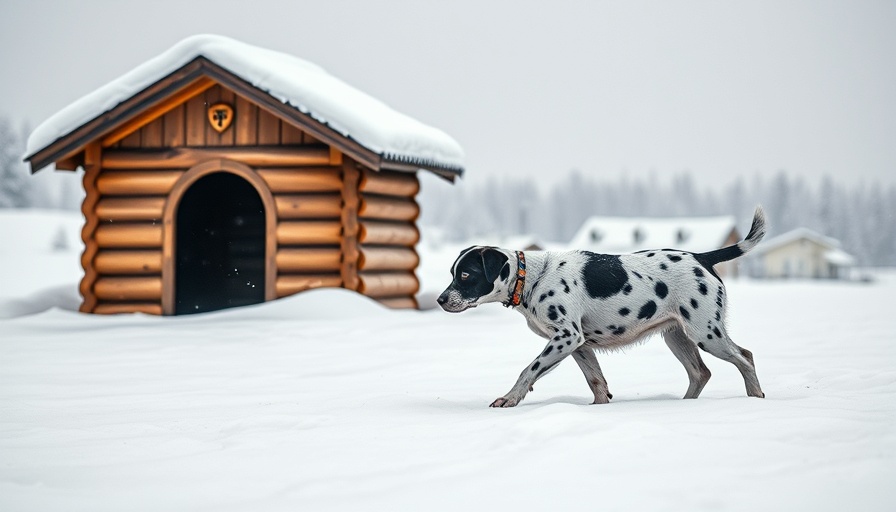
The Importance of Proper Shelter: Insulation and Design

To create a safe and warm dog house for your beloved pet, it’s essential to insulate the structure properly. The dog house should be securely placed with a sloped roof to prevent snow accumulation. Elevating the floor by at least 4 inches keeps cold air at bay, and filling the bottom with insulation materials such as straw can add warmth. An additional layer of straw or a cozy dog bed on top of this insulation provides your pet with a comfortable place to snuggle and rest.

Creating Indoor Comfort: Warming Stations

Besides providing external warmth, consider having designated warming spots indoors. A simple dog bed with a warm blanket can make a significant difference. While heated mats are tempting, they can pose a safety risk if not monitored closely. Always think about your dog’s safety first, ensuring that any heating devices are secure and have no chance of overheating.

Shorter Outdoor Trips: Safety First

Even with a well-insulated dog house, it's crucial not to leave dogs outside for too long in extreme cold. Limit outdoor time to bathroom breaks or very short walks. This not only helps keep them warm but ensures they don’t suffer from the dangers posed by cold weather. Walking your dogs on leashes is another practical safety measure during winter walks, in ensuring they don’t wander into unsafe areas.

Frequently Asked Questions About Keeping Dogs Warm

Many pet owners have questions about the best practices for ensuring their dogs remain comfortable in winter. A common query is whether dogs should sleep outside during snow. While some breeds are winter-ready, it’s best to provide an indoor space or at least a heated area for them to seek refuge as needed. Moreover, regular checks on their food and water supply are crucial since water can freeze quickly in cold temperatures. Keeping their living space clean and the area free of ice or snow buildup on their paws is essential for their well-being.

Final Thoughts: Your Role as a Dog Owner

As responsible dog owners, keeping our pets warm during winter should be a priority. Knowing what to put in an outside dog house for warmth is just one aspect of caring for your furry companions. Combine this knowledge with proper insulation, regular checks, and adjusting their outdoor time to keep them safe. Not only does this enhance their wellbeing, but it also strengthens the bond between you and your dog.

In conclusion, ensure you’re taking proper steps to keep your dog cozy and warm this winter. Adapting their routine and living conditions can significantly improve their comfort during the colder months.

DIY Home Projects

0 Comments

Write A Comment

*
*
Related Posts All Posts
03.12.2026

Unlock Sparkling Clean Sinks: Discover How to Use Dishwasher Tablets!

Update Transform Your Kitchen Sink with This Simple Hack Are you tired of dealing with stubborn sink stains and the endless scrubbing that seems to never yield satisfying results? Here’s a revolutionary solution that could change your cleaning game significantly—dishwasher tablets! This hands-free cleaning hack isn’t just a gimmick; it cleverly utilizes the same technology that keeps your dishes spotless, and you’ll be amazed at the results. The Magic of Dishwasher Tablets Dishwasher tablets are designed to dissolve grime and grease in the high-temperature environment of a dishwasher and they can bring that same efficiency to your kitchen sink. Imagine tossing a tablet in, filling your sink with hot water, and letting the hard work be done for you. It’s a far cry from traditional scrubbing methods that can leave your arms sore and your sink still dirty. Step-by-Step: How to Make Your Sink Shine Here’s how to harness the power of a dishwasher tablet for your sink: Remove all dishes and items from the sink. Insert a drain stopper and fill the sink with hot water. Drop in one dishwasher tablet and allow it to dissolve for about 15 minutes. Let the solution sit for at least two hours or even overnight for tougher stains. Drain, rinse with clean water, and wipe down with a clean towel. This process not only brightens your sink but ensures that the harsh chemicals usually found in household cleaners are circumvented. Considerations Before You Start While the idea is comforting, some precautions are necessary. Not all dishwasher tablets are created equal; look for plastic-free options to prevent plumbing issues. The harsh ingredients in these tablets can irritate your skin and eyes, so wearing gloves is advisable. Avoid using these tablets on delicate surfaces like porcelain or ceramic as they can scratch or dull the finish. Tips for Maintaining Your Sparkling Sink After you’ve achieved shininess, keeping your sink in prime condition is simple: Rinse your sink after each use to avoid food particle buildup. Avoid letting dirty dishes sit for long; clean them promptly. Use a sink strainer to catch debris, and empty it regularly. Taking these small steps can significantly reduce the frequency of deep cleaning. Common Misconceptions and Myths Many people believe that cleaning requires extensive effort and numerous products. However, using a dishwasher tablet proves that a single product can effectively tackle several cleaning jobs around the house. This not only saves time but also reduces clutter in cleaning supplies. Final Thoughts: A Clean Sink, A Happy Home By using dishwasher tablets, you’re not just cleaning your sink; you’re making a statement about ease and efficiency in household maintenance. It’s one small change that can have a dramatic impact on your cleaning routine and overall satisfaction with your kitchen space. So why not give it a try? Next time your sink is in need of some TLC, pop in a dishwasher tablet and let it work its magic. You'll likely find yourself with a brilliantly shining sink and a newfound appreciation for the power of modern cleaning products!

03.11.2026

Transform Your Home: A Simple Guide to Installing a Ceiling Light Medallion

Update Elevate Your Space: The Magic of a Ceiling Light Medallion When it comes to home decor, minor details can transform a room from ordinary to extraordinary. One such detail that packs a punch is the ceiling light medallion. This elegant addition not only enhances the beauty of your lighting fixture but also adds a striking visual element to your ceiling. In this article, we will guide you through the straightforward process of installing a ceiling light medallion, which can breathe new life into your interiors. Why Choose a Ceiling Light Medallion? Ceiling light medallions are a fantastic way to add both character and sophistication to any space. They come in various styles—from ornate traditional designs to sleek, modern options—allowing you to match them with your home’s aesthetic. For homeowners looking to create a cozy yet whimsical atmosphere, as described in the renovation story of a dining room makeover, a medallion can be a standout feature. Pairing it with a contemporary light fixture creates a captivating contrast, proving that traditional elements can coexist harmoniously with modern designs. Gather Materials Before You Start The process begins with gathering the necessary materials. You’ll need: Ceiling Medallion Construction Adhesive Paint (optional) Caulk Tools: Painter’s tape, pin nails or tape, and caulk gun Having everything at hand will streamline the installation process and save you from multiple trips to the hardware store. Prep Work: Removing the Current Light Fixture Installing a ceiling medallion isn’t complicated, but there’s a little prep work before you get started. You will first need to carefully remove the existing light fixture. This step is vital; working around the fixture could result in damage to both your light and the ceiling. Take a moment to turn off the circuit breaker to avoid any mishaps while you handle the wiring. Perfecting the Paint Job Before applying the medallion, take the time to paint it. While medallions often come primed, a fresh coat of paint—preferably the same color as your ceiling—will ensure a polished look. This detail makes a world of difference, providing a seamless integration into your ceiling. If you're feeling bold, consider contrasting colors for a unique flair! Attach the Medallion with Ease With your light fixture safely out of the way and your medallion painted, it’s time to attach it. Apply a generous amount of construction adhesive to the back of your medallion. Position it carefully against the ceiling, pressing firmly to ensure it adheres well. To keep the medallion in place while the adhesive sets, use painter’s tape for a few hours. If you want added support, you can use pin nails, though this is optional. Finishing Touch: Caulking for a Sleek Finish As the final touch, caulk around the edges of the medallion for a seamless appearance. This helps hide any gaps and offers extra security, ensuring the medallion sits flush against the ceiling. Once the caulk dries, you can go ahead and reinstall your light fixture. The result? A chic and polished ceiling that invites compliments and elevates your room. The Transformational Impact Many homeowners are surprised at how such an affordable project—typically under $20—can significantly enhance the aesthetics of a room. It’s an easy way to achieve high impact without breaking the bank. As this project emphasizes, thoughtful details make all the difference in home décor. Broader Impacts and Future Trends The rise of DIY home projects has inspired many to take on renovations themselves, with light fixtures and ceiling treatments becoming popular focal points. As trends shift towards a mix of traditional and modern designs, ceiling medallions remain timeless. They not only elevate the decor but also reflect a homeowner's personal style and creativity. Share Your Journey Once you have installed your ceiling light medallion, the next steps involve accessorizing and personalizing your space. These finishing touches, like selecting curtains and artwork, contribute to the overall atmosphere you want to achieve. If you’re inspired to try this project yourself, take the plunge! Your space deserves these thoughtful enhancements that resonate with your unique style. For more home decor inspirations and DIY projects, keep following along!

03.10.2026

Mastering Dog Hair Removal from Your Car: Tips for Pet Owners

Update Conquering Pet Hair: Why It Matters Every dog owner understands the joy that comes with a loyal furry companion. However, with that joy often comes a significant challenge: dog hair in the car. Maintaining a clean vehicle not only makes for a more enjoyable ride but is also essential for maintaining the vehicle’s value and sanitation. The right cleaning techniques can reclaim your car from the confines of a fur-coated existence, and it all starts with effective methods. Essential Tools for Hair Removal To kick off your dog hair removal mission, you'll need a few tools. A shop vacuum is your first line of defense, followed by a rubber-toothed pet hair removal tool, some lint rollers, and a spray bottle filled with water. These tools work in harmony to ensure thorough cleaning. Step-by-Step Guide to Dog Hair Removal Follow these steps to transform your car from furry to fantastic: Initial Vacuum: Start with a good vacuum session using a shop vacuum. Focus on the seats and carpets, paying extra attention to the crevices where pet hair tends to gather. Neutralize the Static: A common reason dog hair sticks stubbornly is static electricity. Fill your spray bottle with water and mist the areas lightly before proceeding. This minimal moisture will help release the fur from the fabric. Scraping: Use your rubber-toothed tool, pulling it toward you to agitate the fabric gently and dislodge the hair. Clean the tool occasionally to avoid spreading the mess further. Final Vacuum: Vacuum again to collect any hair clumps you've gathered, ensuring your clean-up is as effective as possible. Lint Roller for Loose Ends: Finally, use a lint roller to catch any remaining bits of fur. Running a fan can help dry any moisture left behind. Minimizing Future Hair Accumulation Once you've tackled the dog hair situation, it's wise to consider preventative measures. Regular grooming can significantly reduce the amount of loose hair, and using protective seat covers can keep your vehicle clean and hair-free. If you find certain tools work exceptionally well for your pet, consider investing in more to ease future cleaning tasks. Inspiration from Car Detailing Professionals Professional car detailers often use high-powered vacuums and specialized tools that help them efficiently clean pet hair. While you may not have access to their exact equipment, understanding their methods can inspire homeowners to develop their own efficient cleaning routines. The Emotional Impact of a Clean Car A clean car offers more than just a neat appearance—it can significantly enhance your driving experience and overall mental well-being. A tidy environment reflects a well-kept home, and it boosts confidence every time you slide into the driver's seat. Final Thoughts on Dog Hair Removal With a few simple tools and methods, removing dog hair from your car can be a manageable task that enhances your enjoyment of travel with your furry friend. So, don’t let pet hair keep you from experiencing your vehicle to its full potential. Embrace these techniques, and drive with pride! To stay updated on more tips for maintaining your home and vehicle, make sure to follow reliable DIY and handyman resources. They can help you tackle pet hair challenges and other household concerns with ease.

Terms of Service

Privacy Policy

Core Modal Title

Sorry, no results found

You Might Find These Articles Interesting

T
Please Check Your Email
We Will Be Following Up Shortly
*
*
*