
UPDATE
  • Home
  • Categories
    • Cleaning & Moving
    • Maintenance / Repairs
    • Remodeling & Construction
    • Landscaping / Outdoor
    • Security & Technology
    • Sustainability, Health & Safety
    • Interiors / Décor
    • Expert Interviews
    • DIY Home Projects
Home Wise News!
Wise Insights, Reliable Contractor Advice & Hands on DIY Know How for Savvy Homeowners
May 15.2025
3 Minutes Read

Essential Guide: Why Metal Should Never Be in Microwaves

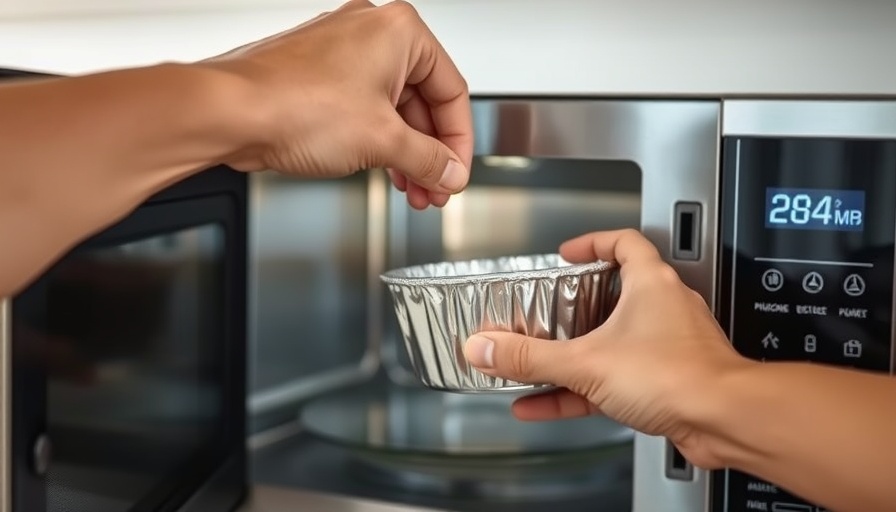
Microwave safety with metal container being placed inside.

Understanding Microwaves: Why Metal Should Never Be Inside

Picture this: you’re in a rush, heating up leftovers for dinner. You toss a metal spoon into the microwave along with your soup, thinking it’s no big deal. Suddenly, sparks fly, a popping sound erupts, and you quickly realize you’ve made a costly mistake. So why can't you put metal in the microwave? let's break it down.

The Science Behind Microwave Safety

Microwaves work by emitting electromagnetic waves that bounce around inside the appliance, heating up the food by exciting water molecules. Metal objects, however, act as reflectors of these waves, creating a dangerous environment where they can spark and arc. Think of it like shining a flashlight into a mirror—the light simply bounces back. This reflection can build up heat and lead to potential fires within the microwave.

What Happens When Metal Enters the Microwave?

When metal is placed inside a microwave, it can cause numerous problems. Initial signs include faint blue or white sparks, often accompanied by cracking sounds reminiscent of firecrackers. If the metal is not removed quickly, the sparks can escalate into a more serious issue, perhaps damaging the microwave or causing a fire. Appliance repair expert Matthew Morrison suggests immediately stopping the microwave and unplugging it to prevent further damage.

Identifying Microwave-Safe Materials

Not all materials are created equal when it comes to microwave usage. Microwavable dishes are typically made from glass, ceramic, or approved plastics that allow microwave energy to pass through, heating only the food. This includes dishes marked as microwave-safe, which means they don’t absorb or reflect energy improperly. On the contrary, items like Styrofoam can release harmful chemicals and should never be placed in a microwave.

Are There Any Exceptions?

While it's advisable to avoid metal, certain exceptions exist. Some specially designed metal trays can be safely used in microwaves, and the metal racks found inside many microwave models are made from smooth stainless steel that can handle the waves. However, experts warn against using thin metals or those with sharp edges as they can easily cause sparks.

Essential Microwave-Safe Materials You Should Use

Here’s a quick list of materials best suited for microwave cooking:

  • Tempered Glass: Perfect for its transparency—allowing you to view your food as it cooks.
  • Ceramic and Stoneware: Great for maintaining and distributing heat evenly.
  • Specific Plastics: Ensure any plastic is labeled microwave-safe to avoid melting or chemical leaching.

Best Practices for Microwave Use

To maintain a safe and efficient microwave cooking experience, consider common handyman tips. Always double-check for any metal components within food packaging before microwaving. Avoid overcrowding your microwave, and ensure that any dish has enough space to allow for steam accumulation. Finally, be proactive about cleaning your microwave to prevent food particles—especially metallic residues—from becoming a fire hazard.

Conclusion: Stay Safe While Cooking

When it comes to microwave use, understanding the materials is crucial. By sticking to glass, ceramic, and approved plastics, you not only enhance your cooking experience but also safeguard your appliance and household. Remember, when in doubt, keep metal out!

If you want to continue learning about home maintenance and safe DIY projects, be sure to explore additional resources and guides we provide.

DIY Home Projects

0 Comments

Write A Comment

*
*
Please complete the captcha to submit your comment.
Related Posts All Posts
05.18.2026

Discover Amazing Tips to Fix Light Scratches on Glass Yourself

Update Understanding Light Scratches on Glass Light scratches on glass can be more than just a visual nuisance; they can affect the charm of your home or cherished items. Whether it's a decorative vase, a favorite picture frame, or the windows in your house, these pesky marks can disrupt the overall aesthetic. Fortunately, you don’t always need to replace the glass to restore its pristine look. With a few savvy tricks, you can tackle light scratches and bring back the luster of your glass treasures. Common Causes of Scratches Many households experience scratches due to everyday interactions. Think about it: moving furniture, pets, and even cleaning can all lead to unintentional scratches on your glass items. Understanding how scratches occur can help you take better care of your glass surfaces. For example, using abrasive cleaning materials or allowing grit to accumulate can lead to those annoying marks. This can be crucial knowledge for anyone looking to preserve their valuables while minimizing future scratches. Do-It-Yourself Solutions: The Charm of Home Remedies For those who enjoy getting their hands dirty, there are several DIY solutions to restore scratched glass without replacing it. Here’s a roundup of popular methods: Baking Soda Paste: Create a simple paste by mixing baking soda with a bit of water. Apply gently and rub with a soft cloth. Baking soda acts as a mild abrasive, polishing the glass without causing further damage. Toothpaste Magic: A non-gel toothpaste can work wonders on light scratches. Apply with a soft cloth in a circular motion and rinse well. This method is particularly effective due to the fine abrasives in toothpaste. Vegetable Oil Trick: Though it might sound unconventional, a small amount of vegetable oil can help mask minor scratches. Apply it lightly, and it can make those scratches less visible. How To Assess When to Try DIY Repairs While tackling light scratches with DIY methods can be effective, it's essential to know when to call in the professionals. If the scratches are deep or if they impact the functionality (like on a windshield), it might be time to consider replacement or professional repair. Knowing when to stop is part of the journey to keeping your glass in tip-top shape. Future Trends in Glass Repair Technology As we embrace an era of technology and innovation, new solutions for glass repairs are emerging. Smart home technologies may integrate advanced auto-repair coatings that can heal minor scratches on the fly. Imagine having windows that literally fix themselves, retaining their crystal-clear brilliance without your intervention. It’s a concept that could merge the realms of maintenance and convenience, particularly for those obsessed with aesthetic perfection in their homes. Getting Creative With Glass Besides maintaining the beauty of your glass items through repair, consider how glass fits into your home's overall design. Unique glass features or artwork can also help draw attention away from minor imperfections. Think about incorporating etched glass or decorative films for windows. Embracing the Challenge Engaging with the world of DIY and home repair not only allows for cost-effective solutions but also fosters a sense of accomplishment. There's something rewarding about tackling challenges head-on and seeing the fruits of your labor. Whether you are trying to buff out scratches or replace a broken pane, each task adds to your home improvement skillset. Take Away Actionable Insights So, next time you encounter a scratch on your beloved glass item, remember you can apply these techniques before considering replacement. Try a couple of the methods outlined here and see which one works best for you. And who knows? You might just discover a hidden talent for glass restoration!

05.17.2026

Transform Your Space with DIY Deck Projects: A Father-Son Journey

Update A Transformative Father-Son Bond: Building a Dream Deck Building a deck can be more than just a labor-intensive weekend project; it can also create lasting memories. When a father and son embark on the challenge of constructing a new deck, they find themselves not only engaged in hard work but also in deepening their bond. This recent DIY undertaking is a testament to the joy of teamwork and creativity, reminding us that valuable experiences can come from simply working together. Learning Through Building: A Lesson in DIY Projects The journey begins with the decision to replace an old and rickety deck. For many, tearing down something old can be daunting, but it presents a unique opportunity for father and son to choose materials and designs that reflect their personal style. This particular project lasted just one week, showcasing how structured planning can streamline significant home repairs while allowing for spontaneous moments of fun. Many fathers who engage in DIY projects with their children report that these activities not only teach practical skills but also impart essential life lessons about perseverance and problem-solving. handyman tips: Choosing the Right Materials One of the pivotal decisions made during the deck-building process was selecting the right materials. Opting for durable composite decking can be beneficial, as it requires less maintenance than traditional wood, is environmentally friendly, and retains its aesthetic charm longer. Reading expert reviews and visiting local suppliers for samples can help to make informed choices, ensuring that the final product meets the family's expectations. A Time for Connection: Emotional Investment in DIY As seen in several father-son DIY stories, the emotional reward from working side by side often outweighs the physical labor involved. One dad, like many others, reflected on how his son learned valuable construction skills and gained confidence in other areas as they worked towards a common goal. Across platforms like Reddit and Facebook, DIY enthusiasts note similar outcomes where child-parent projects lead to improved relationships and happier family dynamics. Creating shared memories is crucial, and as many users point out, the laughter shared during the inevitable mistakes often makes the projects memorable. Broadening Perspectives: How DIY Projects Foster Community Spirit The DIY community thrives on shared experiences like this one. Not only do these projects foster personal bonds, but they also create opportunities for neighbors to get involved—witnessing the progress and even offering assistance. Sharing successes and challenges through platforms such as r/DIY connects individuals who are eager to share similar experiences, proving that DIY isn’t just an insular activity but a community endeavor. The encouragement from fellow DIYers often proves invaluable, as demonstrated with much positive feedback on social media and forums focusing on DIY home projects. Taking Action: Why You Should Start Your Own Project For anyone thinking about undertaking their own project, now might be the perfect time! Whether it's a deck, garden shed, or simply repainting a favorite room in your home, the skills and joys gained from such endeavors far outweigh any challenges faced along the way. Not only would homeowners be able to enhance their living space, but they would also have the chance to cultivate enduring relationships. Plus, engaging in DIY projects can lead to substantial savings compared to hiring out for home improvements. So gather your tools, involve your loved ones, and discover the satisfaction of building something special together!

05.17.2026

The Heartwarming Story of a Father-Son Deck Project Completed in a Week

Update Building Bonds Through DIY: A Stunning Deck Project In a heartwarming showcase of family teamwork, a father-son duo recently completed an impressive deck project in just one week, combining skill, bonding, and creativity. Cary Mark and his son embarked on this home improvement venture with an aim to transform a grey rock-covered section of land into a beautiful outdoor space for relaxation and entertainment. This project epitomizes the essence of DIY, bringing together shared experiences and practical skills. As Cary reflected on the build, he noted how crucial preparation and teamwork were to ensure everything went smoothly. “Doing research and collaborating on ideas really set the foundation for our success,” he mentioned. The Project Stages: From Planning to Completion Before heading out, Cary's son organized the materials, ensuring they arrived promptly for an efficient build. Once together, they rolled up their sleeves and completed the major phases of the project in just two full days! Their approach included using advanced techniques such as hidden hardware to give a polished look to the deck, which was a learning curve for both men. Cary’s previous experience with deck building came in handy, yet he was surprised by the benefits of using Trex composite materials, which provided durability without the need for visible screws or nails. This choice not only improved the aesthetics of the project but also saved time, allowing for quick assembly. Budget-Friendly Tips for DIY Enthusiasts While building their dream deck, Cary and his son implemented effective budgeting strategies, such as opting for narrower Trex boards for the perimeter rather than a wide board to save on costs. Practical financial planning is a vital part of DIY projects, and Cary recommends aspiring builders to explore different materials and configurations to find what fits best within their budget. This aspect reflects a growing trend among DIY enthusiasts who are increasingly looking at both affordability and sustainability when selecting materials. Following the completion of their deck, Cary felt a great sense of pride, especially given that their workmanship was tested right after completion during a Fourth of July gathering. User Experience Design: What Made Their Deck Stand Out One standout feature of their deck was the meticulous attention to detail. Cary shared, “The miter joints on the corners came together perfectly, which is not an easy feat. This attention to craftsmanship ensured the final product was both beautiful and functional.” In doing so, they created a welcoming space not just for their family but for friends and relatives to also enjoy. Moreover, the learning curve involved in mastering new technologies, such as hidden hardware for decking, added a layer of excitement and fulfillment to the process. Marks on budget and aesthetics resonate with aspiring DIYers looking to replicate similar projects in their homes. Lessons Learned: Planning and Patience For those considering embarking on their own DIY projects, Cary advises ample research and preparation as key contributors to success. “Looking at what others have done—gathering tips and insights from different resources—will set you up for a smoother execution,” he explained. Assembling insights from various sources often mitigates risks related to unforeseen hurdles during the project. Cary’s journey serves as an inspirational example that home projects can foster not only physical improvements but also emotional connections. It highlights how shared experiences in crafting something tangible bring family members closer together. Through careful planning and execution, they weren’t just building a deck; they were fortifying their relationship, creating lasting memories, and acquiring valuable skills. Next Steps in DIY Father-Son Collaborations Looking ahead, Cary and his son are already brainstorming their next project: installing underground gutter downspouts in the yard. This continuous cycle of collaboration not only nurtures creativity but also equips younger generations with foundational skills necessary for home maintenance. Ultimately, the journey from vision to completion in building the deck mirrored a classic father-son dynamic where memories are often birthed through shared experiences. As DIYers continue to explore various home projects, it’s essential to emphasize both the craftsmanship involved and the invaluable time spent together in the process.

Terms of Service

Privacy Policy

Core Modal Title

Sorry, no results found

You Might Find These Articles Interesting

T
Please Check Your Email
We Will Be Following Up Shortly
*
*
*