Add Row
Add Element
UPDATE
Add Element
  • Home
  • Categories
    • Cleaning & Moving
    • Maintenance / Repairs
    • Remodeling & Construction
    • Landscaping / Outdoor
    • Security & Technology
    • Sustainability, Health & Safety
    • Interiors / Décor
    • Expert Interviews
    • DIY Home Projects
Home Wise News!
Wise Insights, Reliable Contractor Advice & Hands on DIY Know How for Savvy Homeowners
October 18.2025
3 Minutes Read

Essential Steps for Winterizing Your Hot Tub Before Freeze Sets In

Hand cleaning hot tub filter, winterizing process in backyard.

Understanding the Importance of Winterizing Your Hot Tub

When the cold months roll in, thoughts of relaxing in your hot tub may begin to fade if you plan to close it up for the season. Winterizing your hot tub is crucial if you're not planning to use it regularly. Failure to properly prepare it for winter can lead to serious issues, including frozen water lines and costly damages to the internal mechanisms.

Consequences of Neglecting to Winterize Your Hot Tub

Neglecting the winterizing process can lead to many problems. For instance, standing water in the hot tub can freeze, causing pipes and pumps to crack, resulting in expensive repairs. Moreover, stagnant water is a breeding ground for algae and bacteria, leading to smelly, cloudy water that can take hours to clean in the spring.

Hot tub expert Levi Freedman reminds homeowners that components such as the heating element are particularly susceptible to ice-related damage. It's essential to address these factors now rather than deal with the ramifications later.

Step-by-Step Guide to Winterizing Your Hot Tub

Winterizing your hot tub might seem daunting, but breaking it down into actionable steps makes the process manageable.

  1. Turn Off the Power: Ensure you cut the power supply at the breaker before beginning the process to prevent any electrical hazards.
  2. Remove Debris: Use a net or scooper to eliminate large items like leaves and branches from the tub.
  3. Drain the Water: Open the drain valve and allow all the water to flow out. You can also use a sump pump to expedite the process if necessary.
  4. Clear Out the Jets: Utilize a wet/dry vacuum to remove any remaining water from the jets and plumbing lines. Uhle emphasizes that even small amounts of water can freeze and lead to cracks.
  5. Disconnect Components: Detach the pumps and heaters to help eliminate any trapped water. It’s crucial to ensure that all parts are dry to prevent any mishaps.
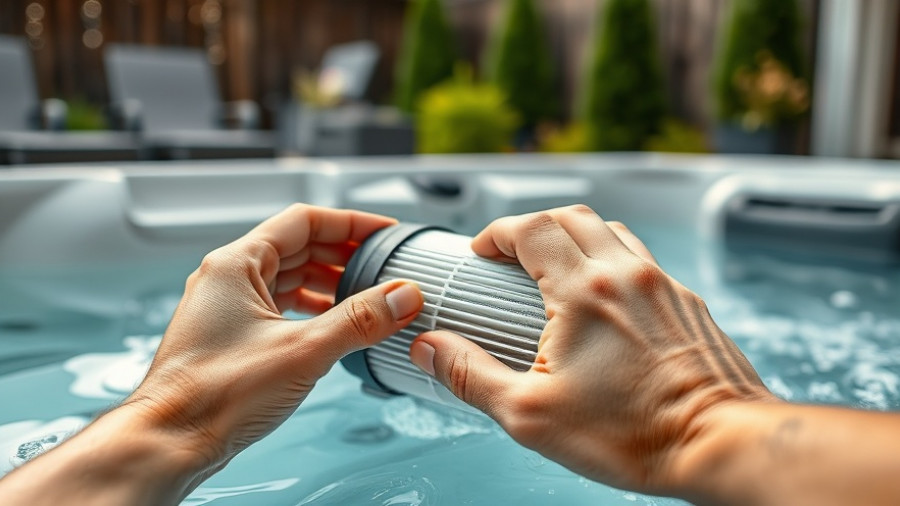
  6. Clean Filters: Remove, clean, and dry the hot tub filters before storing them indoors.
  7. Antifreeze Application: Pour non-toxic RV antifreeze into the plumbing lines for added protection against freezing, using a funnel for precision.
  8. Secure the Cover: Ensure the hot tub cover fits snugly to block out debris and maintain the internal integrity. Consider placing a tarp over it for further protection, especially in regions with heavy snowfall.

Remember to check the manufacturer’s guidelines for model-specific instructions, and if overwhelmed, don’t hesitate to hire a professional.

Best Practices and Maintenance Tips

Winterizing your hot tub is not only about protecting it from winter weather but also about implementing effective maintenance strategies. During those months when the tub is not in use, it’s best to check on it every few weeks to prevent build-up of condensation, which can lead to mold. A simple tip is to open the cover slightly to ventilate, ensuring the inside remains dry.

Furthermore, maintain an eye on any wear and tear that might occur, by inspecting your hot tub cover and components once the winter is over, preparing you for immediate maintenance in the spring so you can enjoy your hot tub hassle-free.

Conclusion: Proactive Maintenance for Enjoyment Year-Round

Taking the time to winterize your hot tub properly saves you from potential headaches and substantial repair costs, opening up the world of enjoyment come spring. Every homeowner can tackle this task with the correct knowledge and approach. Remember, this proactive measure can lead to enjoyable experiences whenever you choose to bask in your hot tub once winter is over.

To further enhance your home maintenance skills, explore more DIY projects that empower you to take control of your home’s upkeep.

DIY Home Projects

Write A Comment

*
*
Related Posts All Posts
12.14.2025

Discover How to Clean Your Microwave with Lemon in No Time!

Update A Easiest Way to Clean Your Microwave Microwaves can be a blessing in every kitchen, but they all share one common problem—stubborn food splatters and stains. Fear not, for a delightful and simple solution is at hand: the humble lemon. Whether you’re a culinary novice or a seasoned pro, cleaning your microwave with lemon will transform your messy kitchen appliance into a sparkling clean marvel without the need for harsh chemicals. Why Lemon? The Science Behind the Magic Lemon juice is acidic, which is a powerful property for cleaning. According to Cornell University, its acidity not only helps break down tough grime, but its natural antibacterial properties also provide an effective way to sanitize surfaces. Lemons can easily cut through grease, dissolve soap scum, and even eliminate lingering odors. So while you may have thought of lemon simply as a cooking ingredient, it turns out it's also a secret weapon in your cleaning arsenal! What You’ll Need for This Lemon Cleaning Trick Before you embark on your lemony fresh journey, gather the following materials: A fresh lemon (or two, if you want a more intense clean) A microwave-safe bowl or measuring cup Water A clean dish towel or sponge Step-by-Step Cleanliness Follow these easy steps for a microwave cleaning experience that’s as satisfying as squeezing fresh lemon juice into your iced tea: Fill a microwave-safe bowl with about 1/2 cup of water. Squeeze the juice of the lemon into the water, and place the squeezed lemon halves into the bowl as well. Put the bowl in the microwave and heat it on high for 3 minutes. This allows the mixture to reach a boiling state. Once the microwave beeps, do not open the door just yet. Let the steam work its magic by resting for another 5 minutes. Now, carefully remove the bowl and wipe down the interior surfaces, starting from the top and moving downwards. The food splatter should wipe away effortlessly! Additional Tips for Success Want to make the most of your lemon cleaning experience? Here are some tips to keep in mind: For stubborn spots that refuse to budge, dip your sponge or cloth into the lemon water before scrubbing. Consider using a brush with soft bristles for those hard-to-reach corners. Wipe down the microwave door as well to eliminate any smudges. Frequency of Cleaning: Keep It Fresh! How often should you embark on this delightful cleaning adventure? Cleaning expert Rosie Picosa recommends cleaning your microwave once a week, especially if you frequently use it. Regular cleaning prevents caked-on messes, ensuring each wipe-down becomes a breeze. The Broader Picture: Embracing Natural Cleaning Products Adopting natural cleaning methods not only helps maintain a cleaner kitchen but also safeguards your health by minimizing exposure to harmful chemicals. Incorporating ingredients like lemon into your cleaning routine aligns with a growing trend towards sustainable living and personal well-being. Final Thoughts: Cleaning with a Twist of Fun! Your microwave doesn’t have to be a source of anxiety each time you see a mess inside. With just a little bit of water, some lemon, and a microwave, you can transform your clean-up routine into a fun activity! Not only will your microwave shine, but the zesty aroma may even brighten your cooking experiences thereafter. So gather those lemons, and make the kitchen a fresher, cleaner place! Want more recipes for cleaner living? Stay on the lookout as we explore fresh, natural cleaning tips to keep your home sparkling!

12.14.2025

Affordable Tiny House Kit Under $25K: A Perfect Start to Minimalist Living

Update Affordable Living: Embracing the Tiny House Movement In an era where housing prices are skyrocketing, the idea of owning a home seems increasingly distant for many. Yet, the tiny house movement is changing the game, offering innovative solutions for those looking to downsize or simply find an affordable sanctuary. One standout example is a fantastic tiny house kit available on Amazon, which comes with a charming front porch and a price tag that won’t break the bank — it’s under $25,000! Why Tiny Homes? The Benefits and Drawbacks Tiny homes, by definition, are typically smaller than 400 square feet and advocate a minimalist lifestyle. They're ideal for young families, retirees, or anyone seeking a simpler way of living. This specific Amazon kit not only provides a comfortable living space but also encourages creativity in home design, allowing owners to customize their structure according to personal needs. Yet, while tiny homes promise a cozy dwelling, potential buyers must consider the challenges as well, including zoning laws, limited storage space, and potential financing hurdles. According to experts, one should assess regulations that differ from state to state to avoid any legal headaches. Planning and structure are key factors for a seamless transition into tiny living. Inside the Cozy Kit: A Look at Features This particular tiny house kit from Amazon does not skimp on style or functionality. Featuring a cozy front porch perfect for rocking chairs, it invites one to relax and connect with nature without stepping far from home. The interior boasts an efficient layout that may include multiple sleeping areas, a kitchen, and a bathroom — making it a practical option for families. Moreover, the ease of assembly and insulation enables buyers to not only save costs but also make minimal effort in moving into their new home. The structure’s quality is highlighted by its durable materials, ensuring it withstands various weather conditions while maintaining thermal efficiency. A Market Shift: How Amazon is Changing Home Ownership The introduction of affordable tiny homes on platforms like Amazon reflects a significant shift in the housing market. As demand for compact, sustainable living spaces grows, e-commerce giants are stepping in to make homeownership more accessible. This kit is just one in a growing catalog that presents a viable solution for those feeling boxed in by sky-high traditional real estate prices. Furthermore, the success of tiny homes resonates with a demographic that values sustainability, customization, and a simplified lifestyle. A look back at similar log cabin kits shows that consumers are ready for economical yet stylish living options, as seen with kits listed at a comparable price of $25,000 in various online marketplaces. Some log homes even come with customizable features ensuring that aspiring owners can create a space that fits their vision perfectly. The DIY Experience: Building Your Own Home One of the most appealing aspects of purchasing a tiny house kit is the hands-on experience it provides. Building your own home can be incredibly rewarding, allowing for a deep sense of accomplishment. With guided instructions often included, even the most novice of builders can create a lovely abode. It’s about transforming the construction process into a communal activity, where families can bond over home-building projects. Moreover, beyond simply creating living spaces, this DIY mentality fosters creativity and resourcefulness, often resulting in unique designs that reflect personal artistry. Tiny homes promote the notion that home isn’t just a physical structure; it is a representation of lifestyle and identity. Conclusion: Why Now is the Time to Consider Tiny The tiny house kit available on Amazon exemplifies the exciting potential of affordable, sustainable living. With prices lower than many traditional builds, the allure of tiny homes expands beyond mere economics. They encapsulate a lifestyle choice that champions minimalism, creativity, and connection with the environment. If you're curious about stepping into the world of tiny living, consider exploring how this kit could fit into your life. Remember, it’s more than just a roof over your head; it's an embodiment of your values and aspirations. Explore the possibilities and let your tiny house journey begin!

12.13.2025

Unlock the Secrets of Safely Splitting Wood With an Axe

Update Mastering Wood Splitting: Safety First! For many, the art of splitting wood isn't just a task—it's a fulfilling way to connect with nature while honing a practical skill. However, wielding an axe is not without its risks. Safety should always be your top priority when splitting wood. This not only includes wearing protective equipment such as gloves and safety glasses but also ensuring that those around you are aware when you’re about to swing. Accidents often involve hands and feet, so always choose your underlying surfaces wisely, aiming to have a solid chopping block that will not move or slip while you work. Choosing the Right Axe for Your Needs The first step in mastering wood splitting is selecting the right tool. Choosing an axe involves understanding the balance and weight that works best for your strength and comfort. On the whole, axes with a handle length that reaches from your hip to the ground are optimal for maintaining control during swings. You may find a splitting maul, which has a heavier, wedge-shaped head, more effective for larger logs, while a lighter axe is ideal for smaller pieces. Ensuring your axe is sharp is crucial for effective splitting; a dull axe increases the risk of injuring yourself, as it requires more force and precision to use. Strategic Positioning: The Key to Success When it comes to preparing your logs, placement is everything. Ideally, logs should be set on a stable block for a safer strike. Consider the natural grain of the wood—look for natural splits to make your task easier, and avoid knots, which can complicate your splits. If you're dealing with green wood, you might struggle more because of its moisture content. When you’re ready to strike, ensure the blade has enough room to fall, particularly away from your legs and feet. Gripping the Axe for Precision and Control Understanding the proper grip on the axe can significantly impact your results. Your dominant hand should be close to the axe head for maximum control over the swing. This enables you to maintain a fluid, powerful motion without risking the integrity of your grip. As you swing down, aim for the center of the log; if you miss, the axe should ideally hit the ground rather than glance against the wood, which could lead to serious injury. Remember: when in doubt about your aim, it’s better to pull back than to swing wildly. The Joy of Splitting: Achieving Satisfaction with Each Swing Splitting wood provides more than just fuel for a fire; it can be incredibly rewarding. The satisfying sound of wood cracking can evoke feelings of achievement and self-sufficiency. The process rewards those who take their time to learn it correctly, reinforcing their knowledge of material properties, physical strength, and safety protocols. Future Trends in DIY Wood Splitting As more individuals seek sustainable living practices, splitting wood for heating has seen a renaissance. It’s not only cost-effective but also environmentally friendly, reducing reliance on fossil fuels. However, anyone looking to engage in this activity should consider taking a class or workshop that emphasizes safety practices and could connect you with fellow woodworking enthusiasts. Community learning fosters respect for the craft and promotes shared knowledge on techniques and tools. Common Misconceptions: Dispelling Wood Splitting Myths Many believe that splitting wood is solely about strength or that using an axe incorrectly can damage the tool. In reality, technique is paramount, and engaging the right method can help preserve your axe's integrity while maximizing efficiency. Practical learning is key: workshop participation or online tutorials can bridge the gap between theoretical understanding and practical expertise. Take Action and Start Splitting! The fulfillment gained from splitting wood is alive and well in DIY culture. By debunking myths and embracing techniques focused on safety and efficiency, we can reintroduce this skill into modern home maintenance. So gather your logs, sharpen your axe, and begin your journey towards wood-splitting mastery. Soon, you might find yourself not only with a stack of firewood but a sense of accomplishment that comes from mastering a truly age-old skill. Ready to split some wood? Dive into DIY projects and see the satisfaction waiting for you!

Terms of Service

Privacy Policy

Core Modal Title

Sorry, no results found

You Might Find These Articles Interesting

T
Please Check Your Email
We Will Be Following Up Shortly
*
*
*