Add Row
Add Element
UPDATE
Add Element
  • Home
  • Categories
    • Cleaning & Moving
    • Maintenance / Repairs
    • Remodeling & Construction
    • Landscaping / Outdoor
    • Security & Technology
    • Sustainability, Health & Safety
    • Interiors / Décor
    • Expert Interviews
    • DIY Home Projects
Home Wise News!
Wise Insights, Reliable Contractor Advice & Hands on DIY Know How for Savvy Homeowners
August 26.2025
3 Minutes Read

Explore Unique Boy Cat Names and Tips for Naming Your Feline Friend

Sleeping tabby kitten with '200 Boy Cat Names' text overlay on zebra blanket.

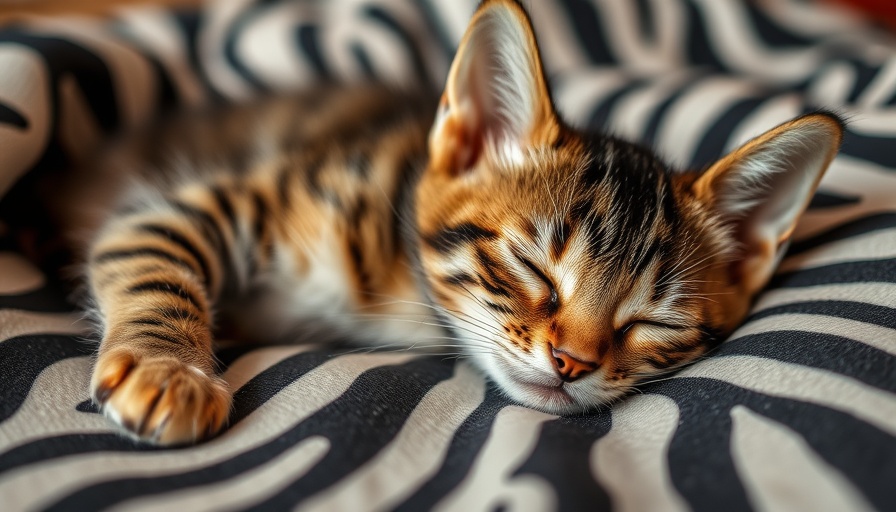
Choosing a Name for Your Male Cat: Tips and Tricks

Naming your new feline friend can be as fun as the cat itself! With countless options available, finding the perfect name for your boy cat is an exciting venture that connects you even deeper with your pet. Reflecting on personal experiences and pet dynamics can be a great way to choose a name that resonates.

When deciding on a name, consider a few key factors:

  • Keep it Short: Cats are more likely to respond to one- or two-syllable names. Think about names that roll off the tongue, like Leo or Max. If you like longer names, shorten them for ease.
  • Think Long Term: Your cat will likely be by your side for years to come. Pick a name that isn’t just a fleeting trend. This helps ensure that the name doesn’t become cringeworthy or outdated as they age.
  • Test It Out: Don’t hesitate to try different names. Your cat will quickly adapt. If something doesn’t feel right after a week, feel free to change it!

Exploring Popular Naming Trends

As society evolves, so do naming conventions for pets. Some common categories that many pet owners draw inspiration from include:

  • Food Names: Creative names like Beans or Tortilla bring a playful vibe.
  • Celebrity and Fictional Names: Channel your favorite characters or personalities with names like Thor or Elmo.
  • Color-Based Names: Names can also reflect your cat’s coat, such as Shadow for a black kitty or Fluffy for a soft and furry friend.

The Value of Names Beyond Cats

It’s interesting to note how naming a pet can reflect broader cultural trends. Not only do these names tie into the owner’s interests, but they can also illustrate a kind of personal expression. For example, naming a cat Cheeto shows a light-hearted, fun side, while Winston could indicate a more serious nature. With names often reflecting personal anecdotes or memories, it makes the act of naming incredibly meaningful.

Common Misconceptions About Naming Pets

Many new pet owners feel pressured to select a perfect name immediately, fearing they can't change it later. However, this notion couldn’t be further from the truth! With patience and experimentation, you can discover a name that embodies your cat’s personality instead of succumbing to the anxiety of a ‘perfect’ choice right away.

Advice for Name Selection

When you find yourself brainstorming, consider the unique quirks that your cat exhibits. Is he playful and dramatic? Maybe a name like Rocket or Ziggy fits. Calm and regal cats may suit names like Jasper or Gatsby. Observing and interacting with your cat provides invaluable insight into what names truly resonate.

Wrapping Up: More Than Just a Name

Names hold significance far beyond their sound. They are a testament to the bond you’ll build with your feline companion. A name can invoke fond memories, strike a chord in your heart, or simply bring a smile to your face when you call your furry friend. Reflecting on the tips and insights shared here, find joy in the naming journey!

DIY Home Projects

0 Comments

Write A Comment

*
*
Please complete the captcha to submit your comment.
Related Posts All Posts
04.10.2026

How to Clean Walls Without Damaging Paint: Easy Techniques Every Homeowner Should Know

Update Effortlessly Restore Your Walls with These Proven Techniques Keeping your walls clean is essential for maintaining a pleasing atmosphere in your home, especially since it's one of the first things guests notice. However, the last thing you want to do is damage your freshly painted walls while trying to wipe away dust, grease, or marks. Luckily, thanks to insights from paint experts, there are easy, safe methods to ensure your walls remain pristine without losing their color or sheen. Choosing the Right Approach: Know Your Paint Finish The first step in cleaning painted walls without jeopardizing the finish is to know the type of paint used. For example, walls painted with higher gloss finishes—like semi-gloss or satin—are generally more forgiving during cleaning. In contrast, matte and eggshell finishes require a gentler touch to avoid damage. Benjamin Moore’s Regal® Select Interior paint is known for its stain-resistive properties and cleans well, making it an excellent choice for high-traffic areas. Gather Your Supplies: Preparation is Key What you'll need: Non-abrasive sponges or cloths Lukewarm water Mild dish soap or an all-purpose cleaner Two buckets—one for cleaning solution and another for rinsing Rubber gloves Soft, absorbent towels Before diving into the cleaning, ensure that all necessary tools are gathered. Cover the floors to catch any drips, and dust the walls with a vacuum’s brush attachment to avoid pushing dirt around. Start Simple: The Power of Water Your first line of attack should be warm water. Simply dampen a non-abrasive sponge and wipe gently. If you're dealing with light stains, this might be all you need to restore the wall's beauty. Always wipe from the bottom upward to prevent streaking from running grime. When to Step It Up: Using Mild Cleaning Solutions If warm water doesn’t do the trick, mix together a few drops of mild dish soap with lukewarm water. The soap helps lift the grime without the harsh chemicals found in many cleaners. When applying, work in small sections, using a circular motion to minimize the risk of damaging the paint. What If the Stains Persist? Try Natural Alternatives For stubborn stains that refuse to budge, a paste made from baking soda and water can work wonders. Apply it to the stained areas and scrub gently with a soft cloth. Baking soda acts as a gentle abrasive and can eliminate marks while being safe for painted surfaces. Don't Forget the Final Touch: Drying and Finishing Once you’ve cleaned the walls, don’t overlook the importance of drying them properly. Use a soft and absorbent cloth to ensure all moisture is absorbed, preventing the risk of mildew forming. A clean wall should feel smooth and look fresh—just like when you first painted it! Establish a Routine: Maintenance for Longevity Incorporating wall cleaning into your regular maintenance routine is important. Regular dusting and periodic washes can significantly extend the life of your paint job. Take note that freshly painted walls should typically be left for at least two weeks before any cleaning is done to allow the paint to cure properly. Conclusion: Transform Your Home’s Ambiance with Care Cleaning your walls doesn’t have to be a daunting task. By following these easy, safe methods, you can maintain the charm of your living space without damaging your paint. The next time you notice fingerprints or dirt on your walls, you’ll be well-equipped to tackle the mess and keep your home looking polished! Don't forget to share your experiences or any additional tips you’ve learned along the way!

04.09.2026

Master the Art of Cleaning Saw Blades and Router Bits with Ease

Update Reviving Your Tools: The Importance of Cleaning Keeping your saw blades and router bits clean is not just about maintaining tools but optimizing performance. A blade dulled by pitch and grime can dramatically reduce efficiency and invoke unnecessary wear on motors. The old saying, "A clean tool is a happy tool," rings true! By dedicating a mere hour of your time, you can vastly improve how your equipment performs on DIY projects. Essential Tools and Materials: What You'll Need Gathering the right tools is the first step to a successful cleaning operation. This endeavor requires minimal investment. For cleaning, you'll usually need a brass bristle brush, a nylon brush, a putty knife, and a shallow plastic container for soaking your blades. Essential materials include clean shop rags, dish soap, lubricating oil, paper towels, and a reliable cleaner such as Simple Green. Step-By-Step Guide to Clean Like a Pro The cleaning process can be broken down into seven key steps: Disassemble the Router Bits: Safely remove any movable parts from your router bits. Prepare the Cleaning Solution: Create a gentle but effective solution using Simple Green or dish soap mixed with water. Submerge and Soak: Let your saw blades and router bits soak for approximately 15 minutes. Remove Buildup: Scrub gently using brushes to remove dirt and pitch. Rinse and Dry Well: Thoroughly rinse under water and dry with towels or a hair dryer. Lubricate: Apply oil to the moving parts during reassembly to enhance longevity. This comprehensive approach not only preserves your tools but also ensures optimal functionality on your next DIY project. Exploring Alternative Cleaning Methods For those looking for alternative cleaning options, many industry professionals recommend products such as Boeshield Blade and Bit Cleaner or Rockler’s Pitch and Resin Remover. These specialized solutions can drastically reduce the time spent on this task, as they’re designed to break down tough pitch and resin quickly. Using readily available products such as Nature’s Orange D-Limonene can also do the trick. However, always ensure that the cleaning method chosen won't harm the equipment or leave any residues. A Common Misconception: When to Replace? It’s often presumed that dull blades must be replaced. This misconception can lead to needless spending. Before dumping a so-called dull blade, consider the amount of pitch or grime it might be caked in. Regular maintenance can yield impressive results, transforming a blade you deemed useless back into a tool ready for any project. Many woodworkers swear by this approach, indicating that a little maintenance far outweighs the cost of replacement. The Benefits of Cleaning Your Tools Investing time and effort into cleaning your tools has two main benefits. First, it leads to enhanced performance during cutting tasks, making them quicker and more efficient. Secondly, it extends the lifespan of your blades and bits, saving you money over time. As noted by fellow hobbyists, maintaining a habit of cleaning ensures that you're always prepared for your next creative endeavor. Final Thoughts: DIY with Confidence Now that you’ve learned effective cleaning techniques for your saw blades and router bits, you’re one step closer to being a DIY master! Engaging with your tools and making a habit of cleaning will not only elevate your home projects but also prolong the life of your equipment. Don’t neglect these valuable tips; however, remember to revisit the cleaning process regularly to maintain performance and longevity. With diligence, you'll find cleaning blades just as satisfying as the art of DIY itself!

04.08.2026

Unlocking Your DIY Potential: Master Tile Cutting Tools with Ease

Update Mastering the Essential Tile Cutting Tools for DIYers When it comes to undertaking a tile project, having the right tools at your disposal can make all the difference between a tedious task and a gratifying experience. No matter if you're updating your bathroom tiles or creating a stunning kitchen backsplash, understanding how to correctly cut tiles is vital for a professional finish. This article breaks down the best methods of tile cutting, featuring three popular tools: manual snap cutters, angle grinders with diamond blades, and wet tile saws. Choosing the Right Tool for the Job Before rolling up your sleeves, the first step in your tile cutting journey is to assess the type of tile you're working with and the kind of cuts needed. Each tile cutting tool serves a different purpose: Manual Snap Cutter: Ideal for straight cuts, particularly in ceramic and porcelain tiles up to 1/2 inches thick. Angle Grinder with a Diamond Blade: Perfect for intricate cuts, including curves and unique shapes like around plumbing fixtures. Wet Tile Saw: Best for larger projects, as it enables precise, clean cuts on various materials, including glass and porcelain. Understanding these tools not only boosts your confidence but also equips you to make the right choice for each phase of your project. How to Cut Tile with a Manual Snap Cutter The manual snap cutter reigns supreme for straight cuts, making it user-friendly, especially for newcomers. Simply follow these steps: Measure and Mark: Use a square to determine your tile size and make a clear mark. Position the Tile: Align your tile against the cutter’s fence, ensuring the scoring wheel is on the marked line. Score the Tile: Pull the cutter’s lever while applying moderate pressure to create a visible score. Snap the Tile: Position the breaker foot slightly below the tile's top and apply downward pressure. Smooth Edges: Use a rubbing stone to finish your piece, ensuring no jagged edges remain. By mastering this straightforward method, you'll be prepared for many basic tiling projects ahead. Utilizing an Angle Grinder for More Complex Cuts If your tiling project calls for more than just straight lines, it’s time to introduce the angle grinder into your toolkit. Here’s how: Setup: Ensure you have a diamond blade made for tile and protective gear, including safety glasses and a respirator. Mark Your Cuts: Use a spray bottle of water to keep dust down and mark your cutting line accordingly. Clamp the Tile: Secure the tile onto a piece of plywood to prevent slipping. Make Your Cuts: Steadily follow your marked line without rushing, ensuring cleaner edges and minimal chipping. The angle grinder offers versatility that can adapt to various cutting needs, facilitating customization that’s essential for unique installation environments. Techniques for Using a Wet Tile Saw The wet tile saw is favored for bulk cuts and ensures clean, precise slices. Here’s how to use it effectively: Mark Your Cuts: Indicate the cutting line clearly on your tile. Prep the Saw: Ensure the reservoir has enough water and check that the blade is sharp. Guiding the Tile: Slowly feed the tile into the saw, allowing the tool to do the work without forcing through the material. Smoothing Edges: Just like with the manual cutter, finish off with a rubbing stone for clean edges. Wet saws are excellent for larger projects, allowing for not just precision but also a speed that manual methods lack. Final Considerations for DIY Tilers Regardless of which tool you choose, safety should always be your top priority. Always wear protective gear and take precautions to avoid injury. Furthermore, familiarizing yourself with each tool's capabilities will enable smoother workflow, minimize frustrations, and lead to beautiful tile installations. Equipped with these tips and techniques, you’re now ready to approach tile cutting with confidence. Don't be intimidated; with practice and the right tools, you'll master the art of tiling in no time. So, gather your materials, and let’s get started on your next DIY project!

Terms of Service

Privacy Policy

Core Modal Title

Sorry, no results found

You Might Find These Articles Interesting

T
Please Check Your Email
We Will Be Following Up Shortly
*
*
*