
• Home
  • Categories
    • Cleaning & Moving
    • Maintenance / Repairs
    • Remodeling & Construction
    • Landscaping / Outdoor
    • Security & Technology
    • Sustainability, Health & Safety
    • Interiors / Décor
    • Expert Interviews
    • DIY Home Projects
Home Wise News!
Wise Insights, Reliable Contractor Advice & Hands on DIY Know How for Savvy Homeowners
May 23.2025
3 Minutes Read

Home Designers’ Favorite Secrets at Home Depot Revealed

Vibrant Home Depot facade with orange signage under blue sky.

What Designers Know: The Hidden Gems of Home Depot

When it comes to home improvement, even the most seasoned interior designers have their go-to list of essentials, and you’d be surprised to find that many of those top choices can be found at Home Depot. Known for its extensive array of materials and tools, this one-stop shop is a haven for design aficionados. The following items are some of the top picks that designers swear by for every project, revealing the strategies they use to create stunning spaces.

Essential Tools for Creative Projects

First on the list is none other than quality paint. Whether it’s a trendy color for an accent wall or a neutral shade for a larger space, paint can transform a room in a matter of hours. Designers often recommend brands that offer a rich palette and long-lasting durability, an essential when planning renovations. Coupled with a good quality brush or roller, any homeowner can achieve that designer finish.

Lighting: A Designer’s Secret Weapon

Next, let’s illuminate the importance of lighting fixtures. From pendant lights to floor lamps, these accessories can elevate the ambiance of any room. Designers often choose adjustable fixtures that offer both function and style, enabling homeowners to enjoy adaptability based on the time of day or activity.

Accessorizing with Style: Cabinet Hardware

For a quick and cost-effective update, cabinet hardware is a favorite amongst designers. Switching out old handles or knobs for chic options can make a stunning impact on kitchen and bathroom renovations. One simple change can modernize a whole area, making it feel fresh and current.

Organizational Essentials: The Power of Storage Solutions

Designers also emphasize the value of storage solutions. Bins, baskets, and organizational accessories are crucial for maintaining an uncluttered space. Home Depot carries a plethora of options that blend style with functionality. They often serve dual purposes, enhancing decor while keeping messes at bay.

Flooring: Make or Break the Aesthetic

When reimagining a home, flooring is where the magic begins. Designers often recommend checking out Home Depot’s selection of laminate, tile, and hardwood options. An excellent choice in flooring can set the tone for a room, whether you’re going for rustic charm or modern elegance.

Weatherproofing for Sustainable Living

In the era of smart homes and sustainability, energy efficiency is key. Designers frequently advise incorporating weather stripping and insulation products. Not only do these solutions lower utility bills, but they also contribute to a more sustainable lifestyle, helping to protect the environment.

The Beauty of Greenery: Indoor Plants

Adding some greenery to a home is another tip from the pros. Home Depot offers a variety of indoor plants that can improve air quality and add a refreshing touch to decor. Designers know that well-placed plants can bring life into any room, creating a vibrant and welcoming atmosphere.

Understanding the Smart Home Wave

Finally, let’s not forget about technology in home improvement. Smart home devices, like thermostats and lighting systems, are becoming increasingly popular. These gadgets are designed to enhance everyday living, offering convenience without compromising security. Designers suggest looking for user-friendly options that integrate seamlessly with existing decor.

Your Turn: Transform Your Space with These Essentials

With this list of must-haves, homeowners can approach their next DIY project with confidence. Remember, the key is to choose items that resonate with your personal style while providing functionality. Don’t hesitate to wander through those aisles at Home Depot, as the next gem for your home could be just around the corner!

DIY Home Projects

0 Comments

Write A Comment

*
*
Please complete the captcha to submit your comment.
Related Posts All Posts
11.13.2026

Create Your Own Oversized Wood Lanterns for Holiday Cheer

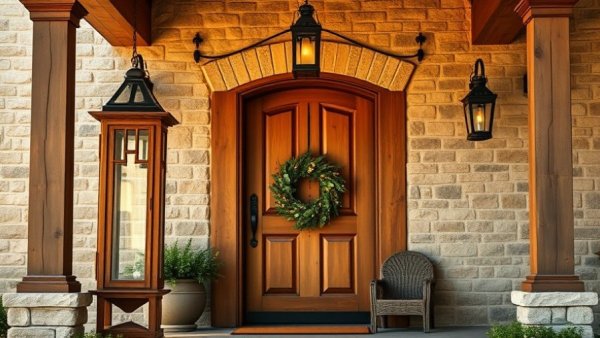
Update Transform Your Home with DIY Oversized Wood Lanterns As the holiday season approaches, many homeowners are looking for ways to enhance their outdoor decor. This year, a fantastic project to consider is building oversized wood lanterns that add warmth and charm to your front porch. Not only will these unique pieces be a stunning focal point, but they also serve as a personal touch to your home festivities. In this article, I'll guide you through creating these impressive lanterns! Why Go Oversized? The Benefits of Larger Lanterns Oversized lanterns can dramatically change the atmosphere of your porch. They draw the eye and create a welcoming space for family and friends during the chilly winter months. Larger lanterns not only offer greater visibility and light but also provide an opportunity to style them according to your personal taste. Imagine using flameless candles inside these lanterns, casting a soft glow that brings holiday cheer to your front yard. Additionally, their larger size allows for more creative opportunities: you can fill them with festive decorations, such as faux snow, evergreen sprigs, or even seasonal ornaments, adding layers of visual interest. Getting Started: Materials You Will Need Before you begin, gather the necessary materials based on your design plan. For one 24" lantern, here's what you'll need: (2) 8′ 1×2 piece of pine (1) 6′ 1×6 piece of pine (1) Wood Post Cap Miter Saw (or Miter Box + Hand Saw) Wood Glue Nail Gun + 18-gauge nails Wood Filler Paint Flameless Candle These materials make starting your project straightforward, even for beginner woodworkers. Feel free to join forces with family members or friends who are eager to learn from the experience. Sharing the workload can turn this project into a delightful bonding activity while bringing joy and festive spirit into your home. Step-by-Step Guide: Building Your Giant Lanterns Building oversized wood lanterns may sound daunting, but with careful preparation and attention to detail, it is an achievable task. Follow these steps for a successful project: Step 1: Cutting the Wood First, determine the dimensions for your lanterns. I typically opt for two sizes: 36" and 24". After measuring, cut three pieces of 1×6 wood to 5.5" each (to form the sides) and four pieces of 1×2 wood corresponding to your height choice. Don't rush this step; precise cuts will make assembly much easier. Consider investing in a clamp to hold wood pieces securely while cutting, which contributes to overall safety and accuracy. Step 2: Assembling the Frame With the wood cut, start assembling. Use wood glue generously between joints, attaching the long 1×2 pieces between the top and bottom sections, effectively outlining the shape of the lantern. Remember, the glue is the main adhesive here; the nails just temporarily hold them together. Make sure everything is level and aligned as you go; this will ensure that your finished project looks neat and symmetrical. Step 3: Adding a Base Now that the frame is in shape, it’s time to add a sturdy base. Attach another piece of 1×6 wood to the bottom. After securing it, create a decorative frame using the remaining 1×2 pieces, which will improve the lantern’s aesthetics and structure. This decorative touch not only reinforces the lantern but also elevates its visual appeal, making it more refined for holiday displays. Step 4: Finishing Touches with the Top Finally, don’t forget the post cap for a polished finish. This element not only enhances the lantern's appeal but also acts as a protective cover, aiding in the longevity of your project. Take the time to paint and seal your lanterns for weather resistance; these additional steps contribute to a beautiful finish that can withstand the elements throughout the season. Enhancements and Customizations: Make It Your Own! Feeling adventurous? Beyond the basics, consider adding paint or stencils to contribute a holiday theme that reflects your style. Whether you opt for vibrant colors or a rustic finish, let your creativity shine! Incorporating greenery around the base or adding lights can give your oversized lanterns an extraordinary touch. Think about tying in other decorations from your yard or front porch for a cohesive look—like wreaths and ribbons. FAQs: Common Queries Answered Q: How do I ensure my lanterns are weather-resistant? A: Use water-resistant wood varnish to protect your lanterns from rain and snow. Consider touching them up each year to keep them looking their best. Q: Can I use real candles inside? A: It’s safer to use flameless candles to prevent fire hazards, especially if the lanterns are placed near flammable materials. Real candles could pose a risk if the wind blows or if decorations around them catch fire. Conclusion: Get Crafting! The project of building oversized wood lanterns is an excellent way to unleash your creativity while enhancing your home’s outdoor aesthetic. With just a few easy steps and simple materials, you can create these charming decorations that will impress your guests throughout the holiday season. So gather your supplies, follow this guide, and let's get crafting! Now that you're equipped with the know-how, it's time to roll up your sleeves and transform your front porch into a welcoming holiday haven. With oversized wood lanterns lighting up your space, you'll create lasting memories for your family and visitors alike. Happy crafting!

11.11.2026

Unleash Your Creativity: Build Your Own Mini Christmas Village

Update Creating Captivating Mini Christmas Villages: A Fun Holiday DIY If the holiday spirit has you inspired to get crafty, making mini Christmas villages could be the perfect project! Not only is it budget-friendly and super beginner-friendly, but it also fits into the festive holiday spirit that many homeowners appreciate. Imagine transforming your living space with whimsical decorations that embody the joy of the season, all while engaging in a delightful hands-on activity. Mini Christmas villages bring warmth and cheer to your home, serving as an excellent conversation starter during family gatherings or parties. Gathering Materials: Your Toolkit for Holiday Creativity Before you dive into constructing your village, gather your materials. You’ll need small Christmas ornament houses, a piece of 1×2 wood (measuring about 11 inches long works well), acrylic paint, a few paintbrushes, and fairy lights to add that warm, twinkling glow. Super glue will be your best friend in securing the houses in place, especially if you're planning to create intricate designs! Consider sourcing your materials from local craft stores to support local businesses or explore online options, where you might find unique items to enhance your village. A Step-by-Step Guide to Building Your Village Start with preparing your houses. If you opt for plain white ornaments, you can choose to leave them as they are for a minimalist look. For a more dynamic appearance, paint them in warm tones like golden brown, which is perfect for gingerbread house designs. Make sure to allow each coat to dry properly to ensure a neat finish. If you’re feeling especially creative, experiment with different colors or patterns; using colors that match your existing holiday decor can tie your theme together beautifully. Once your houses are ready, lay them out on your piece of wood. This is the moment to unleash your creativity! Arrange the houses in a way that varies the heights and patterns. Overlapping houses can create a playful, layered effect that transforms the piece into a three-dimensional scene. Take a moment to step back and view your layout from different angles—a small adjustment can vastly improve the aesthetic of your village. Securing Your Miniature Masterpieces After deciding on the arrangement, it’s time to secure the houses using super glue. Begin with the first layer, laying out every other house before placing the others on top. This method ensures a sturdy build while allowing you to play with the aesthetics. Don’t worry if it takes a few attempts to get the glue in the right spots—it’s all part of the crafting process! If you find some houses wobble after gluing, don’t fret. A little extra glue or finding a small weight to hold them steady while drying can do the trick. Bringing Your Village to Life with Lights No mini Christmas village is complete without the warm glow of fairy lights. Once your houses are glued in place, gently weave the lights through the village to create a magical ambiance. Consider using battery-operated lights for convenience, especially if you want to avoid messy cords. This sparkling addition not only illuminates your village but also sets the mood for cozy holiday gatherings. Dripping light softly across the houses can highlight different features, creating a charming and inviting scene that brings joy whether you're passing by or settling down for a family dinner. Tips for a Successful Craft Showdown with Family and Friends This project shines as a fantastic group activity! Invite friends for a girls’ night or engage the kids in a holiday crafting afternoon. Encourage everyone to add their unique touch to their houses—whether painting details like wreaths or embellishing with additional decorations. Not only will this create lasting memories, but it will also result in a diverse array of villages that reflect each person's style. Keep snacks and drinks on hand to make the crafting even more enjoyable, and don't forget to play some festive music in the background to keep spirits high! Future Trends in DIY Holiday Decor As we look ahead, the trend of crafting personalized holiday decorations continues to grow. Homeowners are increasingly seeking ways to infuse their unique flair into seasonal decor, moving away from mass-produced items. Embracing DIY projects not only allows for creative expression but also fosters a sense of community as family and friends come together to celebrate the festive season. More people are turning to environmentally friendly materials or recycling items they already own, which helps in reducing waste during the holidays. Preserving Your Mini Christmas Village After all your hard work, you'll want to ensure your mini Christmas village lasts for many seasons to come. Store your village carefully in a dry, cool place, ideally in a labeled box. Wrapping each house individually in soft tissue paper can avoid any possible scratches or damage. When setting it up next year, you may also consider expanding your village by adding new houses or decorations, making it a delightful ongoing project that evolves each season. If you’re excited to try this DIY project, now is the best time to gather your materials and get started! You’ll create not only an eye-catching display but also memorable experiences that will last far beyond the season. Whether you are contributing to your own holiday traditions or starting new ones with family and friends, your mini Christmas village will surely bring a smile to all who see it.

11.10.2026

Uncovering the Truth: What the Holes in Your Electrical Plugs Really Mean

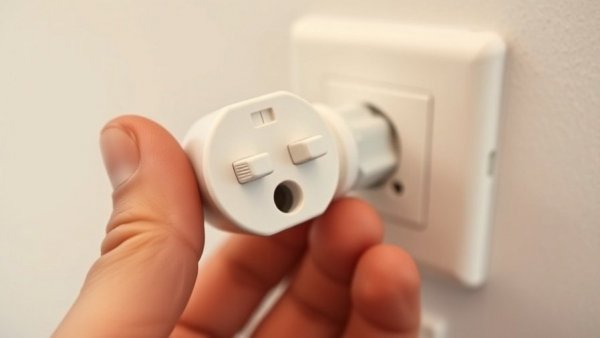
Update The Mystery of the Holes: A Historical Perspective Have you ever wondered about those small holes in the prongs of your electrical plugs? They are more than just a design quirk; they stem from a time when electrical standards were evolving. Originally, these holes were part of a mechanism to secure plugs in outlets—specifically designed to fit into bumps within the receptacles. This was a vital safety measure in the early days of electrical supply, as it reduced the risk of accidental disconnections, a problem prevalent when electricity was gaining prominence in homes. Modern Electrical Standards and Plug Safety When Underwriters Laboratories began to enforce stricter safety regulations, the design evolved. Manufacturers soon ditched the internal bumps, as they complicated the unplugging process without enhancing security. Now, plugs are designed with friction-fit prongs that grip the socket more securely, ensuring that household appliances remain powered without the need for those antiquated holes. In today's electrical landscape, if you notice a plug slipping out of the outlet, it’s likely more indicative of a faulty outlet, not a design flaw in the plug itself. Today's Uses for Those Small Holes What about the holes today? While they no longer serve their original safety purpose, manufacturers have repurposed them for practical applications. Some use these holes to hold the prongs in place during manufacturing, while others utilize them for affixing safety tags or locks to appliances during storage. However, it’s crucial not to confuse these holes with features that enhance electrical safety; they don't improve electrical conductivity or grounding. Furthermore, while these features might seem trivial, they highlight the continuous evolution of electrical engineering toward greater efficiency and safety in everyday products. Understanding Electrical Safety Features Many homeowners may also confuse the small holes with safety features like tamper-resistant receptacles. The latter contains built-in shutters to prevent children from inserting foreign objects, ensuring that electrical safety extends to younger family members. If a plug requires excessive force to insert into a tamper-resistant outlet, it could signify that there is damage to the plug, rather than a fault in the outlet. Homeowners should prioritize having such outlets installed, as they provide essential protection against electrical hazards. This is especially important if there are children or pets in the home where mishaps can easily occur. Additionally, tamper-resistant outlets are becoming more popular due to their focus on safety, and many local building codes even recommend their installation in homes. Common Misconceptions About Electrical Plugs It’s essential to debunk some myths surrounding electrical plugs and their safety features. One common misconception is that the presence of holes in prongs improves safety—this is not true. Moreover, not every household plug needs these holes; many modern plugs operate effectively without them. Home maintenance often leads to various myths about electrical safety; understanding the design and purpose of plugs and outlets is key to informed electrical use in the home. Misunderstandings regarding plugs can lead to improper usage or even create dangerous situations, so it’s important to clarify these points. Taking Action: Ensuring Your Home’s Electrical Safety As a homeowner, knowing the facts about electrical plugs can empower you to tackle your DIY projects with confidence. Regularly inspect your electrical outlets and plugs; if you experience slippage or difficulty when plugging in appliances, it may be time to consider replacing them. For those venturing into home renovations or repairs, understanding these components can aid in making informed decisions about electrical upgrades. Moreover, keeping a checklist of electrical safety procedures in mind can further enhance your home's safety. For example, always unplug devices when not in use, don’t overload outlets, and use surge protectors for sensitive electronics. Understanding the Role of Grounding It's also crucial to highlight the role of grounding in electrical safety. The presence of the round prong in three-prong plugs serves as a grounding mechanism that helps protect against electrical shocks. Grounding wires direct stray electricity safely into the ground, drastically reducing the risks associated with electrical faults. Understanding how grounding and the various prong designs aid safety is vital for homeowners, especially when dealing with older wiring systems that might not meet current safety standards. Final Thoughts on Electric Plug Design Those little holes in your plug prongs may seem insignificant, but they are a fascinating reflection of electrical safety’s evolution. As we advance in technology and safety standards, plugs will continue to adapt, serving the essential purpose of powering our daily lives securely. Next time you plug something in, take a moment to appreciate the design that keeps our homes illuminated and functional. Staying informed about the design and safety mechanisms of these everyday objects not only empowers homeowners but also creates a safer living environment for everyone.

Home Wise News

We concentrate on providing wise insights, reliable home contractor advice and hands‑on DIY know‑how for savvy homeowners. We focus on maintenance, repairs, landscaping ideas, security, smart home options, remodeling, decor and much more.

Find Us on
Social Media 

  • Google+ for PIP Consulting, LLC

847-999-4344

Please Contact Us Today!

Home Wise News
Brought to you by
PIP Consulting, LLC
3773 Howard Hughes Parkway
South Tower, Suite 500
Las Vegas, Nevada
89169

, ,

ABOUT US

We provide evidence-based insights and real-life applications of home advice and know-how practices. We stands out by featuring expert interviews and address the importance of getting practical solutions and DIY information. With the goal of helping home owners decide when they need to call on experts for the job at hand.

© 2026 Energize Your Marketing All Rights Reserved. 3773 Howard Hughes Parkway South Tower, Suite 500, Las Vegas, NV 89169 . Contact Us . Terms of Service . Privacy Policy

eyJjb21wYW55IjoiRW5lcmdpemUgWW91ciBNYXJrZXRpbmciLCJhZGRyZXNzIjoiMzc3MyBIb3dhcmQgSHVnaGVzIFBhcmt3YXkgU291dGggVG93ZXIsIFN1aXRlIDUwMCIsImNpdHkiOiJMYXMgVmVnYXMiLCJzdGF0ZSI6Ik5WIiwiemlwIjoiODkxNjkiLCJlbWFpbCI6Im1hcnNoYUBlbmVyZ2l6ZXlvdXJtYXJrZXRpbmcuY29tIiwidG9zIjoiUEhBK1BITjBjbTl1Wno0OFpXMCtWMmhsYmlCNWIzVWdjMmxuYmkxcGJpQjNhWFJvSUhWekxDQjViM1VnWVhKbElHZHBkbWx1WnladVluTndPeUI1YjNWeUlIQmxjbTFwYzNOcGIyNGdZVzVrSUdOdmJuTmxiblFnZEc4Z2MyVnVaQ0I1YjNVZ1pXMWhhV3dnWVc1a0wyOXlJRk5OVXlCMFpYaDBJRzFsYzNOaFoyVnpMaUJDZVNCamFHVmphMmx1WnlCMGFHVWdWR1Z5YlhNZ1lXNWtJRU52Ym1ScGRHbHZibk1nWW05NElHRnVaQ0JpZVNCemFXZHVhVzVuSUdsdUlIbHZkU0JoZFhSdmJXRjBhV05oYkd4NUlHTnZibVpwY20wZ2RHaGhkQ0I1YjNVZ1lXTmpaWEIwSUdGc2JDQjBaWEp0Y3lCcGJpQjBhR2x6SUdGbmNtVmxiV1Z1ZEM0OEwyVnRQand2YzNSeWIyNW5Qand2Y0Q0S0NqeHdQanhoSUdoeVpXWTlJbWgwZEhBNkx5OTNkM2N1WjI5dloyeGxMbU52YlNJK2FIUjBjRG92TDNkM2R5NW5iMjluYkdVdVkyOXRQQzloUGp3dmNENEtDanh3UGladVluTndPend2Y0Q0S0NqeHdQanh6ZEhKdmJtYytVMFZTVmtsRFJUd3ZjM1J5YjI1blBqd3ZjRDRLQ2p4d1BsZGxJSEJ5YjNacFpHVWdZU0J6WlhKMmFXTmxJSFJvWVhRZ1kzVnljbVZ1ZEd4NUlHRnNiRzkzY3lCNWIzVWdkRzhnY21WalpXbDJaU0J5WlhGMVpYTjBjeUJtYjNJZ1ptVmxaR0poWTJzc0lHTnZiWEJoYm5rZ2FXNW1iM0p0WVhScGIyNHNJSEJ5YjIxdmRHbHZibUZzSUdsdVptOXliV0YwYVc5dUxDQmpiMjF3WVc1NUlHRnNaWEowY3l3Z1kyOTFjRzl1Y3l3Z1pHbHpZMjkxYm5SeklHRnVaQ0J2ZEdobGNpQnViM1JwWm1sallYUnBiMjV6SUhSdklIbHZkWElnWlcxaGFXd2dZV1JrY21WemN5QmhibVF2YjNJZ1kyVnNiSFZzWVhJZ2NHaHZibVVnYjNJZ1pHVjJhV05sTGlCWmIzVWdkVzVrWlhKemRHRnVaQ0JoYm1RZ1lXZHlaV1VnZEdoaGRDQjBhR1VnVTJWeWRtbGpaU0JwY3lCd2NtOTJhV1JsWkNBbWNYVnZkRHRCVXkxSlV5WnhkVzkwT3lCaGJtUWdkR2hoZENCM1pTQmhjM04xYldVZ2JtOGdjbVZ6Y0c5dWMybGlhV3hwZEhrZ1ptOXlJSFJvWlNCMGFXMWxiR2x1WlhOekxDQmtaV3hsZEdsdmJpd2diV2x6TFdSbGJHbDJaWEo1SUc5eUlHWmhhV3gxY21VZ2RHOGdjM1J2Y21VZ1lXNTVJSFZ6WlhJZ1kyOXRiWFZ1YVdOaGRHbHZibk1nYjNJZ2NHVnljMjl1WVd4cGVtRjBhVzl1SUhObGRIUnBibWR6TGp3dmNENEtDanh3UGxsdmRTQmhjbVVnY21WemNHOXVjMmxpYkdVZ1ptOXlJRzlpZEdGcGJtbHVaeUJoWTJObGMzTWdkRzhnZEdobElGTmxjblpwWTJVZ1lXNWtJSFJvWVhRZ1lXTmpaWE56SUcxaGVTQnBiblp2YkhabElIUm9hWEprSUhCaGNuUjVJR1psWlhNZ0tITjFZMmdnWVhNZ1UwMVRJSFJsZUhRZ2JXVnpjMkZuWlhNc0lFbHVkR1Z5Ym1WMElITmxjblpwWTJVZ2NISnZkbWxrWlhJZ2IzSWdZMlZzYkhWc1lYSWdZV2x5ZEdsdFpTQmphR0Z5WjJWektTNGdXVzkxSUdGeVpTQnlaWE53YjI1emFXSnNaU0JtYjNJZ2RHaHZjMlVnWm1WbGN5d2dhVzVqYkhWa2FXNW5JSFJvYjNObElHWmxaWE1nWVhOemIyTnBZWFJsWkNCM2FYUm9JSFJvWlNCa2FYTndiR0Y1SUc5eUlHUmxiR2wyWlhKNUlHOW1JR1ZoWTJnZ1UwMVRJSFJsZUhRZ2JXVnpjMkZuWlNCelpXNTBJSFJ2SUhsdmRTQmllU0IxY3k0Z1NXNGdZV1JrYVhScGIyNHNJSGx2ZFNCdGRYTjBJSEJ5YjNacFpHVWdZVzVrSUdGeVpTQnlaWE53YjI1emFXSnNaU0JtYjNJZ1lXeHNJR1Z4ZFdsd2JXVnVkQ0J1WldObGMzTmhjbmtnZEc4Z1lXTmpaWE56SUhSb1pTQlRaWEoyYVdObElHRnVaQ0J5WldObGFYWmxJSFJvWlNCVFRWTWdkR1Y0ZENCdFpYTnpZV2RsY3k0Z1YyVWdaRzhnYm05MElHTm9ZWEpuWlNCaGJua2dabVZsY3lCbWIzSWdaR1ZzYVhabGNua2diMllnWlcxaGFXd2diM0lnVTAxVExpQlVhR2x6SUdseklHRWdabkpsWlNCelpYSjJhV05sSUhCeWIzWnBaR1ZrSUdKNUlIVnpMaUJJYjNkbGRtVnlMQ0J3YkdWaGMyVWdZMmhsWTJzZ2QybDBhQ0I1YjNWeUlHbHVkR1Z5Ym1WMElITmxjblpwWTJVZ2NISnZkbWxrWlhJZ1lXNWtJR05sYkd4MWJHRnlJR05oY25KcFpYSWdabTl5SUdGdWVTQmphR0Z5WjJWeklIUm9ZWFFnYldGNUlHbHVZM1Z5SUdGeklHRWdjbVZ6ZFd4MElHWnliMjBnY21WalpXbDJhVzVuSUdWdFlXbHNJR0Z1WkNCVFRWTWdkR1Y0ZENCdFpYTnpZV2RsY3lCMGFHRjBJSGRsSUdSbGJHbDJaWElnZFhCdmJpQjViM1Z5SUc5d2RDMXBiaUJoYm1RZ2NtVm5hWE4wY21GMGFXOXVJSGRwZEdnZ2IzVnlJR1Z0WVdsc0lHRnVaQ0JUVFZNZ2MyVnlkbWxqWlhNdUlGbHZkU0JqWVc0Z1kyRnVZMlZzSUdGMElHRnVlU0IwYVcxbExpQktkWE4wSUhSbGVIUWdKbkYxYjNRN1UxUlBVQ1p4ZFc5ME95QjBieUE4YUdsbmFHeHBaMmgwSUdOc1lYTnpQU0pqYjIxd1lXNTVVR2h2Ym1WVmNHUmhkR1VpUGlzeE9EUTNPVGs1TkRNME5Ed3ZhR2xuYUd4cFoyaDBQaTRnUVdaMFpYSWdlVzkxSUhObGJtUWdkR2hsSUZOTlV5QnRaWE56WVdkbElDWnhkVzkwTzFOVVQxQW1jWFZ2ZERzZ2RHOGdkWE1zSUhkbElIZHBiR3dnYzJWdVpDQjViM1VnWVc0Z1UwMVRJRzFsYzNOaFoyVWdkRzhnWTI5dVptbHliU0IwYUdGMElIbHZkU0JvWVhabElHSmxaVzRnZFc1emRXSnpZM0pwWW1Wa0xpQkJablJsY2lCMGFHbHpMQ0I1YjNVZ2QybHNiQ0J1YnlCc2IyNW5aWElnY21WalpXbDJaU0JUVFZNZ2JXVnpjMkZuWlhNZ1puSnZiU0IxY3k0OEwzQStDZ284Y0Q0OGMzUnliMjVuUGxsUFZWSWdVa1ZIU1ZOVVVrRlVTVTlPSUU5Q1RFbEhRVlJKVDA1VFBDOXpkSEp2Ym1jK1BDOXdQZ29LUEhBK1NXNGdZMjl1YzJsa1pYSmhkR2x2YmlCdlppQjViM1Z5SUhWelpTQnZaaUIwYUdVZ1UyVnlkbWxqWlN3Z2VXOTFJR0ZuY21WbElIUnZPand2Y0Q0S0NqeHZiRDRLQ1R4c2FUNXdjbTkyYVdSbElIUnlkV1VzSUdGalkzVnlZWFJsTENCamRYSnlaVzUwSUdGdVpDQmpiMjF3YkdWMFpTQnBibVp2Y20xaGRHbHZiaUJoWW05MWRDQjViM1Z5YzJWc1ppQmhjeUJ3Y205dGNIUmxaQ0JpZVNCMGFHVWdVMlZ5ZG1salpTWWpNems3Y3lCeVpXZHBjM1J5WVhScGIyNGdabTl5YlNBb2MzVmphQ0JwYm1admNtMWhkR2x2YmlCaVpXbHVaeUIwYUdVZ0puRjFiM1E3VW1WbmFYTjBjbUYwYVc5dUlFUmhkR0VtY1hWdmREc3BJR0Z1WkR3dmJHaytDZ2s4YkdrK2JXRnBiblJoYVc0Z1lXNWtJSEJ5YjIxd2RHeDVJSFZ3WkdGMFpTQjBhR1VnVW1WbmFYTjBjbUYwYVc5dUlFUmhkR0VnZEc4Z2EyVmxjQ0JwZENCMGNuVmxMQ0JoWTJOMWNtRjBaU3dnWTNWeWNtVnVkQ0JoYm1RZ1kyOXRjR3hsZEdVdUlFbG1JSGx2ZFNCd2NtOTJhV1JsSUdGdWVTQnBibVp2Y20xaGRHbHZiaUIwYUdGMElHbHpJSFZ1ZEhKMVpTd2dhVzVoWTJOMWNtRjBaU3dnYm05MElHTjFjbkpsYm5RZ2IzSWdhVzVqYjIxd2JHVjBaU3dnYjNJZ2QyVWdhR0YyWlNCeVpXRnpiMjVoWW14bElHZHliM1Z1WkhNZ2RHOGdjM1Z6Y0dWamRDQjBhR0YwSUhOMVkyZ2dhVzVtYjNKdFlYUnBiMjRnYVhNZ2RXNTBjblZsTENCcGJtRmpZM1Z5WVhSbExDQnViM1FnWTNWeWNtVnVkQ0J2Y2lCcGJtTnZiWEJzWlhSbExDQjNaU0JvWVhabElIUm9aU0J5YVdkb2RDQjBieUJ6ZFhOd1pXNWtJRzl5SUR4emRISnZibWMrUEhOd1lXNGdjM1I1YkdVOUltTnZiRzl5T2lOR1JqQXdNREE3SWo1MFpYSnRhVzVoZEdVZ2VXOTFjaUJoWTJOdmRXNTBMM0J5YjJacGJHVWdZVzVrSUhKbFpuVnpaU0JoYm5rZ1lXNWtJR0ZzYkNCamRYSnlaVzUwSUc5eUlHWjFkSFZ5WlNCMWMyVWdiMllnZEdobElGTmxjblpwWTJVZ0tHOXlJR0Z1ZVNCd2IzSjBhVzl1SUhSb1pYSmxiMllwTGp3dmMzQmhiajQ4TDNOMGNtOXVaejQ4TDJ4cFBnbzhMMjlzUGdvS1BIQStKbTVpYzNBN1BDOXdQZ284YUdsbmFHeHBaMmgwSUdOc1lYTnpQU0pqYjIxd1lXNTVUbUZ0WlZWd1pHRjBaU0krUlc1bGNtZHBlbVVnV1c5MWNpQk5ZWEpyWlhScGJtYzhMMmhwWjJoc2FXZG9kRDQ4WW5JZ0x6NEtQR2hwWjJoc2FXZG9kQ0JqYkdGemN6MGlZMjl0Y0dGdWVVRmtaSEpsYzNOVmNHUmhkR1VpUGpNM056TWdTRzkzWVhKa0lFaDFaMmhsY3lCUVlYSnJkMkY1SUZOdmRYUm9JRlJ2ZDJWeUxDQlRkV2wwWlNBMU1EQXNJRXhoY3lCV1pXZGhjeXdnVGxZZ09Ea3hOams4TDJocFoyaHNhV2RvZEQ0OFluSWdMejRLUEdocFoyaHNhV2RvZENCamJHRnpjejBpWTI5dGNHRnVlVkJvYjI1bFZYQmtZWFJsSWo0ck1UZzBOeTA1T1RrdE5ETTBORHd2YUdsbmFHeHBaMmgwUGp4aWNpQXZQZ284YUdsbmFHeHBaMmgwSUdOc1lYTnpQU0pqYjIxd1lXNTVSVzFoYVd4VmNHUmhkR1VpUG0xaGNuTm9ZVUJsYm1WeVoybDZaWGx2ZFhKdFlYSnJaWFJwYm1jdVkyOXRQQzlvYVdkb2JHbG5hSFErIiwicHJpdmFjeSI6IlBIQStQSE4wY205dVp6NVFVa2xXUVVOWlBDOXpkSEp2Ym1jK1BDOXdQZ29LUEhBK1BITjBjbTl1Wno1VWFHVWdhVzVtYjNKdFlYUnBiMjRnY0hKdmRtbGtaV1FnWkhWeWFXNW5JSFJvYVhNZ2NtVm5hWE4wY21GMGFXOXVJR2x6SUd0bGNIUWdjSEpwZG1GMFpTQmhibVFnWTI5dVptbGtaVzUwYVdGc0xDQmhibVFnZDJsc2JDQnVaWFpsY2lCaVpTQmthWE4wY21saWRYUmxaQ3dnWTI5d2FXVmtMQ0J6YjJ4a0xDQjBjbUZrWldRZ2IzSWdjRzl6ZEdWa0lHbHVJR0Z1ZVNCM1lYa3NJSE5vWVhCbElHOXlJR1p2Y20wdUlGUm9hWE1nYVhNZ2IzVnlJR2QxWVhKaGJuUmxaUzQ4TDNOMGNtOXVaejQ4TDNBK0NnbzhjRDQ4YzNSeWIyNW5Qa2xPUkVWTlRrbFVXVHd2YzNSeWIyNW5Qand2Y0Q0S0NqeHdQanhsYlQ1WmIzVWdZV2R5WldVZ2RHOGdhVzVrWlcxdWFXWjVJR0Z1WkNCb2IyeGtJSFZ6TEM0Z1lXNWtJR2wwY3lCemRXSnphV1JwWVhKcFpYTXNJR0ZtWm1sc2FXRjBaWE1zSUc5bVptbGpaWEp6TENCaFoyVnVkSE1zSUdOdkxXSnlZVzVrWlhKeklHOXlJRzkwYUdWeUlIQmhjblJ1WlhKekxDQmhibVFnWlcxd2JHOTVaV1Z6TENCb1lYSnRiR1Z6Y3lCbWNtOXRJR0Z1ZVNCamJHRnBiU0J2Y2lCa1pXMWhibVFzSUdsdVkyeDFaR2x1WnlCeVpXRnpiMjVoWW14bElHRjBkRzl5Ym1WNWN5WWpNems3SUdabFpYTXNJRzFoWkdVZ1lua2dZVzU1SUhSb2FYSmtJSEJoY25SNUlHUjFaU0IwYnlCdmNpQmhjbWx6YVc1bklHOTFkQ0J2WmlCRGIyNTBaVzUwSUhsdmRTQnlaV05sYVhabExDQnpkV0p0YVhRc0lISmxjR3g1TENCd2IzTjBMQ0IwY21GdWMyMXBkQ0J2Y2lCdFlXdGxJR0YyWVdsc1lXSnNaU0IwYUhKdmRXZG9JSFJvWlNCVFpYSjJhV05sTENCNWIzVnlJSFZ6WlNCdlppQjBhR1VnVTJWeWRtbGpaU3dnZVc5MWNpQmpiMjV1WldOMGFXOXVJSFJ2SUhSb1pTQlRaWEoyYVdObExDQjViM1Z5SUhacGIyeGhkR2x2YmlCdlppQjBhR1VnVkU5VExDQnZjaUI1YjNWeUlIWnBiMnhoZEdsdmJpQnZaaUJoYm5rZ2NtbG5hSFJ6SUc5bUlHRnViM1JvWlhJdVBDOWxiVDQ4TDNBK0NnbzhjRDQ4YzNSeWIyNW5Qa1JKVTBOTVFVbE5SVklnVDBZZ1YwRlNVa0ZPVkVsRlV6d3ZjM1J5YjI1blBqd3ZjRDRLQ2p4d1BqeHpkSEp2Ym1jK1dVOVZJRVZZVUZKRlUxTk1XU0JWVGtSRlVsTlVRVTVFSUVGT1JDQkJSMUpGUlNCVVNFRlVPand2YzNSeWIyNW5Qand2Y0Q0S0NqeHZiRDRLQ1R4c2FUNVpUMVZTSUZWVFJTQlBSaUJVU0VVZ1UwVlNWa2xEUlNCSlV5QkJWQ0JaVDFWU0lGTlBURVVnVWtsVFN5NGdWRWhGSUZORlVsWkpRMFVnU1ZNZ1VGSlBWa2xFUlVRZ1QwNGdRVTRnSm5GMWIzUTdRVk1nU1ZNbWNYVnZkRHNnUVU1RUlDWnhkVzkwTzBGVElFRldRVWxNUVVKTVJTWnhkVzkwT3lCQ1FWTkpVeTRnTEM0Z1FVNUVJRlZUTENCSlZDWWpNems3VXlCRFZWTlVUMDFGVWxNc0lFVllVRkpGVTFOTVdTQkVTVk5EVEVGSlRWTWdRVXhNSUZkQlVsSkJUbFJKUlZNZ1QwWWdRVTVaSUV0SlRrUXNJRmRJUlZSSVJWSWdSVmhRVWtWVFV5QlBVaUJKVFZCTVNVVkVMQ0JKVGtOTVZVUkpUa2NzSUVKVlZDQk9UMVFnVEVsTlNWUkZSQ0JVVHlCVVNFVWdTVTFRVEVsRlJDQlhRVkpTUVU1VVNVVlRJRTlHSUUxRlVrTklRVTVVUVVKSlRFbFVXU3dnUmtsVVRrVlRVeUJHVDFJZ1FTQlFRVkpVU1VOVlRFRlNJRkJWVWxCUFUwVWdRVTVFSUU1UFRpMUpUa1pTU1U1SFJVMUZUbFF1UEM5c2FUNEtDVHhzYVQ1TlFVdEZVeUJPVHlCWFFWSlNRVTVVV1NCVVNFRlVJQ2hwS1NCVVNFVWdVMFZTVmtsRFJTQlhTVXhNSUUxRlJWUWdXVTlWVWlCU1JWRlZTVkpGVFVWT1ZGTXNJQ2hwYVNrZ1ZFaEZJRk5GVWxaSlEwVWdWMGxNVENCQ1JTQlZUa2xPVkVWU1VsVlFWRVZFTENCVVNVMUZURmtzSUZORlExVlNSU3dnVDFJZ1JWSlNUMUl0UmxKRlJTd2dLR2xwYVNrZ1ZFaEZJRkpGVTFWTVZGTWdWRWhCVkNCTlFWa2dRa1VnVDBKVVFVbE9SVVFnUmxKUFRTQlVTRVVnVlZORklFOUdJRlJJUlNCVFJWSldTVU5GSUZkSlRFd2dRa1VnUVVORFZWSkJWRVVnVDFJZ1VrVk1TVUZDVEVVc0lFRk9SQ0FvYVhZcElFRk9XU0JGVWxKUFVsTWdTVTRnVkVoRklGTlBSbFJYUVZKRklGZEpURXdnUWtVZ1EwOVNVa1ZEVkVWRUxqd3ZiR2srQ2drOGJHaytRVTVaSUUxQlZFVlNTVUZNSUVSUFYwNU1UMEZFUlVRZ1QxSWdUMVJJUlZKWFNWTkZJRTlDVkVGSlRrVkVJRlJJVWs5VlIwZ2dWRWhGSUZWVFJTQlBSaUJVU0VVZ1UwVlNWa2xEUlNCSlV5QkVUMDVGSUVGVUlGbFBWVklnVDFkT0lFUkpVME5TUlZSSlQwNGdRVTVFSUZKSlUwc2dRVTVFSUZSSVFWUWdXVTlWSUZkSlRFd2dRa1VnVTA5TVJVeFpJRkpGVTFCUFRsTkpRa3hGSUVaUFVpQkJUbGtnUkVGTlFVZEZJRlJQSUZsUFZWSWdRMDlOVUZWVVJWSWdVMWxUVkVWTklFOVNJRXhQVTFNZ1QwWWdSRUZVUVNCVVNFRlVJRkpGVTFWTVZGTWdSbEpQVFNCVVNFVWdSRTlYVGt4UFFVUWdUMFlnUVU1WklGTlZRMGdnVFVGVVJWSkpRVXd1UEM5c2FUNEtDVHhzYVQ1T1R5QkJSRlpKUTBVZ1QxSWdTVTVHVDFKTlFWUkpUMDRzSUZkSVJWUklSVklnVDFKQlRDQlBVaUJYVWtsVVZFVk9MQ0JQUWxSQlNVNUZSQ0JDV1NCWlQxVWdSbEpQVFNCUFVpQlVTRkpQVlVkSUlFOVNJRVpTVDAwZ1ZFaEZJRk5GVWxaSlEwVWdVMGhCVEV3Z1ExSkZRVlJGSUVGT1dTQlhRVkpTUVU1VVdTQk9UMVFnUlZoUVVrVlRVMHhaSUZOVVFWUkZSQ0JKVGlCVVNFVWdWRTlUTGp3dmJHaytDand2YjJ3K0NnbzhjRDQ4YzNSeWIyNW5Qa3hKVFVsVVFWUkpUMDRnVDBZZ1RFbEJRa2xNU1ZSWlBDOXpkSEp2Ym1jK1BDOXdQZ29LUEhBK1dVOVZJRVZZVUZKRlUxTk1XU0JWVGtSRlVsTlVRVTVFSUVGT1JDQkJSMUpGUlNCVVNFRlVJRUZPUkNCVFNFRk1UQ0JPVDFRZ1FrVWdURWxCUWt4RklFWlBVaUJCVGxrZ1JFbFNSVU5VTENCSlRrUkpVa1ZEVkN3Z1NVNURTVVJGVGxSQlRDd2dVMUJGUTBsQlRDd2dRMDlPVTBWUlZVVk9WRWxCVENCUFVpQkZXRVZOVUV4QlVsa2dSRUZOUVVkRlV5d2dTVTVEVEZWRVNVNUhJRUpWVkNCT1QxUWdURWxOU1ZSRlJDQlVUeXdnUkVGTlFVZEZVeUJHVDFJZ1RFOVRVeUJQUmlCUVVrOUdTVlJUTENCSFQwOUVWMGxNVEN3Z1ZWTkZMQ0JFUVZSQklFOVNJRTlVU0VWU0lFbE9WRUZPUjBsQ1RFVWdURTlUVTBWVElDaEZWa1ZPSUVsR0lFaEJVeUJDUlVWT0lFRkVWa2xUUlVRZ1QwWWdWRWhGSUZCUFUxTkpRa2xNU1ZSWklFOUdJRk5WUTBnZ1JFRk5RVWRGVXlrc0lGSkZVMVZNVkVsT1J5QkdVazlOT2p3dmNENEtDanh2YkQ0S0NUeHNhVDVVU0VVZ1ZWTkZJRTlTSUZSSVJTQkpUa0ZDU1V4SlZGa2dWRThnVlZORklGUklSU0JUUlZKV1NVTkZPend2YkdrK0NnazhiR2srVkVoRklFTlBVMVFnVDBZZ1VGSlBRMVZTUlUxRlRsUWdUMFlnVTFWQ1UxUkpWRlZVUlNCSFQwOUVVeUJCVGtRZ1UwVlNWa2xEUlZNZ1VrVlRWVXhVU1U1SElFWlNUMDBnUVU1WklFZFBUMFJUTENCRVFWUkJMQ0JKVGtaUFVrMUJWRWxQVGlCUFVpQlRSVkpXU1VORlV5QlFWVkpEU0VGVFJVUWdUMUlnVDBKVVFVbE9SVVFnVDFJZ1RVVlRVMEZIUlZNZ1VrVkRSVWxXUlVRZ1QxSWdWRkpCVGxOQlExUkpUMDVUSUVWT1ZFVlNSVVFnU1U1VVR5QlVTRkpQVlVkSUlFOVNJRVpTVDAwZ1ZFaEZJRk5GVWxaSlEwVTdQQzlzYVQ0S0NUeHNhVDVWVGtGVlZFaFBVa2xhUlVRZ1FVTkRSVk5USUZSUElFOVNJRUZNVkVWU1FWUkpUMDRnVDBZZ1dVOVZVaUJVVWtGT1UwMUpVMU5KVDA1VElFOVNJRVJCVkVFN1BDOXNhVDRLQ1R4c2FUNVRWRUZVUlUxRlRsUlRJRTlTSUVOUFRrUlZRMVFnVDBZZ1FVNVpJRlJJU1ZKRUlGQkJVbFJaSUU5T0lGUklSU0JUUlZKV1NVTkZPeUJQVWp3dmJHaytDZ2s4YkdrK1FVNVpJRTlVU0VWU0lFMUJWRlJGVWlCU1JVeEJWRWxPUnlCVVR5QlVTRVVnVTBWU1ZrbERSUzQ4TDJ4cFBnbzhMMjlzUGdvS1BIQStQSFUrUW5rZ2NtVm5hWE4wWlhKcGJtY2dZVzVrSUhOMVluTmpjbWxpYVc1bklIUnZJRzkxY2lCbGJXRnBiQ0JoYm1RZ1UwMVRJSE5sY25acFkyVXNJR0o1SUc5d2RDMXBiaXdnYjI1c2FXNWxJSEpsWjJsemRISmhkR2x2YmlCdmNpQmllU0JtYVd4c2FXNW5JRzkxZENCaElHTmhjbVFzSUNaeGRXOTBPM2x2ZFNCaFozSmxaU0IwYnlCMGFHVnpaU0JVUlZKTlV5QlBSaUJUUlZKV1NVTkZKbkYxYjNRN0lHRnVaQ0I1YjNVZ1lXTnJibTkzYkdWa1oyVWdZVzVrSUhWdVpHVnljM1JoYm1RZ2RHaGxJR0ZpYjNabElIUmxjbTF6SUc5bUlITmxjblpwWTJVZ2IzVjBiR2x1WldRZ1lXNWtJR1JsZEdGcGJHVmtJR1p2Y2lCNWIzVWdkRzlrWVhrdVBDOTFQand2Y0Q0S0NqeHdQaVp1WW5Od096d3ZjRDRLUEdocFoyaHNhV2RvZENCamJHRnpjejBpWTI5dGNHRnVlVTVoYldWVmNHUmhkR1VpUGtWdVpYSm5hWHBsSUZsdmRYSWdUV0Z5YTJWMGFXNW5QQzlvYVdkb2JHbG5hSFErUEdKeUlDOCtDanhvYVdkb2JHbG5hSFFnWTJ4aGMzTTlJbU52YlhCaGJubEJaR1J5WlhOelZYQmtZWFJsSWo0ek56Y3pJRWh2ZDJGeVpDQklkV2RvWlhNZ1VHRnlhM2RoZVNCVGIzVjBhQ0JVYjNkbGNpd2dVM1ZwZEdVZ05UQXdMQ0JNWVhNZ1ZtVm5ZWE1zSUU1V0lEZzVNVFk1UEM5b2FXZG9iR2xuYUhRK1BHSnlJQzgrQ2p4b2FXZG9iR2xuYUhRZ1kyeGhjM005SW1OdmJYQmhibmxRYUc5dVpWVndaR0YwWlNJK0t6RTRORGN0T1RrNUxUUXpORFE4TDJocFoyaHNhV2RvZEQ0OFluSWdMejRLUEdocFoyaHNhV2RvZENCamJHRnpjejBpWTI5dGNHRnVlVVZ0WVdsc1ZYQmtZWFJsSWo1dFlYSnphR0ZBWlc1bGNtZHBlbVY1YjNWeWJXRnlhMlYwYVc1bkxtTnZiVHd2YUdsbmFHeHBaMmgwUGc9PSJ9

Terms of Service

Privacy Policy

Core Modal Title

Sorry, no results found

You Might Find These Articles Interesting

T
Please Check Your Email
We Will Be Following Up Shortly
*
*
*