UPDATE
  • Home
  • Categories
    • Cleaning & Moving
    • Maintenance / Repairs
    • Remodeling & Construction
    • Landscaping / Outdoor
    • Security & Technology
    • Sustainability, Health & Safety
    • Interiors / Décor
    • Expert Interviews
    • DIY Home Projects
Home Wise News!
Wise Insights, Reliable Contractor Advice & Hands on DIY Know How for Savvy Homeowners
July 22.2025
3 Minutes Read

How to Clean Your Garbage Disposal the Right Way: Say Goodbye to Odors

Clean stainless steel sink with garbage disposal.

Keeping Your Garbage Disposal Fresh: The Essentials

Ah, the humble garbage disposal—a household hero that quietly works behind the scenes to whisk away food scraps. But like any hero, it needs a little TLC to maintain its powers. Without regular care, this kitchen ally can start to smell offensive, turning your culinary haven into an olfactory nightmare. Learn how to clean your garbage disposal effectively, ensuring it remains in peak condition while keeping those pesky odors at bay.

Understanding the Stinky Science Behind Garbage Disposals

Imagine tossing vegetable peels and uneaten leftovers into a whirlpool of blades. While a garbage disposal is a great convenience, it can also be a breeding ground for bacteria when not cleaned properly. Food particles can get stuck in the crevices of the appliance, leading not only to unpleasant smells but also potential clogs. This is why understanding its inner workings can help you treat your disposal right.

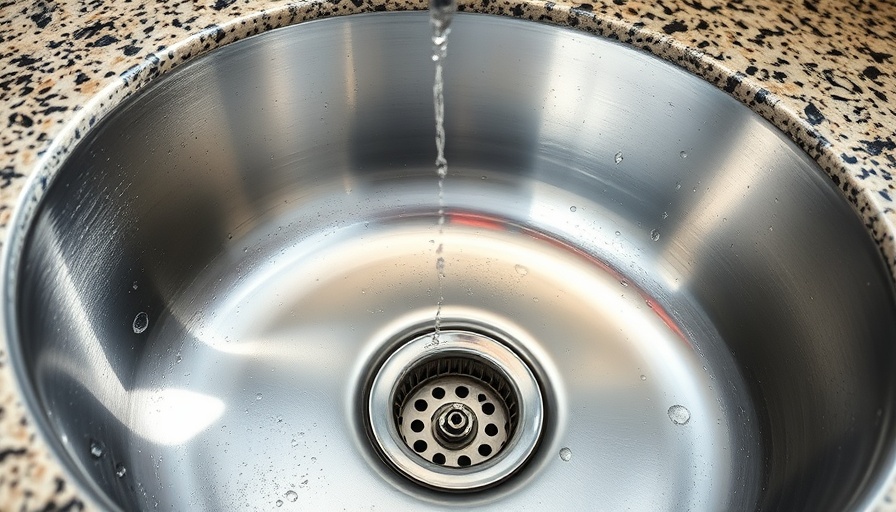
Tools You Need: A Cleaning Arsenal for Your Disposal

Before diving into the scrubbing, gather your cleaning tools. Start with:

  • Hot Water: Essential for breaking down grease and grime.
  • Baking Soda: A natural odor absorber that can combat foul smells.
  • White Vinegar: This acidic wonder not only deodorizes but also helps dislodge food particles.
  • Ice Cubes and Salt: Great for sharpening the blades and cleaning away debris.
With these items on hand, you’re ready to take on the challenge!

The Cleaning Process: Step-by-Step

Here’s how to banish odors and keep your garbage disposal in great shape:

  1. Run Cold Water: Before cleaning, let cold water flow through the disposal for a minute to rinse away any loose debris.
  2. Add Ice and Salt: Toss a handful of ice cubes and a cup of coarse salt into the disposal. The combination not only cleans the blades but also sharpens them. Run the disposal for about 30 seconds.
  3. Baking Soda and Vinegar Duo: Pour half a cup of baking soda followed by one cup of vinegar down the disposal. It’ll fizz and bubble, working deep into those stubborn smells. Wait 10-15 minutes, then rinse thoroughly with hot water.
  4. Final Touch with Citrus: For that fresh fragrance, toss in a few citrus peels—lemons or limes work wonderfully. Run the disposal again to keep odors in check.

Repeat this cleaning process monthly to ward off any lingering smells.

Pro Tips to Sustain Your Garbage Disposal’s Cleanliness

Maintenance doesn’t end with cleaning! Here are a few tips to ensure your garbage disposal remains fresh:

  • Be Mindful of What You Dispose: Avoid putting fibrous vegetables, bones, or any non-food items into the disposal.
  • Grease Alert: Never pour grease down the disposal; it can harden and cause clogs. Dispose of grease in a sealed container.
  • Frequent Flushing: Regularly running warm water down the disposal with a bit of soap can help maintain its hygiene.
With these simple practices, your disposal will not only function like a champ but also smell like one!

Investing in Smart Solutions for Your Disposal

With the rise of smart home technology, some new disposals come equipped with features that simplify maintenance. Sensors can detect clogs, and smart technology may provide alerts directly to your phone if something is amiss. Considering such an investment might save you headaches in the long run, keep food waste at bay, and maintain an eco-friendly kitchen.

Conclusion: Keep It Fresh, Keep It Fun!

Maintaining your garbage disposal doesn’t have to feel like a chore. With a bit of knowledge, the right tools, and the occasional zing of citrus, you can keep your kitchen appliance clean and smelling great. Make this cleaning routine a part of your monthly household chores and trust us, your future self will thank you!

Cleaning & Moving

0 Comments

Write A Comment

*
*
Please complete the captcha to submit your comment.
Related Posts All Posts
06.10.2026

Transform Your Cooking with Our Expert Tips for Cleaning Your Barbecue

Update Essential Tips for a Sparkling Clean Barbecue As the aroma of grilled steaks and burgers fills the air, there's one task that all barbecue enthusiasts must face—the daunting yet crucial task of cleaning the grill. Keeping your barbecue clean not only enhances its longevity but also elevates the flavors of your grilled masterpieces. Let's dive into practical tips that will transform your post-cookout cleanup routine into a breeze. Why Clean Your Grill? Cleaning your grill might seem tedious, but it's crucial for several reasons. Not only does it ensure a better cooking experience, but a clean grill can also prevent flare-ups that may occur due to grease buildup. Grease traps and burnt remnants can interfere with the smoke and flavors you are trying to achieve. Additionally, neglecting grill maintenance can lead to part failures over time, making your investment less reliable. Regular cleaning keeps your barbecue operational for years, so consider it an essential aspect of ownership. What You’ll Need for the Job Before launching into your cleaning odyssey, gather the necessary supplies. You'll need: Grill brush: A wire brush, or a DIY alternative made from aluminum foil, is perfect for scraping grates. Scouring sponge: Ideal for tough residues without scratching the grill surface. Dish soap or a mild degreaser: Products like Simple Green are effective and food-safe. Vegetable oil: To coat your grates after cleaning, ensuring non-stick properties. Paper towels and tongs: For wiping down and cleaning the grates. These supplies will set the stage for a spotless grilling experience. Routine Cleaning: The Five-Minute Approach To keep your grill in top shape, incorporate a quick cleaning ritual each time you use it. After grilling, while the grates are still warm (but not scorching), take the following steps: Scrape the Grates: Use your grill brush to dislodge food particles. This process not only clears the debris but also prevents carbon buildup. Wipe Down: Use a wet rag or paper towel with tongs to clean any remaining soot. Oil the Grates: Lightly coat using vegetable oil to keep food from sticking during your next grilling adventure. This quick routine can take about 5-10 minutes and is essential for maintaining your grill’s performance. Deep Cleanse: A Seasonal Scrub At least once a season, or after heavy grilling periods, conduct a thorough clean. For gas grills, disassemble the grates and burner hoods. Aim for the grease trap’s lower section, which often accumulates residue. Use hot, soapy water or a food-safe cleaner, scrubbing meticulously to break down stubborn grime. Inside the firebox, use a scraper or paint tool for stuck debris, and be sure everything is rinsed and allowed to dry before reassembling. Unique Cleaning Methods: Harnessing Baking Soda For those seeking natural cleaning methods, baking soda serves as a powerful and safe alternative. Here's how: Paste Application: Combine baking soda with water to create a thick paste, apply it to the grates, and allow it to sit briefly before scrubbing. Foil Scrub: Use a wadded ball of aluminum foil with your paste for enhanced abrasion against stubborn residues. This natural approach minimizes chemical exposure while effectively loosening grime, making your cleaning task that much simpler! Storage Tips: Protecting Your Investment Proper storage can prolong your grill's lifespan. If possible, store your grill in a garage or equipped shed. If that’s not an option, investing in a quality grill cover is a must. It shields your grill from the elements, preventing rust and deterioration, allowing you to uncover and start grilling at a moment's notice! Conclusion: Taking Action for a Better Grill Experience We know that a clean grill makes for a better barbecue experience, allowing you to concentrate on what truly matters—conjuring delightful memories over sizzling steaks and buttery corn on the cob! Equip yourself with these handy tips, incorporate them into your routine, and enjoy grilling in style. Remember, the secret to fantastic barbecue starts with a clean grill, enticing your guests with the mouthwatering aroma and taste everyone loves.

06.10.2026

Unlock the Secrets to Effortless Cleaning: Discover Professional Tips!

Update Cleaning Simplified: Master Your Home with Expert Tips! Cleaning often feels like an uphill battle, but with the right strategies, you can conquer clutter and build a healthy living environment. Ever wondered how to tackle dust bunnies under your bed or the stubborn pet hair on your sofa? Join me as we navigate the best cleaning tips, all drawn from insights of experts and practical experience. Declutter for a Fresh Start! Before diving into the nitty-gritty of cleaning, it’s essential to declutter your space. As highlighted in a recent survey, 80% of Americans engage in spring cleaning motivated by a desire to refresh their environment. However, the clutter makes cleaning daunting! Start with one room at a time, or even one corner. A focused approach promotes sustainability in your cleaning habits without overwhelming you. Enlist Help: It’s a Family Affair! To instill good organizational habits, involve your children in the cleaning process! As experts suggest, make tidying fun. Create a reward system where each family member earns points for putting away their things. This not only lightens your cleaning load but also teaches responsibility. The Power of a Cleaning Kit Don’t underestimate the importance of a well-stocked cleaning kit. Equip yourself with essentials like rubber gloves, microfiber cloths, and eco-friendly cleaning sprays. Having all your supplies in one portable basket simplifies tasks and saves time. Plus, it instills a sense of readiness when a mess strikes. Top-Down Clean: A Better Method Cleaning rooms using the top-down, left-to-right technique ensures no area is missed and allows fallen dust to be vacuumed up in the process. This method, endorsed by cleaning professionals, saves time and effort while yielding better results! Allergens Be Gone: Enhance Your Air Quality! Spring cleaning isn’t just about appearance. It serves as an opportunity to address indoor air quality, crucial for allergy sufferers. An air purifier with a HEPA filter can significantly reduce dust mites and pet dander in your home, as advocated by health specialists. Pet Owners Unite: Tackle Pet Hair Like a Pro! For pet owners, tackling the inevitable pet hair situation is a major concern. While vacuuming is effective, there are more ingenious methods! Try using a slightly damp rubber glove to effortlessly collect hair from your furniture. Not only is it cheaper than specialized tools, but it’s also effective! Make it a Habit: Maintenance Overhaul One-off cleanings can be exhausting; instead, aim for a regular schedule. Set aside just ten minutes daily for basic cleaning tasks. Thrown in daily habits like making the bed or decluttering your surfaces to maintain that clean ambiance throughout the season. Cleaning Trends: Tech That Simplifies Your Life This year, consider investing in cleaning technology like robotic vacuums that autonomously maintain your floors. They keep dirt at bay while you go about your day-to-day activities, ultimately reducing the need for frequent, exhausting cleaning sessions. Wrap Up and Involve Yourself With these tips in your arsenal, cleaning becomes less of a chore and more of a manageable task that even your family can be a part of. Clean wisely, maintain consistency, and enjoy a sparkling clean home! Remember, a tidy environment fosters a positive mindset!

06.06.2026

Why Your Home Feels Messy: 7 Surprising Reasons After Decluttering

Update Why Your Home Might Still Feel Messy Post-Decluttering Have you ever spent hours tossing out possessions, only to realize your home feels just as cluttered as before? Even the most passionate declutterers can find themselves stuck in an organizational rut, wondering why their hard work has not paid off. The truth is, decluttering isn't always enough to create a harmonious living space. Here’s a dive into some unexpected reasons your home still feels chaotic—and how you can tackle those underlying issues. Beyond Visible Clutter: Understanding Attachment As we dig into individual items, emotional attachments can cloud our judgment. Many struggle with letting go of items, believing they hold memories or may be useful ‘one day.’ This emotional baggage adds unnecessary weight to our spaces. To combat this, embrace a mindset shift; remember that memories are created in your heart, not just through physical items. Start by asking if each item genuinely contributes to your daily life or happiness. The Decluttering Strategy: Assess and Adapt Effective decluttering strategies are crucial. Simply clearing drawers or closets without a plan can lead to reoccurring chaos. As identified in Southern Living, creating a proactive plan can help maintain order. The first step includes evaluating which items you truly need after decluttering. Are the items you're putting back actually necessary? Perhaps it's time to reassess their roles in your household, and say goodbye to what doesn’t serve you anymore. Space: The Final Frontier Another reason for persistent messiness could be insufficient space. Post-decluttering, you may find that there's still not enough room to house essentials properly. To avoid overcrowding, strategically allocate spaces for each item: kitchen items stored in the kitchen—imagine that! This simple yet profound step helps maintain organization and practicality in your home. You might consider utilizing vertical spaces, such as shelves, or incorporating hooks and bins for items that currently find themselves in limbo. Beyond Clutter – The Role of Habit It's not merely about making space; establishing and maintaining habits is vital too. Once you've removed clutter, teach yourself (and your family) to put items back in their designated spots. This is where habit formation comes into play. Setting visual reminders—like sticky notes on the fridge—can help reinforce these habits. As mentioned in Driven by Decor, creating a place for everything ensures that when you take something out, you also have a straightforward way to return it. Unseen Clutter: Digital and Paper Piles Clutter isn't just physical. The digital realm can be a breeding ground for mess, too. Digital paper piles can take the form of unopened emails or cluttered downloads. Adopt a strategy for digital decluttering akin to physical decluttering: categorize and prioritize. For instance, if you're managing responsibilities across various devices, consider a universal organizational app where you can consolidate tasks and reminders. Additionally, transition towards paperless solutions for bills and subscriptions. This reduces physical clutter and makes it easier to find what you need. The Emotional Impact of a Chaotic Space It’s essential to recognize that a messy home can lead to stress and anxiety. On the other hand, a refreshing, organized space fosters productivity and well-being. Remind yourself of how great it feels to maintain a tidy home. Start by creating spaces that enhance your lifestyle instead of hindering it. Final Thoughts: Embrace the Journey Towards Organization Remember, organization is an ongoing journey, not a destination. It's okay to tweak systems that aren’t working and explore new ways to keep your home in order. Each small step toward decluttering is a stride toward finding balance in your living space. Are you ready to take back control over your home's organization?

Terms of Service

Privacy Policy

Core Modal Title

Sorry, no results found

You Might Find These Articles Interesting

T
Please Check Your Email
We Will Be Following Up Shortly
*
*
*