Add Row
Add Element
Add Element
  • Home
  • Categories
    • Cleaning & Moving
    • Maintenance / Repairs
    • Remodeling & Construction
    • Landscaping / Outdoor
    • Security & Technology
    • Sustainability, Health & Safety
    • Interiors / Décor
    • Expert Interviews
    • DIY Home Projects
  • Search
Home Wise News!
Wise Insights, Reliable Contractor Advice & Hands‑on DIY Know‑how for Savvy Homeowners
June 12.2025
3 Minutes Read

Save Energy and Money: How Often to Clean Your Refrigerator Coils

Dusty refrigerator coils needing cleaning, macro shot.

Why You Should Clean Your Refrigerator Coils Regularly

Your refrigerator is like a dedicated friend that keeps your food fresh and your drinks cold. But like any relationship, it requires a little maintenance to keep it running smoothly. That’s where cleaning your refrigerator coils comes in! Dust and debris can accumulate on these coils, causing your fridge to work overtime, which not only drains energy but also your wallet. Cleaning them is a simple yet effective step to ensure your appliance runs efficiently.

How Often Should You Clean Your Fridge Coils?

The frequency of cleaning your refrigerator coils can depend on a few factors. According to appliance experts, it’s generally recommended to give these coils a good clean every six months. However, if you have pets that shed or live in a dusty area, you might want to consider doing this every three months. Just think of it as a little spring cleaning for your fridge!

Tools You Need for the Job

Ready to get started? You won’t need much to tackle this task. Here’s what you should have on hand:

  • Vacuum Cleaner: With a brush attachment, this can make your life much easier.
  • Soft Brush: A small, soft-bristled brush will do wonders in reaching those tight spots.
  • Cloth or Rag: To wipe away any dust or spills.

With these tools, you’re just a few steps away from a cleaner, more efficient refrigerator.

Steps for a Successful Clean

Now let’s break it down step by step:

  1. Unplug Your Refrigerator: Safety first!
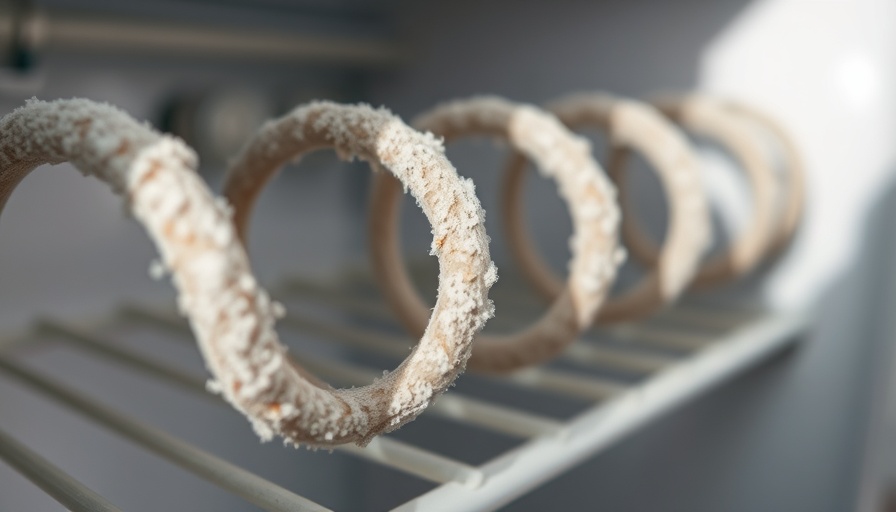
  2. Locate the Coils: Typically found at the back or underneath the appliance.
  3. Brush Away the Dust: Use your soft brush to clear out dust bunnies, then vacuum up any remaining debris.
  4. Wipe Down Surfaces: Use a damp cloth to clean any spills or stains that may have accumulated.
  5. Plug It Back In: Once everything is clean and dry, plug your fridge back in and enjoy peace of mind!

Why This Matters: The Environmental Factor

Regularly cleaning your refrigerator coils not only saves you money on energy bills but also contributes to sustainability efforts. Energy-efficient appliances consume less energy, which means a smaller carbon footprint. So, as you keep your fridge healthy, you’re also doing your part for the planet. It’s a win-win!

Common Misconceptions About Fridge Maintenance

Some individuals tend to believe that as long as the fridge is functioning fine, there’s no need for maintenance. But that's a myth! Regular upkeep, like cleaning the coils, helps prevent long-term issues and ultimately keeps your appliance longevity intact. Ignoring this simple task can lead to bigger, costlier repairs down the line.

Unique Benefits of Cleaning Your Refrigerator Coils

Knowing when and how to maintain your refrigerator can yield several surprising benefits. Not only does it enhance energy efficiency, but it also prolongs the life of your appliance and cuts back on the frequency of breakdowns. Beyond the technicalities, consider it an act of self-care for your home.

Final Thoughts: A Sparkling Clean Fridge Awaits

Incorporating regular cleaning schedules into your home maintenance routine will pave the way for smarter living. From saving energy to extending the life of your fridge, it's a simple yet impactful task. So grab that vacuum and get to work!

Maintenance / Repairs

Write A Comment

*
*
Related Posts All Posts
07.19.2025

Discover How Ceiling Fans Should Turn in Summer for Maximum Comfort

Update Are You Spinning in Circles? The Right Direction of Your Ceiling Fan With summer heat raising temperatures, the question on everyone's minds is how to stay cool without cranking up the AC bills. Most homeowners may not realize that the direction of your ceiling fan can significantly influence your comfort. So, which way should a ceiling fan turn in the summer? The simple answer—clockwise is for winter warmth, and counter-clockwise is your best friend in the sizzling summer months. Why Direction Matters for Comfort and Energy Efficiency As the temperatures start to rise, fans should be set to rotate counterclockwise, prompting the fan blades to push cool air downwards creating a wind-chill effect. This effect allows you to feel several degrees cooler than your actual room temperature—meaning you might not need to rely on air conditioning as much. In fact, adjusting a ceiling fan's rotation can lower your energy bills by about 20%! Understanding the Science Behind Ceiling Fan Mechanics The mechanics of ceiling fans are more than just aesthetics; they are designed with efficiency in mind. In cooling mode, the blades create a downdraft, sending cool air cascading towards the floor. However, most fans have a small switch on the motor housing that allows you to reverse the direction of the fan blades, thereby changing its airflow. During winter, a clockwise rotation helps circulate warm air that rises to the room's ceiling back down towards the living area. Energy-Saving Strategies That Go Beyond Fan Direction Beyond just fan direction, there are additional strategies homeowners can implement: - Keep windows drawn during the hottest part of the day to prevent heat from entering. - Consider using ceiling fans in tandem with other cooling systems to maximize efficiency. - Upgrade to smart ceiling fans, which can be programmed to change direction according to the seasons, further optimizing energy use. Counterarguments: Are Ceiling Fans Always the Best Solution? While ceiling fans offer an enjoyable breeze and energy savings, they are not the only option. Some may argue that in extremely humid climates, relying solely on a ceiling fan may not provide sufficient cooling, necessitating air conditioning. However, the combination of both can significantly enhance the comfort levels in a household. It's about striking the right balance for your specific environment and preferences. DIY Tips for Maintaining Your Ceiling Fan Efficiency To ensure your ceiling fan operates effectively, regular maintenance is key. Here are a few quick tips: - Dust the blades regularly to prevent dust build-up which can affect efficiency. - Check for obstructions—ensure that chandeliers or other hanging items do not block airflow. - Every now and then, tighten screws and inspect the fan's balance to prevent wobbling, which can decrease performance. Conclusion: Elevate Your Summer Comfort By adjusting just the rotation of your ceiling fan, you're not only changing airflow but also enhancing your summer comfort. So go ahead, flip that switch, and enjoy the cool breeze. With these tips in hand, you're well on your way to turning your home into a summer sanctuary.

07.17.2025

Unlock DIY Success: Easy Repairs for Vinyl Plank Flooring

Update Quick Fixes: Mastering Vinyl Plank Repairs Vinyl plank flooring has surged in popularity due to its resilience, aesthetic appeal, and affordability. However, accidents can happen, leading to unsightly damage. Fortunately, the ability to repair your vinyl floors without replacing the entire flooring can save you time and money. Whether you’ve dealt with scratches, dents, or even a plank that has become warped, this article provides effective tips and methods for a seamless fix. Understanding Vinyl Plank Flooring Understanding the type of vinyl plank flooring you own can significantly affect your repair approach. High-quality vinyl planks often come with a click-lock installation, allowing easier removal for repairs. However, for lower-quality options, you might need to employ a more invasive approach. Knowing your flooring can mean the difference between an easy fix and a troublesome task. Two Primary Repair Methods When it comes to repairing vinyl plank flooring, two methods stand out based on the quality of flooring: Unclicking and Replacing: Ideal for high-end planks, this method involves unclicking the flooring until you reach the damaged plank. You can easily remove the faulty piece, replace it, and reinstall it without affecting the surrounding planks. According to flooring experts, this is the preferred method as it maintains the integrity of your flooring system. Gluing Down a Replacement: If you’re dealing with lower-quality planks or if removing them isn’t feasible, you may consider cutting out the damaged area and gluing a new plank in its place. While this is doable, flooring professionals advise caution. This method alters the original floating nature of the flooring and can lead to further issues if not done properly. Step-by-Step Guide to Repairing Vinyl Planks Now that you’re aware of the two primary methods, let’s delve into the practical steps you can take to repair your vinyl plank flooring. Tools You’ll Need Pry Bar Circular Saw or Oscillating Saw Hammer Utility Knife Replacement Plank Superglue or Finish Nails Steps for the Unclicking Method Remove the Baseboards: Start by carefully scoring the top edge of your baseboards with a utility knife to break the bond with the wall paint. Use a pry bar to gently remove them. Pry Up the Damaged Plank: Use a pry bar to lift the last installed plank in the corner. Be cautious to avoid damage to surrounding pieces. Replace with New Plank: Once the damaged plank is removed, simply insert the new plank, click it in place, and reinstall the baseboards. Check to ensure all clicks are secure. Steps for the Gluing Method Score and Cut: Using your utility knife, cut along the edges of the damaged plank to ease its removal. Remove the Damaged Area: Carefully pry out the damaged section. Prepare Replacement: Trim the new plank to fit the gap, then apply glue around the edges and place it into the cut-out area. Common Misconceptions About Vinyl Plank Flooring Repairs One prevalent myth is that once damaged, vinyl plank flooring must be fully replaced. On the contrary, quick fixes can extend the life of your flooring without necessitating a complete overhaul. Additionally, homeowners fear they lack the skills for repairs. Most of these tasks can be tackled by individuals with basic DIY skills and a little confidence. Final Thoughts: Empower Your Home Maintenance Skills Repairing your vinyl plank flooring is a task within reach for most homeowners. Using the right tools and knowing the appropriate methods allows you to regain the beauty of your floors efficiently. As you tackle home repairs, remember that confidence and practice improve your DIY skills. Don’t hesitate to take the plunge in applying these handyman tips and tricks to elevate your home maintenance! Explore more DIY home projects or sign up for newsletters that deliver practical home maintenance insights straight to your inbox. Embrace the empowerment that comes with homeownership and make repairs a part of your routine!

07.17.2025

Discover How St George Roofing Specialists Enhance Home Protection

Update Understanding the Impact of Weather on RoofsIn today’s unpredictable climate, homeowners grapple with diverse challenges. Extreme weather such as intense heat waves, sudden storms, and torrential rain can severely affect the performance and durability of roofs. This not only leads to aesthetic issues like fading or cracking but can also necessitate costly repairs or replacements over time. For residents of areas prone to such weather variations, standard roofing solutions may fall short, making it essential to select roofing materials that can withstand these localized stresses.Choosing Durable Roofing Materials for Maximum ProtectionSelecting the right roofing material is pivotal for both longevity and energy efficiency. Homeowners looking for the best options can consider the following innovative choices for roofing:Metal Alloys: With lifespans ranging from 40 to 70 years, metal alloys are prized for their excellent UV resistance, sustainability as a recyclable material, and minimal maintenance requirements.Polymer-Modified Shingles: These shingles, boasting a lifespan of 30 to 50 years, offer impressive flexibility to adapt to temperature changes while maintaining a robust structure.Cool-Roof Coatings: Optimal for regions with high temperatures, these coatings last between 10 to 20 years, effectively reflect sunlight, lower cooling costs, and have eco-friendly properties.When choosing, homeowners should consider diverse factors such as lifespan, aesthetics, and budget compatibility. For example, matching polymer shingles to classic designs or using cool coatings on contemporary architecture can elevate both style and functionality.The Role of Professional Expertise in RoofingTo ensure a roofing project’s success, hiring qualified professionals is non-negotiable. Homeowners must vet roofing companies meticulously, ensuring they have necessary licenses, certifications, and proven expertise in the field. Seeking contractors with transparent warranties and strong portfolios can set the stage for quality work.Maximizing Your Roofing InvestmentWhile the initial cost of high-quality roofing materials may seem daunting, the long-term savings, durability, and reduced maintenance make them a sound investment. Homeowners should weigh these factors carefully, understanding that investing in a reliable, high-performing roof can substantially lower overall home repair costs in the future.

Terms of Service

Privacy Policy

Core Modal Title

Sorry, no results found

You Might Find These Articles Interesting

T
Please Check Your Email
We Will Be Following Up Shortly
*
*
*