UPDATE
  • Home
  • Categories
    • Cleaning & Moving
    • Maintenance / Repairs
    • Remodeling & Construction
    • Landscaping / Outdoor
    • Security & Technology
    • Sustainability, Health & Safety
    • Interiors / Décor
    • Expert Interviews
    • DIY Home Projects
Home Wise News!
Wise Insights, Reliable Contractor Advice & Hands on DIY Know How for Savvy Homeowners
August 23.2025
3 Minutes Read

Mastering the Art of Baseboard Cleaning: Your Ultimate Guide

Gloved hand cleaning a baseboard with cloth, elegant room setting.

Unlocking The Secrets to Spotless Baseboards

Baseboards often go unnoticed until they become a dusty eyesore, but a clean, well-maintained baseboard can truly elevate the look of any room. If you’re among the many who treat baseboard cleaning as an afterthought—like a forgotten sock under the bed—fear not! Cleaning baseboards can be a straightforward task with the right tools and tips. Let’s dive into a cleaning journey that not only makes your baseboards shine but also gives you a sense of accomplishment.

The Mindset of Cleaning: Setting the Scene

Before you wield that mop or cloth, you should know that cleaning is as much about mindset as it is about technique. Boost your motivation by cranking up some feel-good music and visualizing how fabulous your freshly cleaned baseboards will look. Besides, a tidy home leads to a tidy mind, right?

Gathering Your Cleaning Arsenal

First things first—let’s assemble your cleaning arsenal! All you really need are a few basic supplies:

  • A vacuum cleaner with a dusting attachment: Perfect for reaching into those nooks and crannies.
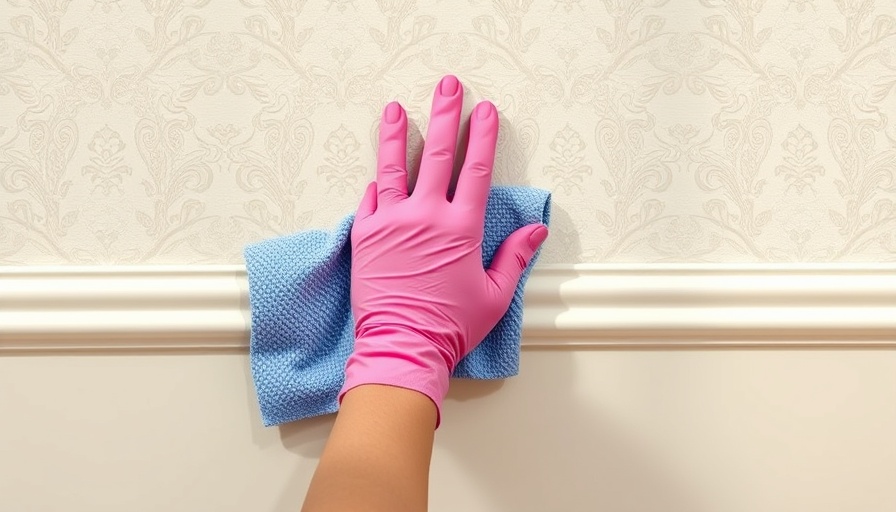
  • A microfiber cloth: Gentle yet effective; it’s your best friend in baseboard cleaning.
  • All-purpose cleaner: Choose one that’s safe for your baseboard material—wood, painted, or molded.
  • Baking soda (optional): For those extra stubborn spots, this natural cleaner can work wonders.

Cleaning Techniques That Work

With your supplies in hand, you can begin the mission to conquer your baseboards:

  1. Start with a Vacuum: Use the vacuum first to remove any loose dust and debris. If you have pets, you’ll find hair lodged in the corners—this helps clear it away.
  2. Wipe Down: Use a damp microfiber cloth and your chosen cleaner to wipe down the surfaces. Don’t forget to get down on your knees and check those lower edges!
  3. Address Stubborn Stains: For any pesky marks, apply a mixture of equal parts baking soda and water, gently scrubbing until the spot lifts.

Regular Maintenance: The Key to Longevity

Like many things in life, prevention is far better than cure! Establish a cleaning routine where you wipe down baseboards at least once every few months. This not only keeps your baseboards looking sharp but can also reduce the amount of deep cleaning needed down the line. Think of it like brushing your teeth—you wouldn’t skip it for months, right?

Embracing the DIY Spirit: What You Can Gain

Cleaning your baseboards is not just about aesthetics; it’s about embracing the joys of home maintenance. The satisfaction of seeing a transformed corner of your home contributes to your overall sense of pride in your living space. So, might we suggest you channel that inner DIY hero and make your baseboards a focal point rather than a forgotten task?

Conclusion: A Fresh Start Awaits

Having clean baseboards can enhance the overall ambiance of your home, making it look more polished and inviting. So put on your favorite playlist, gather your cleaning arsenal, and take pride in your home. Don’t delay—jump in and elevate your space today! You’ll find that every wiped-down corner adds to the character of your sanctuary.

Cleaning & Moving

0 Comments

Write A Comment

*
*
Please complete the captcha to submit your comment.
Related Posts All Posts
06.17.2026

10 Kitchen Items You Need to Toss Immediately to Stay Safe

Update Declutter Your Kitchen: Why Tossing Old Items is Essential The kitchen is often called the heart of the home, but it can also become a graveyard for unused items. Many of us hold on to kitchenware with sentimental value or the hope that we might one day need those gadgets. However, expert organizers and health specialists agree: it's time to lighten the load. With spring cleaning often seen as the perfect moment for a thorough declutter, there's no reason to wait. Why not tackle kitchen clutter now to create a more functional and sanitary workspace? Are Your Kitchen Sponges Harboring Bacteria? One of the items that should be tossed immediately is the kitchen sponge. Studies have shown that sponges can harbor dangerous bacteria after just a few weeks of use, making them a prime candidate for frequent replacement. The USDA recommends swapping out sponges regularly to avoid cross-contamination. This simple change can significantly improve kitchen hygiene, offering a safer environment for food preparation. Don’t Forget Your Old Cutting Boards Worn-out cutting boards can also become a breeding ground for bacteria. Grooves and scratches from food preparation activities are hard to clean, so when these imperfections become apparent, it's time for them to go. If you use wooden cutting boards, look for bamboo options, known for their durability and ease of cleaning. Untamed Utensils: Know When to Toss Just like cutting boards, utensils should be regularly assessed for wear and tear. Cracked or chipped utensils can break off in your food, creating a choking hazard. This concern extends even to plastic kitchenware made from recycled materials, which have been found to leach harmful substances. Professionals recommend that a periodic audit of your utensils can help maintain kitchen safety. From Clutter to Clarity: The Case for Unused Appliances How many appliances are sitting in your kitchen gathering dust? Experts suggest that small kitchen gadgets—perhaps a single-use appliance like an ice cream maker—often end up as regrets. A serious inventory can reveal which items are actually used versus those that are merely collecting dust. Donate or sell the ones that serve no function in your current kitchen routine. The Hidden Hazards of Expired Foods Moreover, many kitchens hold onto expired food items that can take up unnecessary space. Check your pantry and fridge for past-their-prime spices or old cooking oils. Experts recommend tossing these out, as not only do expired items clutter your space, but they also can lead to foodborne illnesses. As a rule of thumb, use a simple system to rotate your items to keep it manageable. Freshen Up Your Spice Collection Speaking of expired items, spices are another area that often gets overlooked. Over time, spices lose potency and flavor, so it's critical to assess their freshness regularly. Utilize small quantities for purchasing spices, especially if you have a tendency to forget they’ve been shelved. Labeling with purchase dates can help to keep track of their shelf life. Takeout Items: Useful or Just Taking Up Space? Finally, the drawer filled with takeout condiments and utensils? It's time to purge! Unless you anticipate using them, don’t hold onto packets of ketchup or soy sauce. They take up space and can clutter your kitchen drawers. A clean-out of this nature promotes both cleanliness and simplicity. Creating a Functional and Safe Kitchen By regularly assessing and removing unnecessary items, you can transform your kitchen from cramped chaos into an organized hub of creativity. Transitioning to this mindset will not only make cooking more enjoyable but will also keep your food fresh and your family safe. As professional organizers suggest, decluttering starts with a thoughtful inventory and a willingness to let go of what no longer serves you. Take Action: Embrace the Power of Decluttering Start today! Whether it's tossing out expired items or finding donations for unused gadgets, taking the first step can lead to a profound transformation in how you engage with your kitchen. As you declutter, you'll notice a significant decrease in stress and an increase in functionality—an organized kitchen is a happy kitchen!

06.16.2026

Refresh Your Towels with Vinegar: A Simple Cleaning Hack

Update Revive Your Old Towels with Vinegar: A Refreshing SolutionWe’ve all been there: you step out of the shower, wrap yourself in a towel, and your heart sinks as you realize it feels more like sandpaper than the soft, fluffy experience you crave. If your towels have lost their charm and are giving off funky smells, don’t despair. Using white vinegar is the simple, cost-effective solution that can breathe new life into your towel collection.Understanding Towel Toughness: The Science Behind ItMany of us may not realize that the primary culprit behind rough, odoriferous towels is the detergent residue that gets trapped in the fabric. Too much detergent is not a friend to your fluffy friends; it can create a breeding ground for bacteria when combined with dampness. The result? Musty odors and stiff fibers.Instead of splurging on expensive towels, a solution lies in your pantry. Vinegar acts as a natural fabric softener, breaking down the residues that have accumulated over time. A cup added during the wash cycle can do wonders.The Vinegar Cleaning Method: Step-by-StepHere’s how to effectively wash your towels using vinegar:First Wash: Set your washing machine to a hot water cycle and add one cup of white vinegar. Do not include any detergent. This initial wash will help to strip towels of built-up detergent and odors.Second Wash: Without drying them, repeat the hot water wash with one cup of baking soda to further freshen them up. Baking soda not only boosts cleaning but also helps eliminate any lingering odor.Drying: Dry your towels as you normally would, but skip fabric softeners during this step. This helps maintain their absorbency.Following these methods, you’ll find your towels feeling renewed, soft, and significantly less odorous!Potential Pitfalls: What to AvoidWhile using these methods can significantly improve your towels' condition, avoid mixing vinegar and baking soda in the same wash cycle as it can lead to overflow issues in your machine. Additionally, steer clear of commercial fabric softeners; they coat the fibers and reduce absorption, doing more harm than good.Long-Term Care for Soft, Fluffy TowelsAfter rescuing your towels, it's essential to maintain their softness. Here are some tips:Use the correct amount of detergent. Always measure according to the recommendations to avoid buildup when washing your towels.Hang your towels to dry versus throwing them in the hamper while wet, as this helps prevent bacteria growth.Wash towels frequently to keep them fresh; ideally, they should only go about three uses before washing.Alternative Techniques: Beyond VinegarIf you’re looking for additional methods, consider these:Baking Soda: In conjunction with detergent for regular washes, baking soda can enhance fluffiness and whiteness, acting as a natural layer of protection for your fabrics.Tennis Balls in the Dryer: Some swear by adding clean tennis balls to the dryer. They help to aerate the towels as they tumble, which can prevent clumping and keep fibers soft.Brushing Your Towels: Odd but effective, using a hairbrush after washing and drying can help separate the fibers and increase fluffiness.With these insights and approaches, you can keep your towels feeling new, ensuring that every shower ends with the same soft hug we all desire. So, stock up on vinegar and give your towels the TLC they deserve!Take Action for a Cozy HomeNow that you know how to rejuvenate those musty towels, it’s time to put this knowledge into action. Turn your laundry day into a productive session filled with refreshing surprises. With just a few simple ingredients, you can create an oasis of softness that enhances your daily routines.

06.15.2026

Transform Your Laundry Routine: How Vinegar Makes Clothes Softer and Fresher

Update Why Vinegar is Your Laundry's Secret Weapon If you think laundry is just about detergent and the latest fabric softeners, think again! Vinegar, that humble pantry staple, is quietly revolutionizing how we care for our clothes. Used as a rinse agent, vinegar softens fabrics and diminishes static cling, all while providing a fresher scent that can make your laundry feel as good as new. Unpacking the Myth: Does Vinegar Really Work? For ages, vinegar has been touted as a miracle substance, and laundry is no exception. Many people may raise an eyebrow at the idea of using vinegar in their wash, but scientific evidence backs up its effectiveness. A rinse with vinegar not only eliminates soap residue but also acts as a natural fabric softener, helping to soften crunchy towels and bedding devoid of harsh chemicals. Improved Freshness and Fabric Longevity: A Two-for-One Benefit By using vinegar in the laundry, you’re essentially ensuring fresher-smelling clothes and extending their lifespan. Its acidic nature helps dissolve mineral deposits in hard water that might otherwise cling to fabric, causing fading and weakening fibers. So next time your clothes feel a little rough or smell a bit stale, consider adding a cup of vinegar to your wash cycle! Practical Steps for Implementing Vinegar in Your Laundry Routine So, how do you incorporate vinegar into your laundry regimen? It’s simple! Just add a cup of white distilled vinegar to your washing machine during the rinse cycle. For those with top-loading machines, you can add the vinegar during the wash cycle for excellent results. Remember, no need for expensive fabric softeners or fragrances—vinegar takes care of it all, and you won’t even notice the vinegar scent in your laundry post-wash. Addressing Common Concerns: The Vinegar Smell One common worry is that your clothes will come out smelling like a salad dressing. But don’t fret! The smell dissipates during the wash cycle, leaving your clothes smelling fresh and clean without any lingering vinegar odor. Plus, lemons can be added for a zesty twist, further enhancing your laundry aroma. Beyond the Laundry Room: Other Uses for Vinegar Why stop at laundry? Vinegar can be your go-to household hero! From being a potent cleaning agent to refreshing your carpets or carpets, it can also be used to clean shiny furniture surfaces. Its versatility makes it an invaluable addition to your DIY cleaning supplies basket. Think of it as a maintenance multitasker—filling roles in cleaning, deodorizing, and fabric care! Wrapping It Up: The Great Vinegar Revolution In a world filled with advanced cleaning technologies and glowing advertisements for the latest laundry products, it’s refreshing to see a classic like vinegar holding its own. Its natural properties make it not only a safe choice for your family but also an eco-friendly option. Say goodbye to harsh chemicals—next laundry day, embrace the vinegar revolution! In conclusion, adding vinegar to your laundry routine can be a game changer. Not only will your clothes emerge softer and fresher, but you'll also save money and reduce your household's environmental impact. So, gather that vinegar and transform your washing experience!

Terms of Service

Privacy Policy

Core Modal Title

Sorry, no results found

You Might Find These Articles Interesting

T
Please Check Your Email
We Will Be Following Up Shortly
*
*
*