Add Row
Add Element
UPDATE
Add Element
  • Home
  • Categories
    • Cleaning & Moving
    • Maintenance / Repairs
    • Remodeling & Construction
    • Landscaping / Outdoor
    • Security & Technology
    • Sustainability, Health & Safety
    • Interiors / Décor
    • Expert Interviews
    • DIY Home Projects
Home Wise News!
Wise Insights, Reliable Contractor Advice & Hands on DIY Know How for Savvy Homeowners
May 06.2025
3 Minutes Read

Maximize Your Move: Here’s Why Only One Side of Bubble Wrap is Poppable

Close-up of bubble wrap on dark surface highlighting bubble wrap usage.

Why Proper Bubble Wrap Usage Matters

Bubble wrap might seem like a simple, straightforward packing material, but the manner in which it is utilized can significantly impact the safety of your fragile items. Many people assume that simply surrounding their valuables with bubble wrap is sufficient. However, this assumption can lead to catastrophe if the wrap is used incorrectly.

Expert Ross Sapir, founder & CEO of Roadway Moving, emphasizes that the bubble side should always face inward, towards the item being packed. This strategy maximizes cushioning and helps absorb shocks and vibrations that could otherwise harm delicate objects. Understanding the structure and purpose of bubble wrap can make all the difference, especially during a move—when things are stressful enough without added worries about broken items.

How is Bubble Wrap Made?

To fully appreciate bubble wrap’s protective capabilities, it helps to know how it’s manufactured. The production process involves melting and shaping polyethylene beads into thin sheets. This is achieved through a unique system where one sheet is formed over a roller that creates the bubbles by suction. Afterwards, a second flat sheet is laminated over it to seal these bubbles in place. This dual-layer design allows the bubbles to maintain their structure while providing an easily stackable surface on the other side.

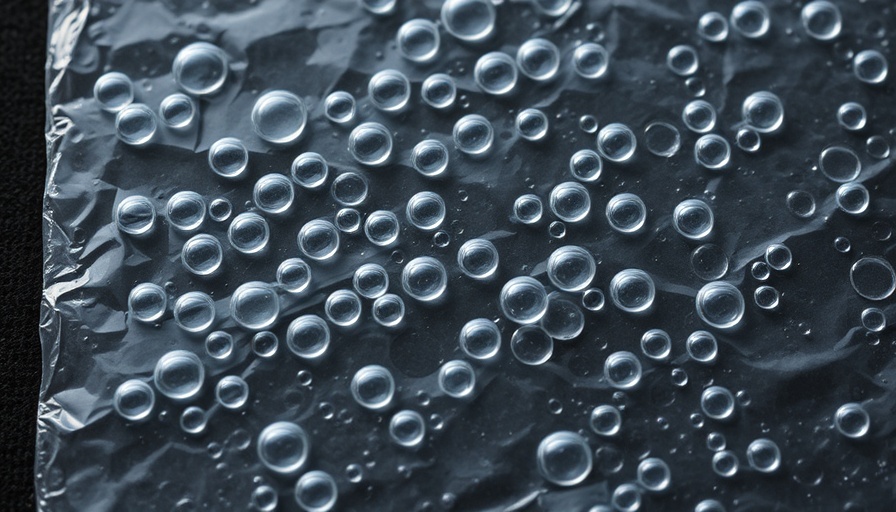
One Side for Effectiveness: Why Only One Side is Bubbly

Many may wonder why only one side of the bubble wrap features those iconic bubbles. It's all about functionality. The flat side not only aids in the wrapping process but also promotes better handling and stacking of items packed with it. The absence of bubbles on one side means the surface is more conducive to organization and storage while protecting the fragile air-filled pockets on the other side from being squashed or damaged.

How to Bubble Wrap Like a Pro: Step-by-Step Guide

Now that you understand why proper bubble wrap usage is crucial, here’s a simple guide to ensure your packing technique is up to par:

  1. Start with the bubble wrap facing the right direction—bubbles up!
  2. Center your item on the wrap.
  3. Encapsulate the item completely, ensuring that the bubbles touch the object for maximum shock absorption.
  4. Secure the wrap in place using packing tape.
  5. If the item is particularly fragile, consider double-wrapping it for added protection.
  6. Finally, place the bubble-wrapped item into a box cushioned with packing peanuts or crumpled paper to buffer against movement during transport.

Practical Insights: Avoid These Common Mistakes

While wrapping items, it’s easy to make some common errors that can leave valuables vulnerable. Here’s what to avoid:

  • Ignoring the flat side: Forgetting to use the bubble side inward can lead to items hitting hard surfaces, negating the protective benefits of the wrap.
  • Overestimating bubble wrap thickness: Just because the material seems thick doesn’t mean it’s sufficient for delicate items. Always assess the type of item before packing.
  • Skimping on tape: Not using enough packing tape can lead to wrapped items coming undone during transportation.

Future Insights: The Evolution of Packing Materials

As we move toward a more sustainable focus, packaging innovations are emerging that may redefine how we think about bubble wrap. Some companies are experimenting with biodegradable alternatives that maintain protective features while minimizing environmental impact. Keeping an eye on these developments not only benefits the planet but also could offer new solutions for securely moving and storing your items without relying on traditional plastic products.

Cleaning & Moving

Write A Comment

*
*
Related Posts All Posts
01.20.2026

Discover Why Your Silicone Kitchen Tools Taste Like Soap And How To Fix It!

Update Why Do Silicone Kitchen Tools Taste Like Soap? If you've ever taken a bite of your baked goods and been greeted by a mysterious soapy aftertaste, you're not alone. Many home cooks encounter this baffling issue, often wondering how their silicone utensils could negatively impact their culinary creations. But fear not! This article sheds light on the causes behind this unpleasant phenomenon and arms you with handy solutions to banish the soapy taste from your kitchen. Understanding the Soapy Taste in Silicone Tools Silicone is an incredibly popular material used in kitchen tools such as spatulas, molds, and baking mats due to its flexibility, heat resistance, and ease of cleaning. However, the very properties that make silicone great can also lead to the absorption of odors and flavors, particularly from strong dish soaps. It's a classic case of the material's permeability causing annoying outcomes. According to experts, if you're experiencing a soap-like flavor, it often results from the chemical residues left behind by harsh detergents. Products containing essential oils or fragrances tend to leave a lingering scent that becomes encapsulated in the silicone, eventually influencing whatever delectable dish you attempt to prepare. The Culprits: Types of Dish Soaps to Avoid Household dish soaps are not all created equal. High-temperature exposure to aggressive cleaning agents, especially ones high in pH or packed with fragrances, can lead to significant soap infiltration in your silicone products. For instance, Stasher, a popular silicone storage bag brand, specifically warns against using Cascade detergent, which is notorious for leaving behind a soapy aftertaste. Strong essential oils in dish soaps can also be suspected. While they may entice with their pleasant aroma, they have the potential to embed within the silicone during the washing process, causing havoc in your next kitchen venture. To minimize this issue, consider using unscented or neutral-pH detergents, which are gentler on silicone and less likely to seep into your kitchen tools. Practical Solutions: How to Remove the Soap Flavor The good news? You have plenty of options at your fingertips to rectify the soapy flavor. Here are some effective methods endorsed by experts: 1. Baking Soda Scrubbing One of the simplest remedies involves making a paste of baking soda and water. Gently scrub the mixture onto your silicone tools, allowing it to sit for a while before rinsing. The alkaline properties of baking soda will help neutralize the soap residue, refreshing your implements for their next use. 2. Vinegar Solution Soak Dark and murky flavors can also be cleared with a vinegar solution. A mixture comprising equal parts vinegar and water can be an effective soak for around 1 to 3 hours. Rinse well afterward to avoid any lingering acidity. 3. Baking It Off with Heat If scrubbing and soaking don't do the trick, try employing the power of heat. Preheat your oven to 250°F, and place your silicone tools on a baking sheet. Bake them for about 30 minutes, which will allow any remaining residues to evaporate. Just ensure that your products are oven-safe! Keep Your Kitchen Smelling Fresh Of course, prevention is paramount. By incorporating a few best practices into your dishwashing routine, you can significantly mitigate any unpleasant flavors: Use unscented, mild detergents free from fragrances. Ensure thorough rinsing of your silicone tools after washing. Store silicone items in a dry, well-ventilated area to avoid moisture retention, which can harbor undesirable smells. Embrace the Versatility of Silicone without Concern Your love for silicone kitchen tools doesn’t need to be marred by the pesky issue of soap-flavored dishes. By being mindful of your choice of dish soap and employing some of these solutions, you can still enjoy the versatility and durability of silicone without the aftertaste. So go ahead and bake to your heart's content—just remember to keep it 'soap-free'! For those who want to dive deeper into maintaining a fresh kitchen environment, be sure to check out our additional resources on kitchen cleaning and maintenance.

01.17.2026

Transform Your Laundry Day: How to Prevent Sheets From Balling Up in the Dryer

Update The Struggle is Real: Why Sheets Love to Ball Up We've all experienced the frustration of pulling a tangled mess of sheets from the dryer, a literal ball of fabric that would make even the best of us want to throw in the towel (pun intended!). This common laundry woe happens due to the large surface area of sheets, which can easily twist and fold during the tumble dry cycle. But fear not! With some insider tips from laundry professionals, you can keep those sheets from becoming a jumbled mess. The Bigger the Load, The Bigger the Mess One of the first rules of thumb when dealing with laundry is to avoid overloading the dryer. Laundry experts recommend separating sheets and towels from other clothing items. Why? Because towels are bulky and tend to create tension in the dryer. When sheets get tangled with towels, they are more likely to ball up. Instead, dry your sheets alone or with a couple of lightweight items to give them more space to move freely. The Magic of Drying Balls and Fabric Softener Another fantastic tip is to use dryer balls. Whether made from wool or rubber, these handy little tools introduce air gaps between clothing, allowing for better airflow and reducing clumping. Not only do they help prevent sheets from balling but they can also decrease drying time, which is a win-win! Pair them with a capful of fabric softener for added freshness and fluffiness, and you'll soon find laundry day transformed from a chore to a delightful experience. A Game of Timing: The Right Settings Matter It’s not just what you put in the dryer, but how you put it in there that matters! Opt for a lower heat setting or a delicate cycle when drying sheets. Using a higher temperature can give your sheets that crispy feel but also increases the likelihood that they will wrinkle and crease, causing them to ball up. Experiment with your dryer’s settings to find the perfect balance of dried but not crumpled. Matching Your Sheets for Maximum Effect Another unexpected but crucial tip from laundry pros is to keep your sheets matched in terms of fabric type and weight. Mixing different types of fabrics (think flannel with satin) can create havoc in the dryer, as they respond differently to heat and movement. Keeping similar sheets together will help distribute weight evenly and significantly reduce the risk of tangling. The Unexpected Role of Humidity Believe it or not, the humidity level in your home can greatly affect drying times and fabric behavior. In particularly humid environments, sheets may take longer to dry and are more likely to gather moisture, which can lead to spots and odors if left bunched up. Keeping your laundry room well-ventilated can aid in reducing humidity and ensuring that your sheets dry quickly and efficiently. Storing Sheets for Success Finally, how you store your sheets can impact their longevity and performance. Rather than shoving your sheets haphazardly in a drawer, fold them neatly and store them in an organized manner. Not only does this prevent wrinkles, but it also makes it easy to grab a matching set without having to dig through a chaotic pile. Plus, it’s aesthetically pleasing! Your Gateway to Laundry Liberation With the right approach, your laundry routine doesn’t need to be a perpetual battle. Instead, embrace these tips to transform laundry day into a stress-free experience. So next time you face the dryer, you can confidently anticipate a smooth, wrinkle-free retrieve. Remember, a bit of planning and care can make all the difference! Are you ready to give these laundry techniques a try? You might just find these insights not only enhance your efficiency but also ensure that your sheets are fresh and tidy, eliminating that dreaded balling issue once and for all!

01.16.2026

What Is the Right Temperature for Washing Sheets? Find Out Now!

Update Finding the Perfect Temperature for Sheet Washing When it comes to washing sheets, many might think the hotter, the better. However, experts suggest that there’s an optimal temperature for washing sheets that not only cleans but also preserves your bedding. Understanding the best temperature can save you money on energy bills and extend the life of your linens. The Argument for Hot Water Hot water—typically around 130°F to 140°F—is often recommended by laundry professionals for its effectiveness in killing germs and bed bugs. For example, the Hotpoint brand recommends this high temperature to effectively eliminate allergens and bacteria that can be lurking in your sheets, especially for those suffering from allergies or respiratory issues. However, it’s essential to remember that frequent washing at such high temperatures can diminish fabric quality, leading to wear and tear. Embracing Warm Water Interestingly, warm water (around 90°F to 110°F) strikes a balance between cleanliness and care for your linens. Most laundry experts advocate for warm washes as more than sufficient for removing body oils, sweat, and common stains without the risk of damaging your sheets. This temperature also significantly reduces energy consumption compared to hot washes, aligning with sustainable practices that many consumers are now embracing. Cold Water: The Eco-Friendly Option Recent advancements in detergent formulations have made cold washing (around 65°F to 80°F) a viable option for cleaning sheets effectively. Cold water has the distinct advantage of dramatically reducing energy use, thus appealing to eco-conscious individuals. A survey by the Energy Saving Trust indicates that roughly 90% of the energy used in a washing machine goes into heating the water. As a result, opting for cold washes not only conserves energy but also preserves your linens. Best Practices for Sheet Care Regardless of the temperature, there are several best practices to consider when washing sheets. First, always check the care label on your bedding before selecting a washing temperature. Some fabrics, like delicate silks or blends, may require specific temperatures to avoid damage. Additionally, using the appropriate detergent can enhance the washing process; look for detergents specifically formulated for cold washes if you opt for the eco-friendly route. Common Misconceptions About Sheet Washing One prevalent myth suggests that higher temperatures are synonymous with cleaner sheets, but this isn’t necessarily true. Over-washing at high temperatures can lead to fabric degradation, making sheets less comfortable over time. Therefore, understanding both the material and its required care can make a notable difference. For example, many consumers might not realize that bleach, while effective for some white linens, can cause colorful sheets to fade and become unsightly. Steps to Optimize Your Sheet Washing Routine 1. Pre-Treat Stains: Identify and treat any stains prior to washing. A quick spot treatment can work wonders. 2. Use a Mesh Bag: If you have delicate sheets, using a mesh laundry bag helps protect them during the wash cycle. 3. Avoid Overloading: Washing too many items at once can lead to improper cleaning. Stick to the recommended load size. 4. Drying Tips: After washing, consider air drying your sheets to maintain their quality. If you prefer using a dryer, select a low heat setting to prevent shrinking. What It Means to You Having clean sheets contributes significantly to overall health and wellness. By understanding the right temperature for washing sheets, you can ensure a comfortable sleep environment while prolonging the lifespan of your linens. Additionally, being mindful of energy consumption supports a broader commitment to sustainability, balancing cleanliness with eco-friendliness. Take Action for Cleaner Bedding Next time you wash your sheets, remember these tips on the ideal washing temperature. Embrace the changes that not only benefit your linens but also the environment. After all, who doesn’t love snuggling into a bed with fresh, clean sheets?

Terms of Service

Privacy Policy

Core Modal Title

Sorry, no results found

You Might Find These Articles Interesting

T
Please Check Your Email
We Will Be Following Up Shortly
*
*
*