Add Row
Add Element
UPDATE
Add Element
  • Home
  • Categories
    • Cleaning & Moving
    • Maintenance / Repairs
    • Remodeling & Construction
    • Landscaping / Outdoor
    • Security & Technology
    • Sustainability, Health & Safety
    • Interiors / Décor
    • Expert Interviews
    • DIY Home Projects
Home Wise News!
Wise Insights, Reliable Contractor Advice & Hands on DIY Know How for Savvy Homeowners
July 29.2025
3 Minutes Read

Moving Essentials You Need for a Stress-Free Relocation

Stacked moving boxes in a garage, highlighting moving essentials.

Moving Made Simple: Essential Must-Haves for Homeowners

Moving can be an overwhelming experience, especially for homeowners. Whether you’re relocating across town or shifting to a new neighborhood, the endless checklist of what to pack can leave anyone baffled. Fear not! We’re here to simplify that list with the moving essentials you actually need and what you can skip.

Sort Through the Noise: What You Really Need

When the decision to move is made, everyone suddenly becomes a self-proclaimed expert, inundating you with recommendations and unsolicited advice. This avalanche of information often complicates things more than necessary. Instead of feeling overwhelmed, let’s focus on a compact list of practical items that can streamline your move.

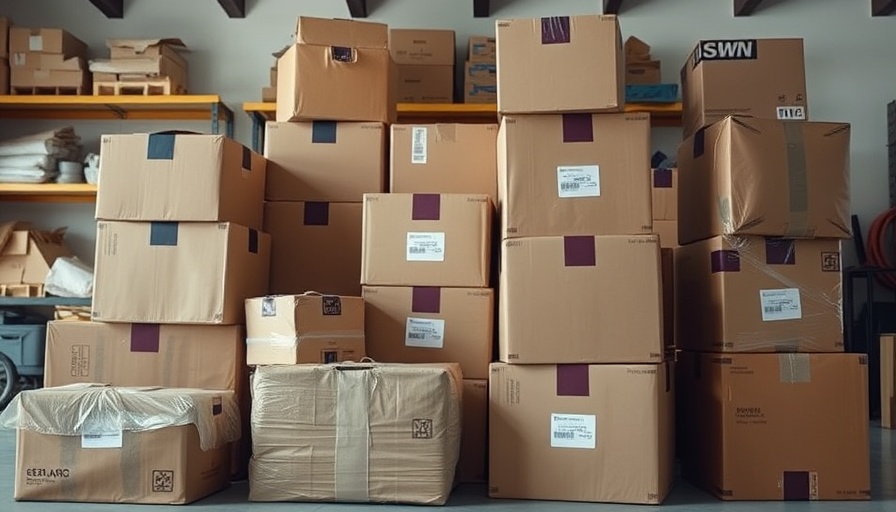
First and foremost, let’s talk about moving boxes. Yes, you can’t move without them! I always recommend a variety of sizes—medium and smaller boxes are your best friends, as larger boxes tend to become too heavy and unwieldy. Sources for free boxes could be right in your community. For instance, check local Facebook groups or ask local businesses like liquor stores and fast food restaurants.

Essential Packing Tools to Keep You Organized

When it comes to labeling and securing your boxes, there are a few must-have tools that might go overlooked. Packing tape and a good dispenser—yes, it may be tempting to try and make do with regular scissors—are invaluable. Trust me; you’ll be taping up boxes far more than you think! Sharpies for labeling are essential too, and honestly, just as effective as those fancy color-coded labels. They save both time and money!

Let’s not forget about the importance of plastic wrap—this handy tool not only keeps drawers in place but can also bundle cords and other miscellaneous items together, which is a lifesaver when you are in the thick of moving chaos.


Setting Up for Success: Handy Tips for Packing

As you prepare for the big day, think about how everyday items can be repurposed for packing. For instance, ziplock bags are far more functional than you’d anticipate—they’re perfect for holding spare screws, random odds and ends, and even your personal items like spare keys. Keep those organized!

Another pro tip? Utilize trash bags for clothing. By flipping them upside down, you can easily poke hangers through, creating a makeshift wardrobe that’s not only easier to move but saves you the hassle of unpacking later. Beautifully neat stuffed animals and pillows can also make the transition into these bags.

Strategize Your Moving Day with Practical Tools

A basic tool kit should be within arm’s reach as you disassemble furniture and prepare the house for new beginnings. You’ll want to have a drill or screwdriver handy, along with maybe a hammer for removing those stubborn nails. All these little tools make a big difference!

If you’re considering a DIY move, you might also benefit from having a hand truck available. While it may seem unnecessary if you’ve hired movers, it can still come in handy for maneuvering heavy items and simply makes the entire process smoother.

What to Skip: Avoiding the Overwhelming Extras

Now that we’ve covered the essentials, let’s discuss what you can skip. Buyers often get swayed into purchasing various specialty boxes and tools that only complicate the process. For instance, avoid oversized boxes; they may seem appealing for their capacity but usually lead to stress when loading and unloading.

Also, refrain from investing in overly complicated packing systems or elaborate labeling tools unless you find them genuinely useful in your packing routine. Stick to the basics, and you’ll have a less chaotic moving day.

Looking Forward: Making the Most of Your Move

Moving doesn’t have to be chaos! By prioritizing what you truly need and avoiding overwhelming extras, you’ll ease the burden significantly. Every homeowner experiences the moving process differently, but bearing these tips in mind can turn your next move into a more manageable and even enjoyable adventure.

So when you’re gearing up for your next move, focus on those essentials mentioned, and leave the rest behind! Keeping it simple yields lasting rewards.

Ready for your next big move? Don't let the process overwhelm you—keep it simple!

Cleaning & Moving

Write A Comment

*
*
Related Posts All Posts
01.20.2026

Discover Why Your Silicone Kitchen Tools Taste Like Soap And How To Fix It!

Update Why Do Silicone Kitchen Tools Taste Like Soap? If you've ever taken a bite of your baked goods and been greeted by a mysterious soapy aftertaste, you're not alone. Many home cooks encounter this baffling issue, often wondering how their silicone utensils could negatively impact their culinary creations. But fear not! This article sheds light on the causes behind this unpleasant phenomenon and arms you with handy solutions to banish the soapy taste from your kitchen. Understanding the Soapy Taste in Silicone Tools Silicone is an incredibly popular material used in kitchen tools such as spatulas, molds, and baking mats due to its flexibility, heat resistance, and ease of cleaning. However, the very properties that make silicone great can also lead to the absorption of odors and flavors, particularly from strong dish soaps. It's a classic case of the material's permeability causing annoying outcomes. According to experts, if you're experiencing a soap-like flavor, it often results from the chemical residues left behind by harsh detergents. Products containing essential oils or fragrances tend to leave a lingering scent that becomes encapsulated in the silicone, eventually influencing whatever delectable dish you attempt to prepare. The Culprits: Types of Dish Soaps to Avoid Household dish soaps are not all created equal. High-temperature exposure to aggressive cleaning agents, especially ones high in pH or packed with fragrances, can lead to significant soap infiltration in your silicone products. For instance, Stasher, a popular silicone storage bag brand, specifically warns against using Cascade detergent, which is notorious for leaving behind a soapy aftertaste. Strong essential oils in dish soaps can also be suspected. While they may entice with their pleasant aroma, they have the potential to embed within the silicone during the washing process, causing havoc in your next kitchen venture. To minimize this issue, consider using unscented or neutral-pH detergents, which are gentler on silicone and less likely to seep into your kitchen tools. Practical Solutions: How to Remove the Soap Flavor The good news? You have plenty of options at your fingertips to rectify the soapy flavor. Here are some effective methods endorsed by experts: 1. Baking Soda Scrubbing One of the simplest remedies involves making a paste of baking soda and water. Gently scrub the mixture onto your silicone tools, allowing it to sit for a while before rinsing. The alkaline properties of baking soda will help neutralize the soap residue, refreshing your implements for their next use. 2. Vinegar Solution Soak Dark and murky flavors can also be cleared with a vinegar solution. A mixture comprising equal parts vinegar and water can be an effective soak for around 1 to 3 hours. Rinse well afterward to avoid any lingering acidity. 3. Baking It Off with Heat If scrubbing and soaking don't do the trick, try employing the power of heat. Preheat your oven to 250°F, and place your silicone tools on a baking sheet. Bake them for about 30 minutes, which will allow any remaining residues to evaporate. Just ensure that your products are oven-safe! Keep Your Kitchen Smelling Fresh Of course, prevention is paramount. By incorporating a few best practices into your dishwashing routine, you can significantly mitigate any unpleasant flavors: Use unscented, mild detergents free from fragrances. Ensure thorough rinsing of your silicone tools after washing. Store silicone items in a dry, well-ventilated area to avoid moisture retention, which can harbor undesirable smells. Embrace the Versatility of Silicone without Concern Your love for silicone kitchen tools doesn’t need to be marred by the pesky issue of soap-flavored dishes. By being mindful of your choice of dish soap and employing some of these solutions, you can still enjoy the versatility and durability of silicone without the aftertaste. So go ahead and bake to your heart's content—just remember to keep it 'soap-free'! For those who want to dive deeper into maintaining a fresh kitchen environment, be sure to check out our additional resources on kitchen cleaning and maintenance.

01.17.2026

Transform Your Laundry Day: How to Prevent Sheets From Balling Up in the Dryer

Update The Struggle is Real: Why Sheets Love to Ball Up We've all experienced the frustration of pulling a tangled mess of sheets from the dryer, a literal ball of fabric that would make even the best of us want to throw in the towel (pun intended!). This common laundry woe happens due to the large surface area of sheets, which can easily twist and fold during the tumble dry cycle. But fear not! With some insider tips from laundry professionals, you can keep those sheets from becoming a jumbled mess. The Bigger the Load, The Bigger the Mess One of the first rules of thumb when dealing with laundry is to avoid overloading the dryer. Laundry experts recommend separating sheets and towels from other clothing items. Why? Because towels are bulky and tend to create tension in the dryer. When sheets get tangled with towels, they are more likely to ball up. Instead, dry your sheets alone or with a couple of lightweight items to give them more space to move freely. The Magic of Drying Balls and Fabric Softener Another fantastic tip is to use dryer balls. Whether made from wool or rubber, these handy little tools introduce air gaps between clothing, allowing for better airflow and reducing clumping. Not only do they help prevent sheets from balling but they can also decrease drying time, which is a win-win! Pair them with a capful of fabric softener for added freshness and fluffiness, and you'll soon find laundry day transformed from a chore to a delightful experience. A Game of Timing: The Right Settings Matter It’s not just what you put in the dryer, but how you put it in there that matters! Opt for a lower heat setting or a delicate cycle when drying sheets. Using a higher temperature can give your sheets that crispy feel but also increases the likelihood that they will wrinkle and crease, causing them to ball up. Experiment with your dryer’s settings to find the perfect balance of dried but not crumpled. Matching Your Sheets for Maximum Effect Another unexpected but crucial tip from laundry pros is to keep your sheets matched in terms of fabric type and weight. Mixing different types of fabrics (think flannel with satin) can create havoc in the dryer, as they respond differently to heat and movement. Keeping similar sheets together will help distribute weight evenly and significantly reduce the risk of tangling. The Unexpected Role of Humidity Believe it or not, the humidity level in your home can greatly affect drying times and fabric behavior. In particularly humid environments, sheets may take longer to dry and are more likely to gather moisture, which can lead to spots and odors if left bunched up. Keeping your laundry room well-ventilated can aid in reducing humidity and ensuring that your sheets dry quickly and efficiently. Storing Sheets for Success Finally, how you store your sheets can impact their longevity and performance. Rather than shoving your sheets haphazardly in a drawer, fold them neatly and store them in an organized manner. Not only does this prevent wrinkles, but it also makes it easy to grab a matching set without having to dig through a chaotic pile. Plus, it’s aesthetically pleasing! Your Gateway to Laundry Liberation With the right approach, your laundry routine doesn’t need to be a perpetual battle. Instead, embrace these tips to transform laundry day into a stress-free experience. So next time you face the dryer, you can confidently anticipate a smooth, wrinkle-free retrieve. Remember, a bit of planning and care can make all the difference! Are you ready to give these laundry techniques a try? You might just find these insights not only enhance your efficiency but also ensure that your sheets are fresh and tidy, eliminating that dreaded balling issue once and for all!

01.16.2026

What Is the Right Temperature for Washing Sheets? Find Out Now!

Update Finding the Perfect Temperature for Sheet Washing When it comes to washing sheets, many might think the hotter, the better. However, experts suggest that there’s an optimal temperature for washing sheets that not only cleans but also preserves your bedding. Understanding the best temperature can save you money on energy bills and extend the life of your linens. The Argument for Hot Water Hot water—typically around 130°F to 140°F—is often recommended by laundry professionals for its effectiveness in killing germs and bed bugs. For example, the Hotpoint brand recommends this high temperature to effectively eliminate allergens and bacteria that can be lurking in your sheets, especially for those suffering from allergies or respiratory issues. However, it’s essential to remember that frequent washing at such high temperatures can diminish fabric quality, leading to wear and tear. Embracing Warm Water Interestingly, warm water (around 90°F to 110°F) strikes a balance between cleanliness and care for your linens. Most laundry experts advocate for warm washes as more than sufficient for removing body oils, sweat, and common stains without the risk of damaging your sheets. This temperature also significantly reduces energy consumption compared to hot washes, aligning with sustainable practices that many consumers are now embracing. Cold Water: The Eco-Friendly Option Recent advancements in detergent formulations have made cold washing (around 65°F to 80°F) a viable option for cleaning sheets effectively. Cold water has the distinct advantage of dramatically reducing energy use, thus appealing to eco-conscious individuals. A survey by the Energy Saving Trust indicates that roughly 90% of the energy used in a washing machine goes into heating the water. As a result, opting for cold washes not only conserves energy but also preserves your linens. Best Practices for Sheet Care Regardless of the temperature, there are several best practices to consider when washing sheets. First, always check the care label on your bedding before selecting a washing temperature. Some fabrics, like delicate silks or blends, may require specific temperatures to avoid damage. Additionally, using the appropriate detergent can enhance the washing process; look for detergents specifically formulated for cold washes if you opt for the eco-friendly route. Common Misconceptions About Sheet Washing One prevalent myth suggests that higher temperatures are synonymous with cleaner sheets, but this isn’t necessarily true. Over-washing at high temperatures can lead to fabric degradation, making sheets less comfortable over time. Therefore, understanding both the material and its required care can make a notable difference. For example, many consumers might not realize that bleach, while effective for some white linens, can cause colorful sheets to fade and become unsightly. Steps to Optimize Your Sheet Washing Routine 1. Pre-Treat Stains: Identify and treat any stains prior to washing. A quick spot treatment can work wonders. 2. Use a Mesh Bag: If you have delicate sheets, using a mesh laundry bag helps protect them during the wash cycle. 3. Avoid Overloading: Washing too many items at once can lead to improper cleaning. Stick to the recommended load size. 4. Drying Tips: After washing, consider air drying your sheets to maintain their quality. If you prefer using a dryer, select a low heat setting to prevent shrinking. What It Means to You Having clean sheets contributes significantly to overall health and wellness. By understanding the right temperature for washing sheets, you can ensure a comfortable sleep environment while prolonging the lifespan of your linens. Additionally, being mindful of energy consumption supports a broader commitment to sustainability, balancing cleanliness with eco-friendliness. Take Action for Cleaner Bedding Next time you wash your sheets, remember these tips on the ideal washing temperature. Embrace the changes that not only benefit your linens but also the environment. After all, who doesn’t love snuggling into a bed with fresh, clean sheets?

Terms of Service

Privacy Policy

Core Modal Title

Sorry, no results found

You Might Find These Articles Interesting

T
Please Check Your Email
We Will Be Following Up Shortly
*
*
*