Add Row
Add Element
Add Element
  • Home
  • Categories
    • Cleaning & Moving
    • Maintenance / Repairs
    • Remodeling & Construction
    • Landscaping / Outdoor
    • Security & Technology
    • Sustainability, Health & Safety
    • Interiors / Décor
    • Expert Interviews
    • DIY Home Projects
  • Search
Home Wise News!
Wise Insights, Reliable Contractor Advice & Hands‑on DIY Know‑how for Savvy Homeowners
May 21.2025
3 Minutes Read

7 Pro Tips to Keep Your Bathroom Tile Looking Brand-New

Luxurious bathroom with clean tiles and bright decor.

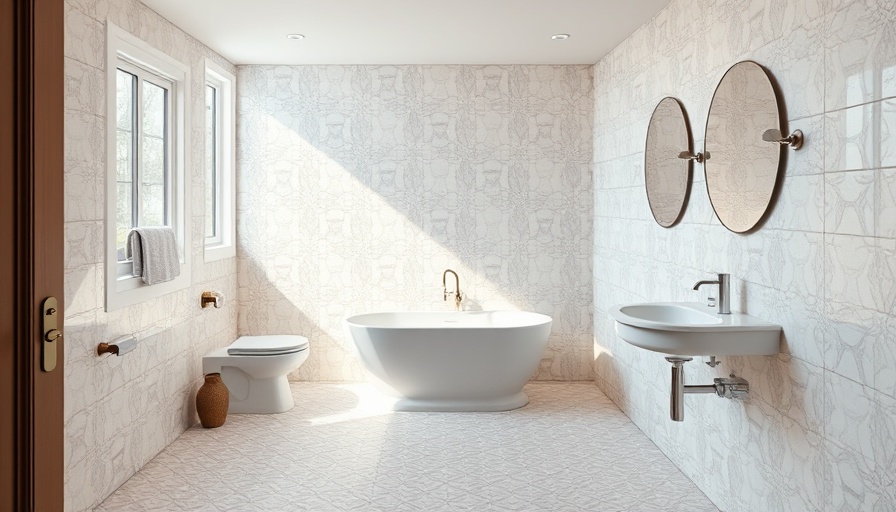
Unlocking the Secrets: Keeping Your Bathroom Tile Sparkling

Every homeowner knows that a shimmering bathroom tile can elevate the entire vibe of the room. But what happens when those once-glossy tiles begin to dull and lose their charm? Fear not! Professional cleaners have some time-tested tricks up their sleeves that can breathe new life into your bathroom tile. From clever cleaning solutions to maintenance techniques, let’s dive into what you can do to keep that tile looking brand-new.

1. Use a Gentle Acid for Tough Stains

Vinegar and baking soda are household staples that do more than just add flavor to your recipes. When mixed, these two can work wonders on stubborn stains. Create a paste with baking soda, apply it to the stained tiles, and then spritz some vinegar over it. Let the reaction sit for a few minutes before scrubbing gently. Rinse it off, and voila! Your tiles will shine bright like a diamond.

2. Routine Scrubbing is Key

It might feel like a chore, but regular scrubbing can prevent the buildup of grime on tiles. Aim for a thorough scrub every few weeks. Grab a soft-bristle brush and your cleaning solution of choice, and tackle those nooks and crannies that often get overlooked. Not only will your tiles look cleaner, but you’ll also prolong their lifespan.

3. Seal Your Grout

Grout can be the unsung hero—or villain—of your tile's appearance. Sealing your grout every six months will prevent moisture and stains from seeping in, keeping your tile looking fresh. A good-quality sealer can make the maintenance of your tiles a breeze and significantly reduce future cleaning efforts.

4. The Magic of Steam Cleaning

Investing in a steam cleaner can be a game-changer. This tool uses high heat and pressure, effectively eliminating dirt, mold, and bacteria without the need for harsh chemicals. Not only does steaming clean deeply, but it also sanitizes your bathroom. It’s like giving your tiles a luxurious spa day!

5. Employ the Power of Dish Soap

Yes, your kitchen doesn't have all the fun! A few drops of liquid dish soap mixed with warm water can effectively cut grease and grime buildup on tile surfaces. Simply use a microfiber cloth to wipe down the tiles after a shower or bath, and watch them maintain their sparkle!

6. Limit Harsh Cleaning Agents

While it may be tempting to grab the strongest cleaner upon encountering dirt, oftentimes less is more. Avoid abrasive chemicals that can strip the shine from your tiles and degrade the grout. Instead, opt for more natural products which tend to be gentler and still effective.

7. Consider Regular Professional Cleanings

For those DIY-averse, scheduling professional cleanings can be a lifesaver. Experienced cleaners can tackle long-term buildup and provide deep cleaning that is sometimes hard to achieve on your own. They also have access to top-notch cleaning products that are eco-friendly but still powerful enough to restore your tile's luster.

As much as we love a clean bathroom, there’s no denying that maintaining it can feel like climbing a mountain. However, by implementing these pro tips into your cleaning routine, your tiles can remain sparkling and inviting. So why not take a weekend afternoon and give your bathroom the love it deserves? Your tiles (and guests) will thank you! Interested in more home-maintenance tips? Stay tuned for upcoming articles!

DIY Home Projects

Write A Comment

*
*
Related Posts All Posts
07.20.2025

Gasoline 101: 10 Critical Insights for Homeowners and DIYers

Update Understanding Gasoline: 10 Essential Insights Gasoline is the lifeblood of many of our vehicles, yet most people remain in the dark about its intricacies. For homeowners and DIY enthusiasts, knowing the facts about gasoline can illuminate many decisions regarding vehicle maintenance and home projects. Below, we delve into ten crucial insights that will equip you with the knowledge you need when it comes to purchasing or storing gasoline. 1. Is Premium Gas Really Worth It? Many car owners often debate whether upgrading to premium gas is necessary. The answer lies in understanding octane ratings. Premium gasoline may resist detonation better than regular gasoline; however, unless your vehicle's manufacturer specifies it, you're unlikely to experience a notable difference in performance. More often than not, regular 87-octane gas will suffice for most vehicles. The crucial takeaway is to always follow your owner’s manual to determine the best fuel grade for your engine. 2. Gasoline Storage: How Long Can It Last? If you're a DIYer, you may need to store gasoline for lawn mowers or other small engines. Tightly sealed containers can keep gasoline usable for a season. Without proper sealing, however, ethanol can separate, leading to oxidation and gum formation—friends of neither your fuel system nor your engine. A fuel stabilizer can help maintain gasoline integrity, but it's ideal to invest in good containers for storing fuel. 3. The Truth About Gas Additives Ever find yourself in the gas station aisle pondering whether to grab a bottle of fuel additive? Here's a hint: most fuel additives promise more than they deliver. Although some formulations can help clean your fuel system, they do not significantly boost fuel efficiency. Look for those containing polyisobutylamine (PIBA) or polyetheramine (PEA), and avoid others that may not offer any real benefits. 4. Is Brand Name Gas Better? Historically, gas from major brands was deemed superior to that from lesser-known stations, primarily due to higher additive packages. However, this gap has narrowed significantly over the years. Today, many budget brands meet the same specifications as major ones, including detergents and additives mandated by the EPA. For consumers looking to save, opting for a less well-known brand may not be the risky choice it once was. 5. Can You Use Gasoline in Older Vehicles? If you drive a classic car, you might be concerned about using modern unleaded gasoline. Many older engines were designed for leaded fuel, which raises the question: is unleaded safe? In general, unleaded gas is acceptable, but using higher-octane fuels can help reduce engine knocking in older cars. Experiment with different grades if you experience any knocking, but always remember to consult your mechanic for tailored advice. 6. Gasoline and Environment: What You Should Know As environmental concerns grow, understanding how gasoline impacts air quality and pollution is vital. Gasoline combustion produces greenhouse gases, contributing to climate change. For eco-conscious consumers, alternatives such as electric vehicles or biofuels provide pathways to reducing carbon footprints. Knowing the impact of your fuel choice is crucial in today’s climate-conscious world. 7. Safety Measures When Handling Gasoline Handling gasoline may seem routine, but it’s essential to prioritize safety. Always store gasoline in approved containers, away from ignition sources, and never fill tanks near running engines or sparks. Wearing gloves can help protect your skin from chemical exposure. This simple protocol can prevent accidents and ensure your DIY projects go off without a hitch. 8. Ethanol in Gasoline: What You Need to Know Much of the gasoline sold today contains ethanol, which is derived from corn and promotes greener fuel options. However, ethanol can also attract moisture, which can harm small engines. If you’re using gasoline in lawn equipment or older cars, consider using fuel without ethanol to avoid potential damage. 9. The Role of Detergents in Your Gasoline Detergents are crucial in keeping your engine clean by preventing deposits that might affect performance. Major gasoline brands often promote their detergent additives, claiming they offer superior cleaning. While all brands must meet minimum EPA standards, opting for brands known for better detergent protection can help maintain long-term engine health. 10. Preparing Your Engine for Seasonal Changes As seasons change, prepare your gasoline consumption accordingly. In colder months, using a fuel blend designed for winter can aid in starting your vehicle. Conversely, if you're storing fuel during the off-season, ensure it’s treated with a stabilizer to maintain its freshness. Planning based on usage patterns can save you money and keep your engines running effectively. Conclusion: Fuel Up with Confidence Armed with this knowledge about gasoline, you can make smarter decisions both in fuel purchases and maintenance of your equipment. From choosing the right gas for your vehicle to safely storing fuels, your understanding will pave the way for DIY success and confident vehicle operation. Embrace this newfound knowledge and fuel up for your next project!

07.19.2025

Explore Easy Ways to Make Your Home Feel Brand New Again

Update Revitalize Your Home with Simple Updates Have you ever walked into your house feeling uninspired by your surroundings? This is a common sentiment shared by many homeowners, as time can make even the coziest spaces feel lackluster. Thankfully, there are practical and affordable ways to rejuvenate your home without the need for expensive renovations. Whether you're based in Louisville, Kentucky, or anywhere across the U.S., these tips will breathe new life into your living space. Transform Your Bathroom: Small Changes, Big Impact Your bathroom is not just a utility space; it's a sanctuary where you start and end your day. Minor updates can make a significant difference. For instance, consider replacing old fixtures like faucets and showerheads. Adding floating shelves enhances storage while lending a modern touch. If you have a budget for more impactful changes, enlisting a local bathroom remodeler can help you achieve a stylish makeover, potentially incorporating a walk-in shower or chic tiles. Rearranging for Optimal Flow Sometimes all it takes is a fresh layout to rekindle your love for a space. Rearranging furniture can shift the energy of a room dramatically. Try moving your couch or chairs to different positions. This new arrangement can create inviting conversation areas and enhance the overall flow of your living space. If you're overdue for an upgrade, consider investing in a few new furnishings that reflect your personality—like a funky chair or a sleek coffee table—to reinvigorate the atmosphere. Declutter for a Breath of Fresh Air Clutter has a knack for making rooms feel cramped and chaotic. Dedicating some time to declutter each space can transform your home into a more tranquil environment. Start small: tackle one room at a time and sort through items to keep, donate, or recycle. Consider effective storage solutions, such as bins or baskets, to maintain organization. A tidy home not only looks better but also feels more relaxing and enjoyable to inhabit. Let There Be Light! Lighting plays a vital role in setting the mood of your home. Dull lighting can sap the energy out of any room. Upgrading to brighter LED bulbs or fashionable light fixtures can significantly enhance your spaces. Incorporate layered lighting options—floor lamps, pendant lights, or under-cabinet lighting—to create a beautifully illuminated and inviting atmosphere. By implementing these straightforward strategies, you can elevate your home's feel without extensive renovations. Start small, and you'll be amazed at how these changes can bring back the excitement and comfort in your home. Enhance your home further by exploring more DIY projects and tips—your ideal living space awaits!

07.16.2025

DIY Heat Pump Thermostat Wiring Made Easy: A Comprehensive Guide

Update Wiring Your Heat Pump Thermostat: An Empowering DIY Journey When it comes to home improvement, many homeowners shy away from projects that seem overly technical—especially when it involves electrical systems. Yet, wiring a heat pump thermostat is a task well within the reach of most DIY enthusiasts. With the right tools and a little guidance, you can significantly improve your home’s heating efficiency with this small yet impactful upgrade. Essential Tools and Materials You’ll Need Before you start, gather all the necessary tools and materials to ensure a seamless installation process. You will need: Marker for labeling: To clearly mark wires for easy reconnection. Non-contact voltage tester: Safety first! This tool ensures that the power is off before you proceed. Screwdrivers: Both Phillips and small flathead screwdrivers will be handy. Wire strippers: Make sure they are available to strip wires as needed. Electrical tape: This will help secure any connections made. Your heat pump thermostat: The new component that will enhance your home’s efficiency. Mounting screws and hardware: Often included with your new thermostat. Step-by-Step Instructions to Wire Your Heat Pump Thermostat With your tools ready, let’s walk through the steps to successfully wire your new heat pump thermostat. Step 1: Power Down Your safety is paramount. Start by finding the disconnect switch to your furnace or air handler, typically located near the unit. If needed, you can also switch off the circuit breaker at your electrical panel or turn off the main breaker. Step 2: Assess the Existing Setup After ensuring the power is off, remove the faceplate of your existing thermostat. Use your non-contact voltage tester again to confirm that there’s no power. Count the wires attached to your old thermostat; according to Micah Sherman, an HVAC technician from Frontdoor, ensure that you have at least five wires available for use in your new thermostat. A crucial tip: take a picture of the current setup, which will serve as a reference during installation. Step 3: Remove the Old Thermostat Using your flathead screwdriver, carefully remove the wires from the terminal block. Label each wire with tape and marker to avoid confusion later. Finally, unscrew the mounting screws to detach the old thermostat from the wall. Step 4: Install the New Thermostat Now it’s time to install your new thermostat. Thread the thermostat wires through the new thermostat base before leveling and screwing it into the wall. Attach the wires onto the new terminal block, following the diagram provided with your new device. This step is crucial for ensuring that your thermostat operates correctly. Step 5: Power Up and Test Once everything is connected, turn the power back on. Test the thermostat’s functionality by adjusting settings to ensure that your heat pump is responding correctly. A successful upgrade will help you better manage heating and cooling needs, ultimately enhancing comfort in your home. Why You Should Consider Upgrading Your Thermostat A new thermostat can provide numerous benefits aside from improved aesthetics. Smart thermostats, for example, can learn your schedule and adjust temperatures accordingly, saving energy and reducing utility costs. Additionally, a more modern device typically comes with enhanced functionality and features, aligning well with today’s technology-driven lifestyles. DIY Confidence: A Key Takeaway Wiring a heat pump thermostat is not merely a task; it’s an empowering experience that can foster confidence in handling home repairs. By taking on this straightforward project, homeowners unlock the potential to upgrade and maintain their homes effectively. The skills learned during such DIY projects can open doors to tackling more complex home maintenance tasks in the future. If you’re ready to enhance energy efficiency and add control over your home’s environment, do not hesitate to tackle this project. Your home will thank you for it!

Terms of Service

Privacy Policy

Core Modal Title

Sorry, no results found

You Might Find These Articles Interesting

T
Please Check Your Email
We Will Be Following Up Shortly
*
*
*