UPDATE
  • Home
  • Categories
    • Cleaning & Moving
    • Maintenance / Repairs
    • Remodeling & Construction
    • Landscaping / Outdoor
    • Security & Technology
    • Sustainability, Health & Safety
    • Interiors / Décor
    • Expert Interviews
    • DIY Home Projects
Home Wise News!
Wise Insights, Reliable Contractor Advice & Hands on DIY Know How for Savvy Homeowners
June 24.2025
3 Minutes Read

Stylish Outdoor Bug Zappers You Need: Keep Mosquitos Away!

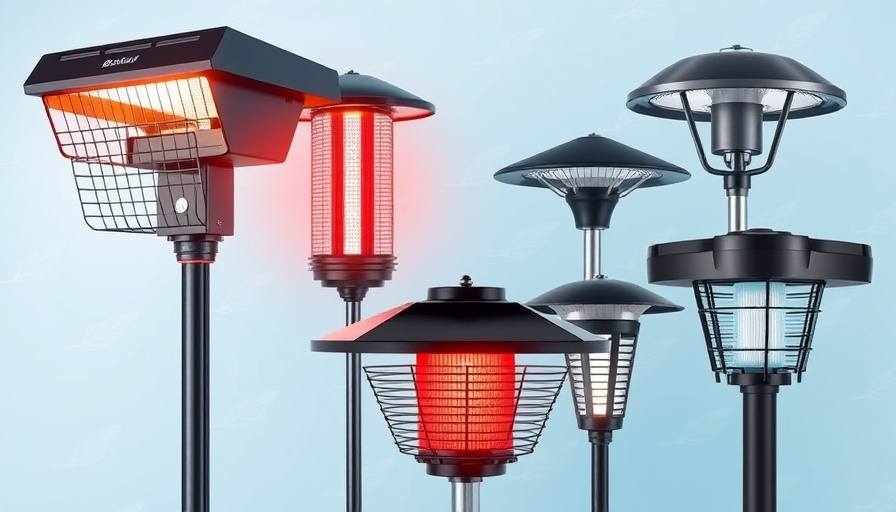
Stylish outdoor bug zappers with modern designs on a feathered background.

Introducing Stylish Outdoor Bug Zappers: Function Meets Fashion

When warmer months arrive, so do the pesky mosquitoes ready to ruin your evening barbecue or garden party. While many battle these critters with lesser contraptions, why not invest in stylish outdoor bug zappers that not only keep bugs at bay but also enhance your yard's aesthetic? We’ve scoured some of the best deals out there to find bug zappers that balance efficacy with design, making your outdoor space both functional and fashionable.

Why Choose a Bug Zapper?

Bug zappers are a preferred choice for many homeowners seeking to control mosquito populations. Unlike traditional repellents, which can be less effective and often leave a sticky residue, outdoor bug zappers deploy UV light to lure in insects and eliminate them on contact. Recent innovations have made these devices more efficient, making them essential for anyone looking to enjoy their backyard without swatting away bugs incessantly.

The Fashion Factor: Bug Zappers That Don't Cramp Your Style

In the past, bug-zapping technology was often synonymous with clunky, unattractive designs. Thankfully, the market has evolved. Design-conscious consumers can now find a plethora of outdoor bug zappers that blend seamlessly into gardens or patios. From chic lantern styles to sleek, modern units, these products serve their purpose while complementing your landscaping. Imagine sipping your evening iced tea knowing that your bug zapper doubles as a trendy garden light.

Top Picks for Stylish and Effective Bug Zappers

Here are some remarkable choices that combine good looks with power:

  • Solar-Powered Lantern Zapper: Perfect for eco-conscious homeowners, this lantern not only zaps bugs but also uses solar energy to light up your yard at night.
  • Modern Wall-Mounted Zapper: For those who prefer a minimalist look, these wall-mounted zappers offer a sleek design that blends well against any backdrop.
  • Rustic Table Lamp Zapper: Ideal for garden parties, this zapper imitates an elegant table lamp while keeping pests away.

Future Innovations: What's Next in Bug Zapping?

As technology evolves, so does the sophistication of bug zappers. Future innovations may feature smart capabilities that connect with your smartphone, allowing you to control lighting and zapping times remotely. Imagine being able to adjust your bug zapper to turn on or off at specific intervals to maximize efficiency. Furthermore, the integration of atmospheric sensors could trigger zappers only when pests are detected—an intuitive approach to pest control.

Challenges in the Bug Zapper Market

Despite the advancements in indoor and outdoor insect control, there are still challenges to consider. Bug zappers can sometimes attract beneficial insects, leading to an imbalance in the ecosystem. Select models carefully based on their drawing power and light spectrum to mitigate this concern. Additionally, some homeowners worry about using electric devices outdoors. The answer lies in proper installation and regular maintenance, ensuring that your zapper is effective and safe.

DIY Bug Zapper Enhancements: Customize Your Experience

For the handy type, consider personalizing your bug zapper for enhanced performance. Adding a reflective material around your zapper can increase its effectiveness by directing more light toward mosquitoes. Furthermore, keeping your zapper clean will extend its life and ensure it operates efficiently, reducing the need for replacements.

Final Thoughts: Transform Your Outdoor Experience

Investing in a stylish bug zapper not only protects your outdoor gatherings but also elevates your garden's look. As you gear up for summer, consider upgrading to one of these chic models that keep the mosquitoes away while showcasing your style. With options that adapt to every taste and preference, transforming your yard into a bug-free oasis is easier than ever.

Remember, enjoying the summer means taking proactive steps towards a welcoming outdoor environment. Why not start now with an updated bug zapper? Your future self (and your friends and family) will thank you!

Landscaping / Outdoor

0 Comments

Write A Comment

*
*
Please complete the captcha to submit your comment.
Related Posts All Posts
05.21.2026

Build a Thriving Garden: How to Fill a Raised Bed Affordably

Update Transform Your Garden: Affordable Ways to Fill Raised Beds As homeowners venture into gardening, one of the most common hurdles is the cost associated with filling raised garden beds. Purchasing soil can lead to sticker shock, especially if your ambitions involve multiple beds or large garden areas. However, there’s no need to break the bank! With some creativity and resourcefulness, filling your raised garden bed can be both economical and effective. Why Traditional Soil Is So Expensive It's no secret that buying bags of soil can quickly get pricey. A typical 4 ft x 8 ft raised bed that is a foot deep could require over 20 bags of soil, leading to significant costs. Instead, it's essential to explore budget-friendly methods that not only save money but also create a rich, organic growing medium. Layering: Your Secret Weapon The cornerstone of filling a raised bed economically is layering. By using a mix of organic materials and soil, you can fill your bed cost-effectively while ensuring it remains a fertile habitat for your plants. Start with bulky materials like sticks, cardboard, or dry leaves to create a substantial base that will decompose over time. What You Should Use Bulky Organic Materials: Items like fallen branches, untreated wood scraps, and dried leaves can deliver volume without cost. These materials will break down gradually, enriching your soil. Cardboard: Not only does cardboard decompose, but it also acts as a weed barrier when placed at the bottom of your bed. This helps to ensure your plants aren't competing with weeds for nutrients and water. Compost: Homemade compost or local composting resources can add excellent nutrients. Some municipalities even offer free compost to community members, which can be a goldmine for your raised garden. What to Avoid: Common Mistakes While resourcefulness is key, there are materials that can cause more harm than good when filling your raised beds. Avoid using gravel or rocks as a bottom layer. Contrary to belief, these can hinder drainage instead of helping it. Landscape fabric and synthetic materials should also be avoided to ensure the longevity and productivity of your garden. Building a Living Soil Ecosystem When filling your raised garden bed, remember that you're crafting an ecosystem. The goal is to create healthy living soil that features a balance of nutrients, good drainage, and microbial health. Focus on organic materials that will feed your plants over time and support healthy microbes, worms, and fungi. Insider Tips: Networking for Cheap Solutions Don't hesitate to tap into your local community for resources! Many homeowners have leftover materials that can be repurposed in your garden. Local garden groups on Facebook or apps like NextDoor can be invaluable for finding free or low-cost organic materials. Additionally, local tree services are often looking to offload wood chips, which can add bulk to your gardening projects at no cost. Long-Term Strategies for Cost Savings Instead of filling your raised bed all at once, consider a gradual approach that combines layering with seasonally adding compost. Start your garden now with the top areas and allow the lower layers to decompose and enrich your soil over time. This not only saves money but also supports healthier plants. Final Thoughts on Sustainable Gardening Gardening doesn't have to be an expensive hobby. By employing strategic layering and utilizing what you have on hand, you can create a productive raised bed garden without significant investment. As you cultivate your plants, remember that gardening is a journey. Watch as your soil improves, your garden thrives, and you develop skills that will grow your gardening passion. So, are you ready to transform your gardening experience? Implement these strategies today to fill your raised garden beds with creativity and confidence!

05.15.2026

Explore Our Transformative Journey of Back Patio Before Renovations

Update Transforming Outdoor Living Spaces: Why It Matters When it comes to enhancing the value of your home, the outdoor spaces can often be an untapped goldmine. Many homeowners overlook the potential of their back patio areas, relegating them to storage for old furniture and gardening equipment. But what if these forgotten spots could be transformed into stunning outdoor retreats? In this article, we’ll explore the preliminary state of our back patio spaces and outline what it takes to revitalize them, offering you insights that could inspire similar improvements in your own home. What’s Really Going On with Your Back Patio? So, what exactly does our back patio look like before the big transformation? Picture cluttered areas with mismatched furniture, overgrown plants, and little to no cohesion in design. This is a common scenario that many homeowners find themselves in. Often, the potential for outdoor living is hidden beneath layers of neglect. Our initial observations revealed several issues too familiar among homeowners: a lack of functional layout, faded furniture, and plant choices that don’t quite match the aesthetic vision we had in mind. The fallacy many of us fall into is thinking that these spaces can only be enjoyed during warmer months. However, with a little creativity and effort, they can serve as an extension of our living spaces year-round. Making the Most of Your Outdoor Spaces As we embark on the renovation journey, there are valuable insights to consider that can make a significant impact during your own projects: Assess What You Have: Before diving into renovations, take a good hard look at your outdoor space. Identify what furniture can be repurposed, what plants need care, and aspects that require complete replacements. This provides a solid foundation for design ideas. Functionality is Key: When planning your renovations, think about how you want to use the space. Whether it’s for entertaining, relaxation, or gardening, ensuring that the layout serves your needs is crucial. Consider adding features such as outdoor seating, a fire pit, or even an outdoor kitchen if space allows. Consider Seasonal Changes: An outdoor space isn’t just for summer. Planning for elements that can adapt to different seasons, like a pergola or umbrella for shade, can increase usage throughout the year. Accessories such as outdoor heaters can make a cozy winter gathering possible. Healthy Outdoor Spaces Outdoor spaces are not only about aesthetics; they also play a vital role in health and well-being. Connecting with nature can reduce stress, improve mood, and even increase productivity. A well-planned patio can include elements like fragrant plants, relaxing seating, and perhaps a small water feature to create a soothing environment. Ensuring that your outdoor area is inviting can encourage more family time outdoors, away from screens and stressors. A Journey of Transformation: The Big Reveal Awaits The journey to transform our back patio spaces is about more than just physical improvements. It’s an opportunity to redesign how we interact with our homes and ourselves. In upcoming installments, we’ll dive into the specific renovation steps we will take, share our successes, and even our failures, and see the progress unfold. For homeowners considering a similar project, stay tuned; you're not alone in this journey! Your Outdoor Space Awaits! As we prepare to undertake this renovation, take a moment to consider your own back patio. What potential does it hold? We hope to inspire you to envision possibilities and dive into your outdoor transformation. Remember, every great journey begins with that first step.

05.13.2026

Build a Stunning DIY Wire Trellis for Your Trumpet Vines

Update Transform Your Outdoor Space with a Simple DIY Wire Trellis If you've ever admired the beauty of climbing plants and thought about how to integrate them into your home, a DIY wire trellis might just be the perfect solution. With a little guidance, you can create a stunning vertical garden feature that not only enhances your home's aesthetics but also supports your favorite climbing vines. Let's dive into the process of building an easy wire trellis, specifically tailored for trumpet vines, while keeping things straightforward. Why Choose a Wire Trellis for Trumpet Vines? Trumpet vines are renowned for their vibrant flowers and rapid growth, making them an excellent choice for adding life to dull exteriors. A wire trellis provides the necessary support for these vigorous climbers, ensuring their growth isn't just upward but also visually appealing. Unlike heavier structures, a wire trellis is lightweight and can be customized to fit any wall space, allowing for creative designs that enhance your outdoor decor. Gathering Your Materials Before embarking on this DIY trellis adventure, it's essential to gather the right materials. Here's what you'll need: Wire Trellis Kits: These make installation simpler and save time. Eye Hooks: For securing the wire to the wall. Clear Silicone Caulk: To ensure a weatherproof seal. Tape Measure: Precision is key in any DIY project. Drill: For anchoring eye hooks into your wall. Ferrules (optional): While not necessary, they can tidy up the ends of the wire. Planning Your Trellis Layout The most crucial stage of building a wire trellis is planning your design. Instead of complicated math, keep it simple! Decide how many diamond shapes you want across the trellis and their dimensions. For instance, if you want three diamonds, ensure they are wide enough to prevent overcrowding as the vines grow. A width of 20 inches for each diamond is optimal. To find placements for your eye hooks, measure the desired height and spacing to visualize your trellis layout before any installation begins. The Installation Process: Step by Step This project can be completed in just a few hours, even for DIY novices! Once you have your plan set, follow these steps: Install Eye Hooks: Drill holes into your wall at the marked locations and secure the eye hooks, filling each hole with silicone caulk for stability. Thread the Wire: Pass your wire through the eye hooks following the diamond pattern you mapped out. Ensure the wire is taut to provide maximum support for the vines. Plant Your Trumpet Vines: Finally, place the vines at the base of the trellis, allowing them to climb and fill in as they mature. Benefits of a DIY Trellis Creating a wire trellis isn’t just a fulfilling DIY project—it yields several benefits: Aesthetic Appeal: A well-constructed trellis can dramatically improve the beauty of any outdoor wall. Healthy Plant Growth: Providing ample support helps your vines flourish and prevents damage. Cost-Effective: DIY trellises are inexpensive compared to store-bought options and can be tailored to fit any space. Conclusion: Bringing Life to Your Outdoor Area Building a DIY wire trellis for your trumpet vines is not only a fun project but also a chance to transform your outdoor space dramatically. With just a few materials and some time, you get a beautiful backdrop for blooming plants. Remember, the success of your trellis does not solely depend on perfection in construction but on the care and love you put into your plants as they grow. Start your DIY journey today and watch as your outdoor area becomes a vibrant oasis!

Terms of Service

Privacy Policy

Core Modal Title

Sorry, no results found

You Might Find These Articles Interesting

T
Please Check Your Email
We Will Be Following Up Shortly
*
*
*