Add Row
Add Element
UPDATE
Add Element
  • Home
  • Categories
    • Cleaning & Moving
    • Maintenance / Repairs
    • Remodeling & Construction
    • Landscaping / Outdoor
    • Security & Technology
    • Sustainability, Health & Safety
    • Interiors / Décor
    • Expert Interviews
    • DIY Home Projects
Home Wise News!
Wise Insights, Reliable Contractor Advice & Hands on DIY Know How for Savvy Homeowners
August 13.2025
3 Minutes Read

Transform Your Driveway: The Affordable DIY Crack Repair Guide

Concrete driveway cracks close-up for DIY repair guide.

Transform Your Driveway: The Affordable DIY Crack Repair Guide

Cracks in a concrete driveway can be unsightly and troublesome, but fixing them doesn’t have to break the bank. With a modest budget of $10 to $60 and just a few hours of work, you can enhance your property’s aesthetic and value. This comprehensive guide unpacks a practical approach to driveway crack repair, helping you effectively tackle those dastardly splits in your concrete surface.

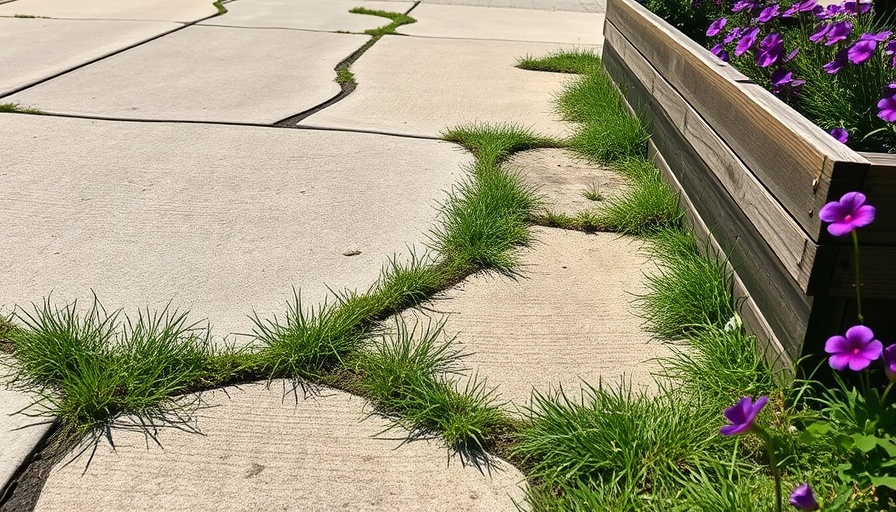
Why Do Driveways Crack?

Understanding why your driveway is cracking can inform your repair strategy. Concrete can crack due to several factors including temperature changes, moisture, heavy traffic, and even soil conditions beneath the surface. For homeowners interested in DIY projects, knowing these factors not only helps in effective repairs but also in preventing future issues. For instance, if your driveway is subjected to a lot of moisture, consider applying a sealant that helps repel water to mitigate cracking in the first place.

The Essential Tools and Materials You Need

To get started, you will need a few tools and materials:

  • Tools: Caulk gun, chip brush, leaf blower or broom, pocket knife, screwdriver, shop vac, spray bottle.
  • Materials: Backer rod, concrete crack filler, disposable gloves, sand, small dowel.

Gathering these items before you start will accelerate your repair process and ensure you don’t have to pause for missing materials.

Step-by-Step Guide to Fixing Driveway Cracks

Follow these steps to repair your driveway cracks like a pro!

Step 1: Choose Your Crack Filler Wisely

There are two primary types of concrete crack fillers: self-leveling and non-sag. Self-leveling fillers are ideal for filling narrow and irregular cracks as they flow into place with ease. Alternatively, non-sag fillers are thicker, making them suitable for filling larger cracks or vertical surfaces. For most homeowners, self-leveling options provide the best results with minimal effort.

Step 2: Preparation is Key

Before applying the filler, ensure the area is clean and dry. Use tools like a shop vac and chip brush to clear out debris and weeds. A properly prepared surface allows the filler to adhere better, ensuring a longer-lasting repair.

Step 3: Filling in Cracks

When you’re ready to fill, cut your caulk tube at a steep angle. Filling the crack thoroughly is crucial, so pour the filler generously, allowing it to settle into place. For deeper cracks, be sure to add a backer rod first, as this will provide support and continuity for the filler.

Step 4: Final Touches

After filling the crack, let the filler dry per the manufacturer’s instructions. Depending on the weather conditions, this might vary. Keeping the area clear of foot traffic and moisture during this time is essential to achieving a successful repair.

Step 5: Seal Your Driveway

For enhanced durability, consider sealing your driveway once repairs are complete. Sealing not only protects your recent repairs but can also improve the overall look of your driveway, extending its lifespan. Most sealants should be applied once the temperature is consistently above 60°F and there’s no rain expected.

Benefits of Tackling DIY Driveway Repairs

DIY driveway repairs present numerous advantages. Firstly, homeowners save money by avoiding costly contractor fees. Secondly, engaging in DIY projects empowers you with a sense of accomplishment and equips you with handy skills for future home maintenance.

Furthermore, the flexibility of doing it at your convenience eliminates the hassle often associated with scheduling laborers. Investing a few hours now not only pays off in current repairs but also in maintaining property value and future peace of mind.

Conclusion: Ready, Set, Repair!

Your driveway is one of the first things visitors see, and maintaining it is essential. With these practical tips, you can effectively repair cracks and enhance your home's curb appeal without incurring hefty expenses. Don’t underestimate the impact that tidy, well-maintained concrete can have on your property’s value!

If you're passionate about home maintenance, consider signing up for a newsletter or a DIY workshop that details more projects like this, ensuring you continue to develop your handyman skills. Remember, the best repairs are the ones you take on yourself!

DIY Home Projects

Write A Comment

*
*
Related Posts All Posts
09.26.2025

Create Stunning Logos for Free with FLPMarkable: The Ultimate Guide

Update Unlocking Your Brand's Potential with FLPMarkable A logo is not just a visual element; it is a powerful representation of your brand's identity. Every small business, startup, freelancer, and community project needs a unique logo that conveys its values and resonates with its target audience. Yet, hiring a professional designer often comes with a hefty price tag. FLPMarkable emerges as a cost-effective solution for those looking to create high-quality logos without breaking the bank. What Sets FLPMarkable Apart? FLPMarkable is a revolutionary free logo library designed to democratize logo design. With a treasure trove of customizable templates, FLPMarkable provides users from all walks of life the ability to craft professional logos quickly. The library encompasses a vast array of styles suitable for industries like technology, health, and education, ensuring everyone can find the right aesthetic for their brand. The intuitive template customization options empower even novice designers to create compelling logos that reflect their unique brand identity seamlessly. Key Features of FLPMarkable You Shouldn't Miss When using Free Logo Library FLPMarkable, users are presented with several standout features that enhance the design experience: Wide Template Variety: Explore numerous pre-designed styles that serve as a solid foundation to launch your creative journey. Customization Options: Enjoy the freedom to adjust colors, fonts, and layouts effortlessly with user-friendly drag-and-drop tools. Multi-format Export: Save your logo in formats appropriate for various applications; high-resolution PNGs for the web or SVGs for print ensure versatility. Royalty-Free Usage: Many templates are free for commercial use, allaying copyright concerns and simplifying usage rights. Preview Tools: Test your logo in real-world scenarios, ensuring it looks fantastic on everything from business cards to website headers. Step-by-Step Guide to Creating Your Logo To maximize your experience with FLPMarkable, follow these straightforward steps: Define Your Brand Identity: Establish the core values of your brand and understand your target audience. What emotions do you want your logo to evoke? Explore Templates: Navigate through the selection to find a template that intrigues you; don’t rush the process here. Customize Thoroughly: Make your logo uniquely yours by tweaking fonts, icons, and layouts until they align with your vision. Test Your Logo: Preview your design in varied contexts to see how it scales and resonates in different formats. Export in Multiple Formats: Secure various formats of your logo for both digital and traditional applications. Apply Consistently: Use your logo across all platforms and materials to build a strong brand presence. Tips to Make Your Logo Truly Remarkable To ensure your logo doesn’t just blend in with the crowd, apply these expert tips: Think Beyond Templates: While templates are a great starting point, don’t hesitate to innovate. Add elements that truly reflect your brand’s personality. Simplicity is Key: Often, the most effective logos are the simplest ones. Aim for clear designs that are easily recognizable. Color Matters: Choose colors that resonate with your message and evoke the intended emotions. Get Feedback: Once your logo is ready, consider gathering opinions from your target audience to gauge their impressions. Why FLPMarkable Matters to You FLPMarkable represents a shift in how individuals and small businesses approach branding. With its user-centric design and accessible tools, it empowers anyone, regardless of their technical skills, to put their best foot forward in a competitive marketplace. By equipping users with necessary design tools, FLPMarkable encourages creativity while fostering a sense of ownership over one’s brand identity, thus paving the way for market success. Your Brand, Your Design, Your Future Ready to take your logo creation to the next level? Embrace the possibilities with FLPMarkable and create a logo that not only captures attention but also embodies what your brand stands for. Start designing your logo today, and watch your brand identity come to life!

09.26.2025

Quickly Master Lahmacun: Create This Turkish Delight in 6 Minutes!

Update Discover a Delicious and Quick Lahmacun Recipe When it comes to Turkish cuisine, few dishes capture the essence of flavor and simplicity as effectively as lahmacun. Known as Turkish pizza, this dish consists of a thin flatbread topped with a delightful blend of minced meat, hearty vegetables, and aromatic herbs. While it boasts strong connections to Turkey, it's also embraced by neighboring cultures in Armenia, Lebanon, and Syria, making it a beloved street food. Why Make Lahmacun in Just 6 Minutes? You may be wondering how this delicious dish can be prepared so quickly. The secret lies in its thin dough and the efficient assembly of ingredients. Dr. Maya's innovative recipe allows you to craft a piping hot lahmacun in around six minutes. As soon as your oven reaches 250°C (or 480°F), the well-prepared flatbread cooks to perfection in just four to five minutes. This speedy preparation makes it perfect for a quick lunch or an inviting dinner! Ingredients You’ll Need Creating a traditional lahmacun doesn’t require elaborate ingredients. You'll need basic essentials that are typically found in any kitchen: Dough: flour, yeast, water, and salt Topping: ground lamb or beef, onions, tomatoes, red peppers, parsley, tomato paste, olive oil, salt, black pepper, and paprika These ingredients not only showcase the vibrant flavors of the dish but also offer a nutritious meal that is light yet satisfying. Perfecting the Dough To achieve that signature crispy texture, the dough must be smooth and elastic. Begin by mixing flour, yeast, salt, and warm water, then knead the mixture for about eight to ten minutes. Allow the dough to rest for half an hour, which will make it easier to roll into thin circles, ideally 20 to 25 centimeters wide. Remember, the thinner the dough, the quicker the bake! Crafting the Flavorful Topping The topping is where the magic happens. A fine blend of minced meat, vegetables, and spices creates a mouth-watering spread. 1. Process the meat with onions, tomatoes, and peppers until you achieve a fine texture without large chunks, which can burn during cooking. 2. A touch of fat in the meat—around 20%—is essential to maintain moisture. Lastly, add parsley, tomato paste, and spices to elevate the flavor profile. Spread this mixture evenly to ensure a consistent taste throughout the lahmacun. Baking to Golden Perfection Now comes the fun part! Place the rolled-out dough on a baking tray or skillet. Spread the topping, ensuring a slim layer that covers the dough without overpowering it. Bake in the preheated oven for 4 to 5 minutes, or on the stovetop covered, for 5 to 6 minutes. The goal is to achieve crispy edges and a well-cooked topping. Serving Suggestions to Brighten Your Meal Lahmacun is typically served with fresh herbs and a hint of acidity from lemon. Fresh parsley, onions tossed with sumac, and slices of tomatoes are popular accompaniments. A classic pairing is a glass of ayran, a refreshing yogurt-based drink. To savor the flavors, squeeze lemon juice over your lahmacun, add the greens, and roll it like a wrap! The Nutritional Perks of Lahmacun On average, a medium-sized lahmacun contains about 350 to 400 calories, offering a healthy balance of protein, carbohydrates, and fats. With approximately 15-18 grams of protein and 40-45 grams of carbs, this dish provides staying power without the heaviness. Thanks to the fresh ingredients, you also gain a boost of nutrients and fiber, making it a wholesome dining option. Wrapping It Up Lahmacun is more than just a dish; it’s a culinary tradition that brings people together over shared meals. Whether enjoyed as a quick snack or a hearty meal, this easy recipe demonstrates how accessible Turkish cuisine can be. Give it a try, and you may discover a new family favorite! By trying this quick lahmacun recipe, you can enjoy an authentic taste of Turkey right in your home, proving that delightful meals don’t have to be time-consuming. So gather your ingredients and experience the joy of making lahmacun today!

09.26.2025

Unlock the Secret to Cleaning Your Glass Oven Door Like a Pro

Update The Secrets to a Gleaming Glass Oven Door If there's one thing that can turn even the most passionate home chef into a frustrated grump, it's a dirty oven door. Nothing says "I cook non-stop" quite like streaky, greasy glass that you can barely see through. Luckily, I'm here to shine a light on a smarter way to restore that pristine glow – without needing an advanced degree in chemistry! Understanding Your Oven Door First things first: not all oven doors are created equal. Most glass oven doors have a heat-resistant surface designed to withstand the rigors of cooking. But that same surface might also be prone to grime buildup, especially if you're a frequent user (and I sure hope you are!). The trick lies in understanding what to use and what to avoid; harsh chemicals can do more harm than good. Let’s Talk Tools and Ingredients Before diving into the scrubbing, gather your cleaning arsenal. Most of these items you likely have at home already: White Vinegar: Nature's magic potion for cleaning. It cuts through grease and eliminates odors. Baking Soda: A gentle abrasive that scrubs away crusted residues without scratching your glass. Microfiber Cloths: Say goodbye to paper towels. These beauties trap dirt and leave a shiny finish. Spray Bottle: For easy application of your vinegar solution. Soft Sponge: Ideal for those tougher stains that require some extra elbow grease. The Cleaning Process: An Easy Step-by-Step Let's get to the fun part! Cleaning your glass oven door can be as easy as following these simple steps: Prepare Your Solution: Mix equal parts of white vinegar and water in your spray bottle. Shake gently to combine. Spray and Wait: Generously spray the solution on the glass surface, focusing on areas with heavy buildup. Let it sit for about five minutes to loosen dirt. Scrub-a-Dub-Dub: Take your microfiber cloth or sponge and gently scrub the glass. For stubborn stains, sprinkle some baking soda directly on the glass and scrub again. Wipe Away the Grime: Rinse your sponge, wipe off the cleaning solution, and marvel at your sparkling clean oven door! Final Polishing: Use a dry microfiber cloth to buff the glass for an extra shiny finish. Elevate Your Cleaning Game Now that you’ve mastered the basics, why not kick it up a notch? Regular maintenance can make the future cleans a breeze: Designate a Cleaning Day: Pick a day each week or month to do a thorough cleaning check on the oven. It’s much easier to wipe when the grime is still fresh! Cover Up: Consider using an oven liner to catch drips and spills. They can usually be wiped clean, saving you time and effort. Use Reflective Cookware: If you can, opt for reflective pans that don’t absorb heat as much. Less cooking residue will mean fewer messes! Common Myths Busted! Cleaning your oven door shouldn’t require elaborate procedures or mysterious potions. Here are some common misconceptions debunked: Myth 1: Glass cleaner is the best option. While it works wonders on mirrors, it might leave streaks if used on your oven door. Myth 2: Vinegar can ruin the surface. Not true – it’s safe and effective for cleaning when used properly. Myth 3: Cleaning appliances is a one-time job. Regular upkeep is key! No one likes to clean an oven door that looks like a science experiment gone wrong. Conclusion: Shine On! In the grand scheme of home care, a clean glass oven door is a small yet impactful task. Regular attention will prevent grime from becoming a formidable foe, allowing your kitchen to shine with pride. Plus, a sparkling clean oven door can elevate the overall aesthetic of your cooking space. Embrace this small but mighty cleaning routine, and watch it transform your kitchen experience. So roll up those sleeves, gather your basic cleaning tools, and get ready to beam with pride at your newly shimmering glass oven door!

Terms of Service

Privacy Policy

Core Modal Title

Sorry, no results found

You Might Find These Articles Interesting

T
Please Check Your Email
We Will Be Following Up Shortly
*
*
*