Add Row
Add Element
UPDATE
Add Element
  • Home
  • Categories
    • Cleaning & Moving
    • Maintenance / Repairs
    • Remodeling & Construction
    • Landscaping / Outdoor
    • Security & Technology
    • Sustainability, Health & Safety
    • Interiors / Décor
    • Expert Interviews
    • DIY Home Projects
Home Wise News!
Wise Insights, Reliable Contractor Advice & Hands on DIY Know How for Savvy Homeowners
May 28.2025
3 Minutes Read

Transform Your Home Cleaning with These Easy Fixes for Mistakes

Avoiding home cleaning mistakes with proper floor scrubbing technique.

Understanding Cleaning Mistakes: A Common Challenge

Cleaning your home can quickly become a source of frustration, especially when you end up with streaks on the windows or a lingering film on the floors. Many homeowners, whether seasoned or new to maintaining a clean living space, often make common mistakes that thwart their cleaning efforts. But the journey to effective home cleaning doesn't have to be overwhelming. With a bit of knowledge, cleaning can transform from a tedious chore into a streamlined process that yields noticeable results.

Why Do Cleaning Mistakes Occur?

Understanding the reasons behind cleaning mistakes is essential to preventing them in the future. One of the primary culprits is a rush to finish cleaning tasks quickly. In our busy lives, we often prioritize speed over effectiveness, leading to skipped steps or improper techniques. Moreover, many individuals still rely on outdated cleaning methods that fail to accommodate advancements in cleaning science.

Using incorrect tools or products for specific surfaces can also lead to poor cleaning results. Poor lighting conditions may obscure dirt or missed spots, while neglecting to read product labels can result in misuse. This variety of factors makes it critical to approach cleaning tasks with both care and strategy.

Top Mistakes and How to Fix Them

Let’s take a closer look at some common home cleaning mistakes, along with simple solutions that will enhance your cleaning routine:

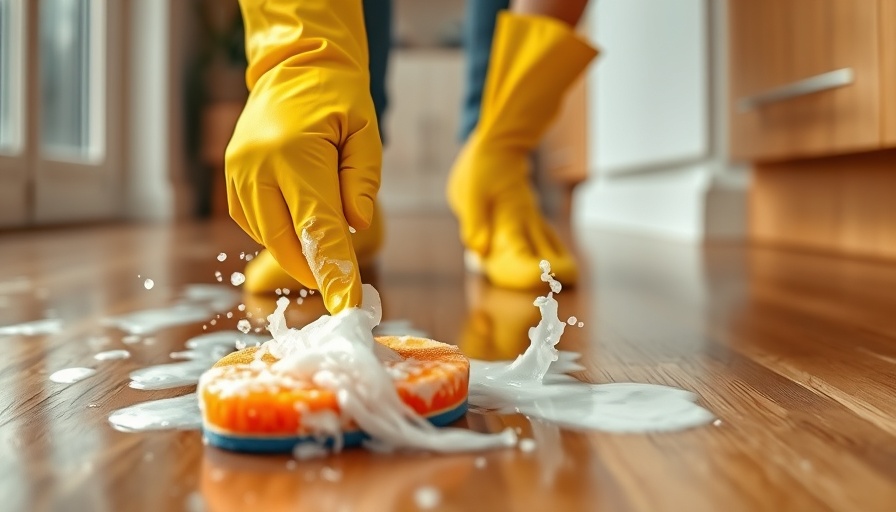
Using Too Much Cleaning Product

One prevalent misconception is that applying more cleaning product equals better results. In reality, overusing cleaners can lead to residue that attracts dirt and dulls surfaces. Instead, follow the product's dilution instructions; often, just a few drops can work wonders. By starting with less and only adding more if necessary, you’ll achieve cleaner surfaces without the waste.

Pro tip: Always test new cleaning products in a discreet area to avoid damaging visible surfaces.

Cleaning Windows Under Direct Sunlight

Bright, sunny days may seem ideal for cleaning windows, but they often lead to streaks and water spots since the product dries too rapidly. Instead, choose overcast days or early mornings for your window cleaning tasks. This will allow the cleaning solution to work effectively, delivering clearer results.

Neglecting to Read Product Labels

Many cleaning mishaps occur from using products incorrectly. Always read the labels to ensure you’re using the product as intended—this includes understanding what materials it's safe for, how to dilute it, and the necessary application methods.

Using Furniture Polish on All Surfaces

Furniture polish can work wonders for wood but is not suitable for every surface. Using the wrong product for specific materials can cause damage—always refer back to your product guide to select the right cleaner for the task.

Cleaning Floors Without a Strategy

When it comes to cleaning floors, working without a clear strategy can lead to missed spots or ineffective results. Adopt a system, such as working from one side of the room to the other, to ensure that every corner is covered. Using the right tools for different floor types is equally important, so ensure you have appropriate mops and solutions for hardwood versus tile.

Overlooking the Importance of Vacuum Filters

Having a clean home begins with a clean vacuum. Neglecting your vacuum's filter can compromise its effectiveness, as clogged filters can reduce suction and allow dirt to escape back into the air. Regularly checking and changing filters will keep your vacuum system running smoothly.

Final Thoughts on Home Cleaning Techniques

Implementing these simple corrections can make a world of difference in your cleaning routine. Not only will you save time and effort, but you'll also protect the longevity of your surfaces. Embrace these insights and enjoy a cleaner, healthier home.

Ready to tackle your next cleaning project with renewed energy? Dive into the world of efficient home maintenance today!Transform routine cleaning into an enjoyable task, and don’t forget to share your cleaning victories with your friends and family!

Cleaning & Moving

0 Comments

Write A Comment

*
*
Related Posts All Posts
03.12.2026

Practical Tips for Keeping Your Grout Looking New and Clean

Update The Struggles of Grout: Why We Need to Care Cleaning grout can often feel like a never-ending battle. It's a chore that most homeowners dread, recently identified as one of the most hated household tasks according to a Yelp survey. With its porous nature, grout easily absorbs dirt, moisture, and stains, changes that can detract from the beauty of any tiled surface. If you're embracing DIY projects and home maintenance, understanding how to preserve that grout between cleanings is vital not only for aesthetics but also to prevent more costly repairs down the line. Expert-Backed Grout Care Tips Fortunately, experts like John Gelfusa from HomeWorks and Mariya Podeyko of :AM Cleaning have offered invaluable advice that can help you maintain clean, beautiful grout. Starting with sealers and pH-neutra cleaning products, let's dive into some tried-and-true methods for keeping grout looking fresh: 1. Seal Regularly to Protect Your Grout The first step to pristine grout is sealing it. A high-quality grout sealer fills in microscopic pores in grout, making it more stain-resistant and easier to clean. Podeyko recommends sealing grout just a few days after installation and continuing to seal it annually. This practice not only maintains cleanliness but also enhances durability. 2. Use Proper Cleaning Solutions When it comes to cleaning grout, always opt for low or neutral-pH cleaning agents. Products designed specifically for grout, such as degreasers or dish soap, will aid in removing dirt without harming the grout itself. Avoid using bleach, as it can break down the surface over time, leading to more dirt accumulation. 3. Keep Wet Areas Dry Post-shower maintenance can extend the lifespan of your grout. Make it a habit to squeegee surfaces after each use to minimize water pooling in shower corners, which can foster mold growth. As Mariasol Rivera from Sparkly Maid Austin emphasizes, a simple towel wipe-down can stop mold at its source and keeps your grout looking fresh. 4. Sweep and Vacuum Regularly Sticking to a sweeping and vacuuming routine will prevent dirt from settling into grout lines. This practice not only keeps grout cleaner for longer but reduces the frequency of extensive cleaning. It’s a proactive way to manage what can feel like an overwhelming chore. 5. Implement a No-Shoe Policy One of the simplest ways to maintain clean floors is by adopting a no-shoe policy in your home. Dirty shoes can transfer significant grime onto tile surfaces. Marisol Rivera recommends this practice, especially if you wish to keep your grout cleaner between cleanings and reduce the labor involved in upkeep. Building Long-Term Cleaning Habits Establishing a regular cleaning schedule can make the daunting task of maintaining grout manageable. Wipe spills promptly, conduct routine cleanings, and incorporate blotting techniques when dealing with liquid stains. Taking consistent steps can dramatically reduce the fight against discoloration. Exploring Different Cleaning Methodologies To find the ideal solution for the unique messiness of your home, consider testing various cleaning methods. For those stubborn stains, Shifrah Combiths, an experienced home cleaner, tested five specific cleaning solutions and ranked them based on effectiveness. Zep Grout Cleaner & Brightener: Highly effective for lifting dirt quickly (rated 5/5). Hydrogen Peroxide and Baking Soda: A practical DIY method for minor cleaning (rated 3/5). Vinegar, Baking Soda, and Lemon Juice: Combining these ingredients can yield impressive results (rated 4/5). While some methods were effective, remember to take care with strong products. Always ensure your space is well-ventilated and follow safety guidelines. The Emotional Connection to a Clean Home A clean home often leads to a more relaxed mindset. As we navigate the ups and downs of our daily lives, it becomes increasingly important to create spaces that invite tranquility. Maintaining clean grout contributes to that sense of peace, allowing spaces such as kitchens and bathrooms to feel wholly welcoming. In conclusion, keeping your grout looking new involves a combination of proactive maintenance, appropriate cleaning techniques, and a bit of commitment. While it may still feel like a tedious chore, your efforts can yield significant benefits, ensuring a more pleasant living environment for you and your family. Want to simplify your grout cleaning methods or delve deeper into DIY home projects? Join our community for more insightful tips on home maintenance.

03.12.2026

Can Sunlight Effectively Remove Stains from Your Dishes? Here’s How!

Update Can Sunlight Really Eliminate Dishes' Stains? If you're like many homeowners, those tough stains on your favorite dishes can be a source of frustration. The solution might be simpler than you think. Believe it or not, natural sunlight may help remove stubborn stains from dishes, taking advantage of an age-old method that has surprisingly beneficial results. How Sunlight Works in Stain Removal Cleaning expert Marisol Rivera of Sparkly Maid Austin explains that sunlight contains UV rays which act almost like a natural bleach. They help to decompose molecules found in organic stains—think tomato sauce, wine, or coffee—through a process known as photobleaching. This process allows stubborn stains to fade when left under the sun for a few hours. The Science Behind Sunlight Stain Removal What makes sunlight effective? Its UV rays break down stain molecules, a natural reaction that doesn't rely on harsh chemicals. While it works wonders on food-related stains, it's less effective on metals or etched glass. Clear, unglazed ceramics and plastics are safe candidates for sunlight cleaning, making this method appliances for many households. Steps to Remove Stains Using Sunlight The process is simple and can save you from replacing stained dishes: Pre-treat stubborn stains: For best results, apply some lemon juice to the stain. The citric acid works together with UV light to enhance the bleaching effect. Positioning: Lay the dish on a towel or a rack outside in direct sunlight. Ensure the dish does not overlap with others, allowing sunlight to reach all stained areas. Timing is Key: For effective cleaning, leave the dish in the sun for 2 to 6 hours depending on the intensity of the stain. Rinse Well: After removing the dish from sunlight, make sure to rinse it thoroughly to remove any residual dirt or lemon juice. Alternatives If Sunlight Isn't Available If sunlight isn’t an option, a hydrogen peroxide soak is a recommended alternative. Fill a basin with warm water and mix in 3% hydrogen peroxide, let the dishes soak for about 30 minutes, and then wash them as per usual. This method is effective for many types of stains and is safe for most materials. Why Choose Natural Methods? Using sunlight as a stain remover not only saves time and effort but also avoids unnecessary exposure to harsh chemicals. Many homeowners are seeking less toxic options for cleaning—an important consideration for families with children or pets. Best Practices and Considerations While using sunlight for cleaning is generally safe, it's necessary to exercise caution. Delicate china with metallic trims, colored glazes, or any surface that could be damaged by UV exposure should be kept away from this method. Always check materials before using sunlight as a cleaning solution. Conclusion: Harnessing Nature for Clean Dishes The next time you face a stubborn stain on a ceramic dish, consider giving Mother Nature a try with her most powerful tools: sunlight. Remember, clearing clutter is also part of effective maintenance. Should you wish to explore more DIY home projects or handyman tips that can empower your daily cleaning routines, incorporating these methods into your cleaning arsenal may prove invaluable.

03.08.2026

How to Efficiently Clean Dust Off Your Light Fixtures to Enhance Aesthetics

Update Stay Bright: The Importance of Cleaning Your Light Fixtures When was the last time you looked up at your light fixtures and thought about their cleanliness? In homes where dust tends to accumulate, light fixtures can quickly become less than sparkling. A light fixture covered in dust not only diminishes the quality of your home lighting but can also become a safety hazard. Understanding how to clean these often-overlooked pieces of decor is essential for maintaining an inviting atmosphere and a safe environment. The Hidden Risks of Dusty Light Fixtures Dust doesn't just dull the glow of your beautiful bulbs; it can also have more significant consequences. Dirty fixtures diminish the effectiveness of lighting, emitting less light and making rooms appear dimmer than they really are. Furthermore, dust can obstruct heat dissipation from bulbs, shortening their lifespan and leading to potentially dangerous electrical problems. With a little care, you can avoid these issues and keep your home aglow. Step 1: Start with Safety First! Before you unearth your cleaning supplies, it’s crucial to ensure your safety. Turn off the power to your light fixtures at the circuit breaker or unplug them if they're portable. Wait for bulbs to cool down to avoid burns. This simple step can prevent accidents that could endanger you or damage your property. Step 2: Gather Your Cleaning Arsenal The right cleaning tools make all the difference. Microfiber cloths are ideal for capturing dust without leaving a residue, and they are durable enough for repeated use. Consider investing in a gentle brush or soft cloth to effectively clean intricate designs on chandeliers or wall-mounted fixtures. A telescoping duster can also help you reach higher fixtures easily, preventing unnecessary falls and accidents. Step 3: Get Your Cleaning Technique Down When it's time to tackle the dust, don't just wipe haphazardly—apply a methodical approach. Begin by dusting the bulbs, then move on to the fixture itself, starting from the top and working your way down. This allows the dust to fall away rather than resettle on already cleaned areas. For delicate materials, use a non-abrasive cleaner approved for the type of surfaces you’re handling. Step 4: Create a Dust-Free Routine Incorporating routine cleaning into your home maintenance can dramatically decrease dust accumulation. Aim for a monthly or bi-monthly schedule to dust your light fixtures. Treat it as a fun ritual—perhaps put on some music while you dust or involve your family to split up the tasks. This not only keeps your fixtures clean but also ensures that your home remains a cozy refuge for everyone. Step 5: The Magic of Dust-Repellent Bulbs Did you know that certain light bulbs are designed to repel dust? Self-cleaning light bulbs can significantly reduce the amount of dust accumulation on your fixtures. By incorporating these innovative bulbs, you may find cleaning less of a chore, allowing you to enjoy the ambient glow your fixtures provide without the frequent upkeep. Future Trends: Smart Solutions for Home Maintenance As technology continues to advance, more homeowners are integrating smart home solutions that not only enhance convenience but also cleanliness. For example, smart lighting systems can alert homeowners when it’s time to clean fixtures based on their user activity and dust levels. Investing in revolutionary solutions can save time without compromising the aesthetic of your home. Getting Inspired Caring for your light fixtures isn't just a cleaning chore; it’s an opportunity to ensure that your home radiates warmth and comfort. Remember, a well-lit environment often makes the difference in how welcoming a space feels. Plus, maintaining your lighting not only beautifies your home but can also highlight your personal style. Take Action for a Bright and Clean Home Now that you know the steps to keep your light fixtures dust-free, why not grab a duster and make it a fun activity? The effort will not only create a beautiful, luminous atmosphere in your spaces but also provide a sense of accomplishment. Remember, a little maintenance goes a long way!

Terms of Service

Privacy Policy

Core Modal Title

Sorry, no results found

You Might Find These Articles Interesting

T
Please Check Your Email
We Will Be Following Up Shortly
*
*
*