Add Row
Add Element
UPDATE
Add Element
  • Home
  • Categories
    • Cleaning & Moving
    • Maintenance / Repairs
    • Remodeling & Construction
    • Landscaping / Outdoor
    • Security & Technology
    • Sustainability, Health & Safety
    • Interiors / Décor
    • Expert Interviews
    • DIY Home Projects
Home Wise News!
Wise Insights, Reliable Contractor Advice & Hands on DIY Know How for Savvy Homeowners
August 26.2025
3 Minutes Read

Transform Your Home with Handy DIY Kitchen Projects and Tips

Modern DIY kitchen project with wooden island and open magazine.

The Heart of the Home: Revitalizing Your Kitchen Space

The kitchen is often referred to as the heart of the home—a vital space where family gatherings, holiday feasts, and even quiet morning moments occur. For many, it’s the hub of connection, nourishment, and creativity. Yet, too often, outdated designs or inefficient layouts can diminish the joy that this space brings. Whether you're a seasoned home chef or someone who merely enjoys the occasional snack, upgrading your kitchen can profoundly enhance your daily life.

Transformative DIY Projects for Every Skill Level

When it comes to revitalizing your kitchen, there’s no shortage of DIY projects that can transform your space without breaking the bank. Here are some practical handyman tips to consider:

  • DIY Butcher Block Countertop: Crafting your own butcher block countertop can give your kitchen a warm, rustic feel while being incredibly functional. Simple tutorials are available online that guide you through the selection of materials, cutting techniques, and the finishing touches needed for a professional look.
  • Installing New Cabinets: If cabinetry is outdated or poorly organized, refreshing this area can give your kitchen a whole new look. There are easy-to-follow guides for installing cabinets from stores like Ikea, which allow you to customize your kitchen layout effectively.
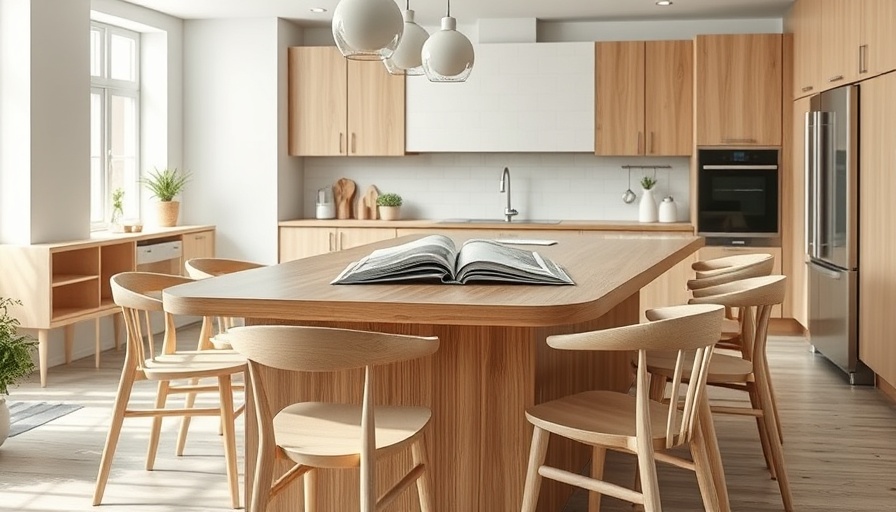
  • Creating an Island: A kitchen island not only adds storage but also creates a gathering place. Building one with seating can be a weekend project that dramatically enhances both functionality and aesthetic appeal.
  • Decor Ideas: From vibrant backsplashes to sleek, modern paint colors, small decor updates can provide a significant "wow" factor. Research trendy ideas that resonate with your personal style.

Revive Your Kitchen: Easy Fixes to Refresh Your Space

In addition to DIY projects, some quick fixes can lead to noticeable improvements:

  • Adjusting Cabinet Doors: Crooked cabinet doors are often an eyesore. Thankfully, straightening them out is a straightforward task that can enhance your kitchen's appearance remarkably.
  • Polishing Surfaces: Don’t underestimate the power of a sparkling sink or polished countertops. Regular maintenance can keep your surfaces looking pristine and inviting.
  • Replacing Fixtures: Even simple updates, such as new handles on cabinets or faucets, can breathe new life into a tired kitchen.

Incorporating Modern Solutions for a Streamlined Experience

Beyond aesthetics, modern solutions can enhance your kitchen's efficiency:

  • Appliance Organization: Consider implementing small appliance storage ideas. Use vertical space and hidden cabinets to minimize countertop clutter while still having essential tools readily available.
  • Energy-Efficient Appliances: If you’re managing an older home, understanding the right time to upgrade appliances can save money in the long run, especially with the latest energy-efficient models.
  • Creative Recycling: Believe it or not, you can even utilize kitchen castoffs creatively. DIY planters made from old containers can spruce up your kitchen while promoting sustainability.

Final Thoughts: The Value of a Well-Designed Kitchen

Upgrading your kitchen doesn’t need to be an overwhelming feat. With a range of DIY projects, quick fixes, and modern solutions at your fingertips, transforming the heart of your home into a space that’s both beautiful and functional is achievable for everyone. Remember, it’s not just about aesthetics—creating a welcoming kitchen enhances your home’s value while facilitating connection and daily enjoyment.

Ready to start planning your kitchen upgrade? Gather your supplies and get inspired. Your dream kitchen awaits!

DIY Home Projects

Write A Comment

*
*
Related Posts All Posts
10.14.2025

Kick Out Those Screws: Simple Steps to Restore Your Hardwood Floors

Update Unlocking the Mystery: How Did Screws End Up on Your Floors? We've all been there: one moment you’re merrily enjoying the woodsy charm of your hardwood floors, and the next, you’re discovering pesky screws dotting the surface like unwanted guests at a party. The reasons behind this mischief can range from questionable renovation attempts to furniture rearrangements that went too far. Understanding the origins of these screws can help you plan the best course of action to restore your beloved floors without diving into a full-scale renovation. Tread Lightly: The Dangers of Ignoring Floor Screws While the temptation to simply leave those screws be is strong, doing so can lead to serious consequences. Over time, these screws can cause the hardwood to crack, splinter, or even create noise when you walk across it. Let’s not forget, your toes will thank you for not risking a surprise encounter with an exposed screw that’s poking out! In addition to dealing with potential hazards, ignoring the problem can hinder the overall aesthetic appeal of your home. Hilton Carter, a renowned interior designer, notes that flooring plays a crucial role in setting the ambiance of a room. Imagine having a beautiful home, only to be marred by a landscape of metal protrusions! DIY Techniques to Remove Screws and Restore Your Floors With high stakes and an eye on aesthetics, it’s time to tackle those intrusive screws head-on. Here’s a step-by-step approach to help you do just that: 1. Gather Essential Tools: Before diving in, ensure you have a Phillips screwdriver, pliers, concrete repair filler (for the inevitable holes), and sandpaper on hand. These tools will make your task significantly smoother. 2. Unscrewing the Culprits: Use the Phillips screwdriver to carefully remove each screw. If they’re stuck, pliers can provide extra leverage. Just make sure not to strip the screws while working your magic. 3. Filling the Void: Once the screws are out, you’ll notice holes left in your hardwood. Try using a concrete repair filler for a seamless patch job. It’s advisable to mix it according to the manufacturer’s instructions and apply it with a putty knife. 4. Sanding and Finishing: After the filler dries, gently sand the areas until they become flush with the rest of the floor. Finally, apply your favorite hardwood floor finish to restore the shine. Future Proofing: Preventing Screw Pests With the screws gone, let’s make sure they don’t come back. A thorough inspection of your furniture can point to any hidden traps where screws might be lurking. It’s also wise to ensure that any renovations you’re considering in the future use secure fixtures that are suited for hardwood applications. Additionally, consider applying a regular maintenance schedule to keep your floors in tip-top shape. Regular check-ups on the integrity of the boards can alert you to issues before they escalate into major disasters. Consulting the Pros: When to Call in the Experts Sometimes the DIY route may feel daunting or time-consuming. In such cases, it’s completely acceptable to seek help from a professional. Experienced floor restorers can assess the damage and suggest the best practices tailored to your specific flooring type. They can also offer refinishing services to restore the luster and character of your hardwood floors, offering an effortless upgrade to your living space. Conclusion: Step Into a Safer, More Beautiful Home Getting rid of screws in your hardwood floors doesn’t have to entail a full-blown renovation. With some simple tools, a bit of elbow grease, and a touch of creativity, you can quickly restore the beauty of your floors and boost the overall aesthetic of your home. Remember to stay proactive about maintenance and don’t hesitate to reach out to professionals if needed. Ready to transform your floors into a masterpiece? Take action today by assessing your hardwood and preparing to unleash its true potential!

10.14.2025

Elevate Your Halloween Table Decor: Simple Ideas to Enchant Guests

Update Transform Your Space with Spooky CharmAs the leaves change and the air gets crisper, homeowners begin to embrace the spooky yet delightful spirit of Halloween. The perfect table décor can set the tone for festive gatherings, whether it’s an intimate dinner with family or a lively party with friends. In this piece, we explore ways to elevate your Halloween table setting, focusing on simplicity and style that anyone can achieve.Simple Yet Effective Decor IdeasCreating a chic Halloween table doesn’t have to involve complicated arrangements or pricey items. The idea is to integrate what you have, sprinkling in holiday-themed touches that resonate with the season. Start by choosing a cohesive color scheme, such as black, white, and gold. This approach not only streamlines your décor but also allows you to creatively repurpose existing items in your home. Using elements like black candlesticks or DIY cauldrons adds flair while keeping it personalized.The Art of Layering: Make Your Table UniqueLayering is a simple trick that can instantly elevate your table design. For instance, incorporating disposable plates with unique Halloween designs can lessen cleanup while providing visual interest. Pairing these with your everyday dishes can create a fun contrast without feeling overdone. Consider layering skeleton plates over classic white plates to add a playful touch that guests will appreciate.Shopping Your House: An Eco-Friendly ApproachOne of the most sustainable practices in home décor is to shop your own home. Look for items you already possess that evoke the Halloween spirit. Things like black and white candles, decorative ghost figures, and even colors from past seasons' décor can be easily integrated into your Halloween table. Try using a DIY disco ball cauldron as a centerpiece – not only will it catch the light beautifully, but it’s also a conversation starter!Why Color Schemes Matter in DecorSticking to a color scheme is not just about cohesiveness; it creates a visual narrative that reflects your personal style. With Halloween, you can mix traditional colors such as orange and purple with chic black and gold to give your table a modern twist. This concept allows creativity while providing structure alongside the spooky vibes of the season.Budget-Friendly FindsTo get into the Halloween spirit without overspending, check out affordable options available online. Items like spider web disposable plates, BOO serving trays, and skull serving bowls can often be found at various price points, allowing you to pick what suits your style and budget. Retailers like Amazon offer a wide variety, enabling you to make quick and cost-effective decisions as you prepare for Halloween festivities.Engaging Your Guests with Themed ElementsAnother element to consider is how your table setting can engage guests. Try introducing interactive dining experiences—like a cauldron filled with candies or a spooky-themed cocktail served in black coupe glasses. These captivating elements don't just adorn your table; they invite your guests into the gathering, offering fun and festive engagement.Final Thoughts: Be Creative, Be FestiveIn conclusion, Halloween table décor can be both festive and functional without overwhelming your space or budget. Whether you're entertaining guests or enjoying a family dinner, the small touches can make a significant impact. Remember to keep it simple, lean into your creativity, and enjoy the process of preparing your home for Halloween. Ready to start decorating? Get into the spirit of the season by curated DIY projects or, simply, by gathering your market finds! Happy decorating!

10.10.2025

Create Your Dream Space: DIY Home Gym Storage Caddie Guide

Update Transform Your Home Gym with a DIY Storage Caddie Are you tired of tripping over dumbbells or digging through clutter to find your yoga mat? A cluttered home gym can hinder your workout motivation, making it vital to maintain an organized space. Fortunately, creating a custom home gym storage caddie can be a straightforward, rewarding DIY project that transforms your workout area. Why You Need a Mobile Storage Solution With a mobile gym storage caddie, you can keep your workout equipment streamlined and accessible. This allows you to focus on your workouts rather than searching for gear or stepping over items. Not only does it enhance your home gym’s aesthetics, but an organized space also promotes safety by minimizing hazards. Materials and Tools Needed for Construction This DIY project requires common materials that are easy to find. You’ll need wood (such as maple or plywood), hardware (like screws and wood glue), and various tools including a miter saw, drill, and angle grinder. Make sure to gather everything before starting to streamline your build process. Step-by-Step Instructions to Build Your Caddie Follow these simple steps to create your own home gym caddie: Step 1: Prepare the MaterialsStart with cutting your wood and angle iron to the prescribed dimensions. Pre-seal the wood with polyurethane for added durability. Step 2: Build the Outer FrameConstruct frames for your caddie's shelves using wood glue and nails for a robust structure. Step 3: Assemble the Legs and ShelvesInstall the legs to support the shelves. Space them evenly to accommodate your equipment efficiently. Step 4: Add Cross SupportsEnhance stability by placing cross supports between the legs on each shelf level. Step 5: Finishing TouchesSand down rough edges and give your caddie a final finish with paint or stain as desired. Common Mistakes to Avoid When Building While embarking on this project, stay away from common pitfalls such as not measuring accurately, rushing through assembly, or neglecting safety by not wearing protective gear while using tools. These mistakes can compromise the quality of your build and may lead to injury. Enhancing Your Home Gym Experience With your new gym storage caddie in place, not only will your space look neater, but you'll also find it easier to stay motivated and focused on your workouts. Having an organized area where you can find everything you need quickly will help maintain your fitness routine. Conclusion: Take Action for a Better Workout Space Don’t let clutter hold you back from achieving your fitness goals. Build this DIY home gym storage caddie and experience the benefits of a well-organized workout environment. Not only will it save you time, but it will also enhance your overall workout experience.

Terms of Service

Privacy Policy

Core Modal Title

Sorry, no results found

You Might Find These Articles Interesting

T
Please Check Your Email
We Will Be Following Up Shortly
*
*
*