Add Row
Add Element
UPDATE
Add Element
  • Home
  • Categories
    • Cleaning & Moving
    • Maintenance / Repairs
    • Remodeling & Construction
    • Landscaping / Outdoor
    • Security & Technology
    • Sustainability, Health & Safety
    • Interiors / Décor
    • Expert Interviews
    • DIY Home Projects
Home Wise News!
Wise Insights, Reliable Contractor Advice & Hands on DIY Know How for Savvy Homeowners
August 26.2025
3 Minutes Read

Transform Your Kitchen into a Functional and Stylish Space: DIY Tips and Ideas

Sleek DIY kitchen project with modern island and decor.

Understanding the Heart of Your Home: Why Kitchen Upgrades Matter

The kitchen is undeniably the heart of the home—a vibrant space where family gathers for meals, conversations, and celebrations. However, as trends evolve and families grow, kitchens can become outdated, stifling enjoyment and efficiency. To truly level up your kitchen, it’s essential to embrace fresh ideas and smart renovations.

Smart DIY Kitchen Projects to Enhance Functionality

If you're looking for ways to improve your kitchen without a hefty price tag, DIY projects offer perfect opportunities. Consider building a butcher block countertop or installing Ikea cabinets—a step that can transform both your cooking space and upper-level aesthetics. Family Handyman offers valuable resources, such as a complete guide on installing Ikea kitchen cabinets, ensuring that any homeowner can tackle these projects with confidence.

Reviving Your Space: Simple Maintenance Tips

Small changes can breathe new life into an old kitchen. Fixing crooked cabinet doors, installing sleek cabinet handles, or replacing outdated fixtures might seem trivial, but they can create immediate visual impact. Utilize resources that explain how to polish stainless steel sinks or address annoying faucet drips to enhance your kitchen’s functionality. Not only do these small upgrades elevate the kitchen’s look, but they also ensure a more enjoyable cooking experience.

Trendy Kitchen Features with the Wow Factor

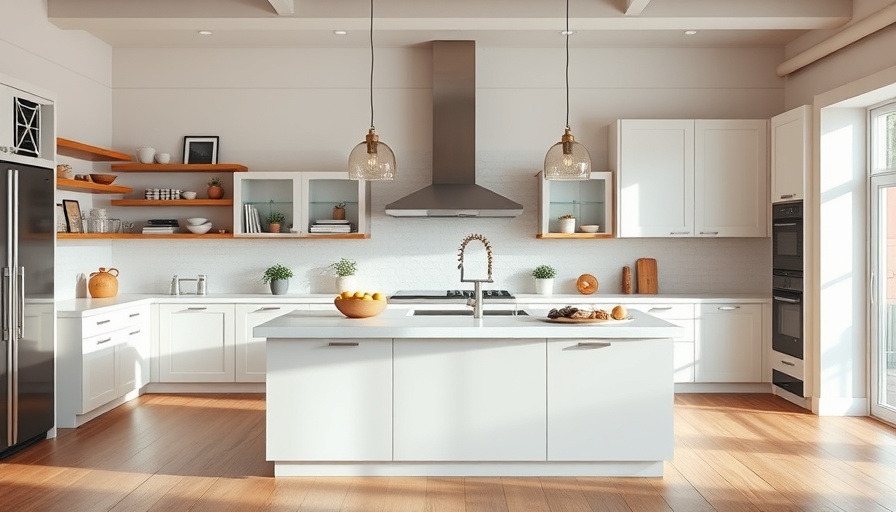
As trends continue to shift, understanding which upgrades are worthwhile becomes key to a successful kitchen renovation. For example, exploring colors like dark vs. white for cabinetry choices can set the tone for a modern kitchen. Additionally, incorporating popular backsplash designs can drastically uplift your kitchen's aesthetic. Several experts recommend making informed decisions about potential upgrades to avoid costly regrets later on.

Solutions for Modern Living: Space Management Tips

In today's bustling households, optimizing space is crucial. From small appliance storage ideas that declutter countertops to creating custom planters from kitchen leftovers, every inch of your kitchen can serve a purpose. Resources offering storage hacks can significantly improve your kitchen's organization, enhancing overall functionality—something every homeowner desires.

The Future of Kitchen Design: What You Need to Know

As you think about your kitchen renovations, consider looking ahead. Future predictions in kitchen design suggest a significant shift toward sustainability and energy efficiency, with new appliances that save both energy and space. Familiarize yourself with home maintenance practices that keep your kitchen in top shape—this is where understanding the longevity of your upgrades comes into play.

Empowering Homeowners: Taking the Initiative with DIY Projects

Taking on DIY projects not only equips you to improve your home but builds essential skills for future maintenance tasks. With the right resources, anyone can learn how to tackle home repairs confidently. From understanding how to measure kitchen spaces accurately for countertops to knowing the right tools for the job, educating yourself amplifies your homeownership experience.

Integrating these concepts into your kitchen transformation not only ensures a space that reflects your style but also one that promotes connection and functionality. For those ready to take these steps, the journey begins with a sprinkle of creativity and a toolbox of basic DIY skills.

Now that you've explored these ideas, it’s time to act! Assess your kitchen's condition, gather your tools, and start planning your next project. Empower yourself with the knowledge to elevate the heart of your home.

DIY Home Projects

0 Comments

Write A Comment

*
*
Please complete the captcha to submit your comment.
Related Posts All Posts
04.10.2026

How to Clean Walls Without Damaging Paint: Easy Techniques Every Homeowner Should Know

Update Effortlessly Restore Your Walls with These Proven Techniques Keeping your walls clean is essential for maintaining a pleasing atmosphere in your home, especially since it's one of the first things guests notice. However, the last thing you want to do is damage your freshly painted walls while trying to wipe away dust, grease, or marks. Luckily, thanks to insights from paint experts, there are easy, safe methods to ensure your walls remain pristine without losing their color or sheen. Choosing the Right Approach: Know Your Paint Finish The first step in cleaning painted walls without jeopardizing the finish is to know the type of paint used. For example, walls painted with higher gloss finishes—like semi-gloss or satin—are generally more forgiving during cleaning. In contrast, matte and eggshell finishes require a gentler touch to avoid damage. Benjamin Moore’s Regal® Select Interior paint is known for its stain-resistive properties and cleans well, making it an excellent choice for high-traffic areas. Gather Your Supplies: Preparation is Key What you'll need: Non-abrasive sponges or cloths Lukewarm water Mild dish soap or an all-purpose cleaner Two buckets—one for cleaning solution and another for rinsing Rubber gloves Soft, absorbent towels Before diving into the cleaning, ensure that all necessary tools are gathered. Cover the floors to catch any drips, and dust the walls with a vacuum’s brush attachment to avoid pushing dirt around. Start Simple: The Power of Water Your first line of attack should be warm water. Simply dampen a non-abrasive sponge and wipe gently. If you're dealing with light stains, this might be all you need to restore the wall's beauty. Always wipe from the bottom upward to prevent streaking from running grime. When to Step It Up: Using Mild Cleaning Solutions If warm water doesn’t do the trick, mix together a few drops of mild dish soap with lukewarm water. The soap helps lift the grime without the harsh chemicals found in many cleaners. When applying, work in small sections, using a circular motion to minimize the risk of damaging the paint. What If the Stains Persist? Try Natural Alternatives For stubborn stains that refuse to budge, a paste made from baking soda and water can work wonders. Apply it to the stained areas and scrub gently with a soft cloth. Baking soda acts as a gentle abrasive and can eliminate marks while being safe for painted surfaces. Don't Forget the Final Touch: Drying and Finishing Once you’ve cleaned the walls, don’t overlook the importance of drying them properly. Use a soft and absorbent cloth to ensure all moisture is absorbed, preventing the risk of mildew forming. A clean wall should feel smooth and look fresh—just like when you first painted it! Establish a Routine: Maintenance for Longevity Incorporating wall cleaning into your regular maintenance routine is important. Regular dusting and periodic washes can significantly extend the life of your paint job. Take note that freshly painted walls should typically be left for at least two weeks before any cleaning is done to allow the paint to cure properly. Conclusion: Transform Your Home’s Ambiance with Care Cleaning your walls doesn’t have to be a daunting task. By following these easy, safe methods, you can maintain the charm of your living space without damaging your paint. The next time you notice fingerprints or dirt on your walls, you’ll be well-equipped to tackle the mess and keep your home looking polished! Don't forget to share your experiences or any additional tips you’ve learned along the way!

04.09.2026

Master the Art of Cleaning Saw Blades and Router Bits with Ease

Update Reviving Your Tools: The Importance of Cleaning Keeping your saw blades and router bits clean is not just about maintaining tools but optimizing performance. A blade dulled by pitch and grime can dramatically reduce efficiency and invoke unnecessary wear on motors. The old saying, "A clean tool is a happy tool," rings true! By dedicating a mere hour of your time, you can vastly improve how your equipment performs on DIY projects. Essential Tools and Materials: What You'll Need Gathering the right tools is the first step to a successful cleaning operation. This endeavor requires minimal investment. For cleaning, you'll usually need a brass bristle brush, a nylon brush, a putty knife, and a shallow plastic container for soaking your blades. Essential materials include clean shop rags, dish soap, lubricating oil, paper towels, and a reliable cleaner such as Simple Green. Step-By-Step Guide to Clean Like a Pro The cleaning process can be broken down into seven key steps: Disassemble the Router Bits: Safely remove any movable parts from your router bits. Prepare the Cleaning Solution: Create a gentle but effective solution using Simple Green or dish soap mixed with water. Submerge and Soak: Let your saw blades and router bits soak for approximately 15 minutes. Remove Buildup: Scrub gently using brushes to remove dirt and pitch. Rinse and Dry Well: Thoroughly rinse under water and dry with towels or a hair dryer. Lubricate: Apply oil to the moving parts during reassembly to enhance longevity. This comprehensive approach not only preserves your tools but also ensures optimal functionality on your next DIY project. Exploring Alternative Cleaning Methods For those looking for alternative cleaning options, many industry professionals recommend products such as Boeshield Blade and Bit Cleaner or Rockler’s Pitch and Resin Remover. These specialized solutions can drastically reduce the time spent on this task, as they’re designed to break down tough pitch and resin quickly. Using readily available products such as Nature’s Orange D-Limonene can also do the trick. However, always ensure that the cleaning method chosen won't harm the equipment or leave any residues. A Common Misconception: When to Replace? It’s often presumed that dull blades must be replaced. This misconception can lead to needless spending. Before dumping a so-called dull blade, consider the amount of pitch or grime it might be caked in. Regular maintenance can yield impressive results, transforming a blade you deemed useless back into a tool ready for any project. Many woodworkers swear by this approach, indicating that a little maintenance far outweighs the cost of replacement. The Benefits of Cleaning Your Tools Investing time and effort into cleaning your tools has two main benefits. First, it leads to enhanced performance during cutting tasks, making them quicker and more efficient. Secondly, it extends the lifespan of your blades and bits, saving you money over time. As noted by fellow hobbyists, maintaining a habit of cleaning ensures that you're always prepared for your next creative endeavor. Final Thoughts: DIY with Confidence Now that you’ve learned effective cleaning techniques for your saw blades and router bits, you’re one step closer to being a DIY master! Engaging with your tools and making a habit of cleaning will not only elevate your home projects but also prolong the life of your equipment. Don’t neglect these valuable tips; however, remember to revisit the cleaning process regularly to maintain performance and longevity. With diligence, you'll find cleaning blades just as satisfying as the art of DIY itself!

04.08.2026

Unlocking Your DIY Potential: Master Tile Cutting Tools with Ease

Update Mastering the Essential Tile Cutting Tools for DIYers When it comes to undertaking a tile project, having the right tools at your disposal can make all the difference between a tedious task and a gratifying experience. No matter if you're updating your bathroom tiles or creating a stunning kitchen backsplash, understanding how to correctly cut tiles is vital for a professional finish. This article breaks down the best methods of tile cutting, featuring three popular tools: manual snap cutters, angle grinders with diamond blades, and wet tile saws. Choosing the Right Tool for the Job Before rolling up your sleeves, the first step in your tile cutting journey is to assess the type of tile you're working with and the kind of cuts needed. Each tile cutting tool serves a different purpose: Manual Snap Cutter: Ideal for straight cuts, particularly in ceramic and porcelain tiles up to 1/2 inches thick. Angle Grinder with a Diamond Blade: Perfect for intricate cuts, including curves and unique shapes like around plumbing fixtures. Wet Tile Saw: Best for larger projects, as it enables precise, clean cuts on various materials, including glass and porcelain. Understanding these tools not only boosts your confidence but also equips you to make the right choice for each phase of your project. How to Cut Tile with a Manual Snap Cutter The manual snap cutter reigns supreme for straight cuts, making it user-friendly, especially for newcomers. Simply follow these steps: Measure and Mark: Use a square to determine your tile size and make a clear mark. Position the Tile: Align your tile against the cutter’s fence, ensuring the scoring wheel is on the marked line. Score the Tile: Pull the cutter’s lever while applying moderate pressure to create a visible score. Snap the Tile: Position the breaker foot slightly below the tile's top and apply downward pressure. Smooth Edges: Use a rubbing stone to finish your piece, ensuring no jagged edges remain. By mastering this straightforward method, you'll be prepared for many basic tiling projects ahead. Utilizing an Angle Grinder for More Complex Cuts If your tiling project calls for more than just straight lines, it’s time to introduce the angle grinder into your toolkit. Here’s how: Setup: Ensure you have a diamond blade made for tile and protective gear, including safety glasses and a respirator. Mark Your Cuts: Use a spray bottle of water to keep dust down and mark your cutting line accordingly. Clamp the Tile: Secure the tile onto a piece of plywood to prevent slipping. Make Your Cuts: Steadily follow your marked line without rushing, ensuring cleaner edges and minimal chipping. The angle grinder offers versatility that can adapt to various cutting needs, facilitating customization that’s essential for unique installation environments. Techniques for Using a Wet Tile Saw The wet tile saw is favored for bulk cuts and ensures clean, precise slices. Here’s how to use it effectively: Mark Your Cuts: Indicate the cutting line clearly on your tile. Prep the Saw: Ensure the reservoir has enough water and check that the blade is sharp. Guiding the Tile: Slowly feed the tile into the saw, allowing the tool to do the work without forcing through the material. Smoothing Edges: Just like with the manual cutter, finish off with a rubbing stone for clean edges. Wet saws are excellent for larger projects, allowing for not just precision but also a speed that manual methods lack. Final Considerations for DIY Tilers Regardless of which tool you choose, safety should always be your top priority. Always wear protective gear and take precautions to avoid injury. Furthermore, familiarizing yourself with each tool's capabilities will enable smoother workflow, minimize frustrations, and lead to beautiful tile installations. Equipped with these tips and techniques, you’re now ready to approach tile cutting with confidence. Don't be intimidated; with practice and the right tools, you'll master the art of tiling in no time. So, gather your materials, and let’s get started on your next DIY project!

Terms of Service

Privacy Policy

Core Modal Title

Sorry, no results found

You Might Find These Articles Interesting

T
Please Check Your Email
We Will Be Following Up Shortly
*
*
*