Add Row
Add Element
UPDATE
Add Element
  • Home
  • Categories
    • Cleaning & Moving
    • Maintenance / Repairs
    • Remodeling & Construction
    • Landscaping / Outdoor
    • Security & Technology
    • Sustainability, Health & Safety
    • Interiors / Décor
    • Expert Interviews
    • DIY Home Projects
Home Wise News!
Wise Insights, Reliable Contractor Advice & Hands on DIY Know How for Savvy Homeowners
June 01.2025
3 Minutes Read

Transform Your Sleep by Learning How to Wash Your Comforter Correctly

Gray comforter being washed in a washing machine, with water swirling around it.

The Ultimate Guide to Freshening Up Your Comforter

It’s that time of the year again! You know what I mean: the moment you realize your comfy, fluffy comforter has become less of a cozy cocoon and more like a dust-mite disco party. But fear not! Washing your comforter the right way can be simple, and it will leave you with a fresh and clean blanket that you can snuggle up in once again.

Understanding Your Comforter: What to Know Before You Wash

First things first, not all comforters are created equal. Some may be filled with down, others might be synthetic. Check the care label meticulously—this is your best friend. It’ll provide specific washing instructions, including water temperatures and drying settings. Remember, ignorance can lead to a comforter that looks like flat pancake after washing.

Preparing for the Wash: The Pre-Wash Checklist

Before you throw your comforter into the washing machine, it’s essential to prepare. Start by checking for any stains that may need a little pre-treatment. Use a mild detergent and a bit of water to dab it gently—no need for a full-out scrubbing that might damage the fabric! Next, ensure your washing machine can handle the weight. Overloading can lead to an uneven clean (and a sad comforter).

Washing Techniques: How to Get It Right

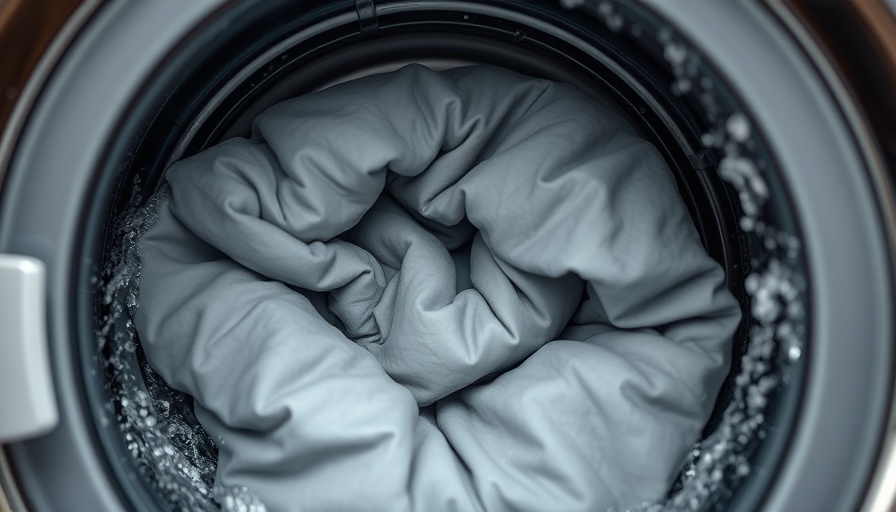
When you're ready to wash, select a gentle cycle with cold water to maintain the integrity of the comforter’s filling material. If your comforter is particularly large, you might need to visit a laundromat. Their industrial-sized machines can make a world of difference. Consider adding a few tennis balls or dryer balls into the washer! They serve to fluff the comforter while it spins, ensuring the filling doesn’t clump together.

Drying Like a Pro: The Finishing Touch

Once that water works its magic, it’s time for the dryer! The key here is low heat—high heat can lead to shrinkage or burning off your comforter’s fabric. Just like washing, toss in those tennis balls again to help maintain fluffiness. Be patient; drying a comforter can take a while, and you might even have to tumble dry it for a couple of cycles.

Future Predictions: Why Regular Cleaning Matters

Did you know that cleaning your comforter regularly—ideally every 3-6 months—can extend its lifespan? This isn’t just about aesthetics, either; maintaining cleanliness can prevent allergens and dust mites from building up, contributing to a healthier sleeping environment. A clean comforter can also assist in better sleep quality, something we could all use!

Common Misconceptions: Debunking the Myths

There are common misconceptions about washing comforters that can lead to disastrous results. Some folks believe that throwing it in with every load of laundry is enough. Sorry to burst your bubble, but comforters need special attention! Others think they can simply “air it out” instead of washing. Unfortunately, that's just postponing the inevitable. Regular washing is key to maintaining cleanliness and comfort.

Get Cozy Again: The Joy of a Fresh Comforter

There’s truly nothing like curling up in a freshly washed comforter. It’s inviting, warm, and the perfect finishing touch to a well-decorated room. So, now that you know how to wash it the right way, it’s time to roll up your sleeves and embrace the chore. Your future self (and couch) will thank you!

Cleaning & Moving

0 Comments

Write A Comment

*
*
Related Posts All Posts
01.22.2026

Eliminate Mildew: 4 Proven Ways to Keep Your Washing Machine Fresh

Update Say Goodbye to Musty Laundry: Effective Tips to Combat Mildew When you think of laundry day, you anticipate fresh-smelling clothes and sparkling appliances. However, many homeowners face a common issue: washing machines that emit a musty, mildew smell. This issue not only impacts the quality of your laundry but can propagate odors that cling to your clothes as well. Fortunately, adopting a few simple habits can keep your washing machine clean and odor-free, leading to a more pleasant laundry experience. Understanding Why Your Washing Machine Smells Before we dive into solutions, it’s crucial to understand why washing machines develop these unpleasant odors. Water accumulation, excess detergent, and lack of proper airflow can all contribute to mildew growth. According to Whirlpool and Maytag, leaving wet clothes in the washer for extended periods is one of the prime culprits. Additionally, dirty component parts, such as dispenser drawers and rubber seals, can harbor odor-causing bacteria. Practical Tips to Dry Out Your Washing Machine 1. **Leave the Door Open**: A simple yet effective approach to allow your washing machine to breathe is by leaving the door or lid open between cycles. This promotes airflow and aids in drying out the drum, significantly reducing moisture accumulation. 2. **Use the Right Detergent**: Many people overlook the importance of using the correct type of detergent for their machines. High-efficiency (HE) washers require HE detergent to prevent residue build-up. Using too much detergent can lead to excess suds, which trap moisture and odors inside the machine. 3. **Regular Cleaning Schedule**: Establish a regular cleaning schedule for your washing machine. Whirlpool suggests cleaning your washer every 30 cycles or as needed, particularly using affresh® washing machine cleaner tablets. These specially formulated tablets help remove residues that can harbor smells. 4. **Promptly Remove Laundry**: To prevent mildew, always remove your laundry promptly after the cycle completes. If you accidentally leave your clothes in the washer for too long, consider running another cycle with vinegar or a specialty cleaner to eliminate odors. Extra Tips for Odor Prevention In addition to drying and cleaning, consider the following maintenance strategies: - **Wipe Down Areas**: Regularly wipe down the rubber seal around the door with a damp cloth to keep it clean. This simple step can help prevent mildew growth. - **Control Your Wash Temperature**: Avoid cool water wash cycles exclusively, as warmer cycles promote better bacterial reduction. - **Use Fan Features**: Many modern washers, like select models from Maytag, have FanFresh technology, which circulates air within the machine to keep laundry fresh even after cycles end. Final Thoughts: Create a Fresh Laundry Routine Integrating these practices into your laundry routine may make a world of difference. Not only will your washing machine produce fresher-smelling clothes, but you’ll also prolong the life of your appliance. By keeping the environment in your washer clean and dry, you’ll enhance your overall laundry experience. Take Action: Freshen Up Your Laundry Routine! Don’t let mildew steal the freshness from your laundry. Implement these tips today and breathe new life into your washing routine. A cleaner washer equals fresher clothes!

01.20.2026

Discover Why Your Silicone Kitchen Tools Taste Like Soap And How To Fix It!

Update Why Do Silicone Kitchen Tools Taste Like Soap? If you've ever taken a bite of your baked goods and been greeted by a mysterious soapy aftertaste, you're not alone. Many home cooks encounter this baffling issue, often wondering how their silicone utensils could negatively impact their culinary creations. But fear not! This article sheds light on the causes behind this unpleasant phenomenon and arms you with handy solutions to banish the soapy taste from your kitchen. Understanding the Soapy Taste in Silicone Tools Silicone is an incredibly popular material used in kitchen tools such as spatulas, molds, and baking mats due to its flexibility, heat resistance, and ease of cleaning. However, the very properties that make silicone great can also lead to the absorption of odors and flavors, particularly from strong dish soaps. It's a classic case of the material's permeability causing annoying outcomes. According to experts, if you're experiencing a soap-like flavor, it often results from the chemical residues left behind by harsh detergents. Products containing essential oils or fragrances tend to leave a lingering scent that becomes encapsulated in the silicone, eventually influencing whatever delectable dish you attempt to prepare. The Culprits: Types of Dish Soaps to Avoid Household dish soaps are not all created equal. High-temperature exposure to aggressive cleaning agents, especially ones high in pH or packed with fragrances, can lead to significant soap infiltration in your silicone products. For instance, Stasher, a popular silicone storage bag brand, specifically warns against using Cascade detergent, which is notorious for leaving behind a soapy aftertaste. Strong essential oils in dish soaps can also be suspected. While they may entice with their pleasant aroma, they have the potential to embed within the silicone during the washing process, causing havoc in your next kitchen venture. To minimize this issue, consider using unscented or neutral-pH detergents, which are gentler on silicone and less likely to seep into your kitchen tools. Practical Solutions: How to Remove the Soap Flavor The good news? You have plenty of options at your fingertips to rectify the soapy flavor. Here are some effective methods endorsed by experts: 1. Baking Soda Scrubbing One of the simplest remedies involves making a paste of baking soda and water. Gently scrub the mixture onto your silicone tools, allowing it to sit for a while before rinsing. The alkaline properties of baking soda will help neutralize the soap residue, refreshing your implements for their next use. 2. Vinegar Solution Soak Dark and murky flavors can also be cleared with a vinegar solution. A mixture comprising equal parts vinegar and water can be an effective soak for around 1 to 3 hours. Rinse well afterward to avoid any lingering acidity. 3. Baking It Off with Heat If scrubbing and soaking don't do the trick, try employing the power of heat. Preheat your oven to 250°F, and place your silicone tools on a baking sheet. Bake them for about 30 minutes, which will allow any remaining residues to evaporate. Just ensure that your products are oven-safe! Keep Your Kitchen Smelling Fresh Of course, prevention is paramount. By incorporating a few best practices into your dishwashing routine, you can significantly mitigate any unpleasant flavors: Use unscented, mild detergents free from fragrances. Ensure thorough rinsing of your silicone tools after washing. Store silicone items in a dry, well-ventilated area to avoid moisture retention, which can harbor undesirable smells. Embrace the Versatility of Silicone without Concern Your love for silicone kitchen tools doesn’t need to be marred by the pesky issue of soap-flavored dishes. By being mindful of your choice of dish soap and employing some of these solutions, you can still enjoy the versatility and durability of silicone without the aftertaste. So go ahead and bake to your heart's content—just remember to keep it 'soap-free'! For those who want to dive deeper into maintaining a fresh kitchen environment, be sure to check out our additional resources on kitchen cleaning and maintenance.

01.17.2026

Transform Your Laundry Day: How to Prevent Sheets From Balling Up in the Dryer

Update The Struggle is Real: Why Sheets Love to Ball Up We've all experienced the frustration of pulling a tangled mess of sheets from the dryer, a literal ball of fabric that would make even the best of us want to throw in the towel (pun intended!). This common laundry woe happens due to the large surface area of sheets, which can easily twist and fold during the tumble dry cycle. But fear not! With some insider tips from laundry professionals, you can keep those sheets from becoming a jumbled mess. The Bigger the Load, The Bigger the Mess One of the first rules of thumb when dealing with laundry is to avoid overloading the dryer. Laundry experts recommend separating sheets and towels from other clothing items. Why? Because towels are bulky and tend to create tension in the dryer. When sheets get tangled with towels, they are more likely to ball up. Instead, dry your sheets alone or with a couple of lightweight items to give them more space to move freely. The Magic of Drying Balls and Fabric Softener Another fantastic tip is to use dryer balls. Whether made from wool or rubber, these handy little tools introduce air gaps between clothing, allowing for better airflow and reducing clumping. Not only do they help prevent sheets from balling but they can also decrease drying time, which is a win-win! Pair them with a capful of fabric softener for added freshness and fluffiness, and you'll soon find laundry day transformed from a chore to a delightful experience. A Game of Timing: The Right Settings Matter It’s not just what you put in the dryer, but how you put it in there that matters! Opt for a lower heat setting or a delicate cycle when drying sheets. Using a higher temperature can give your sheets that crispy feel but also increases the likelihood that they will wrinkle and crease, causing them to ball up. Experiment with your dryer’s settings to find the perfect balance of dried but not crumpled. Matching Your Sheets for Maximum Effect Another unexpected but crucial tip from laundry pros is to keep your sheets matched in terms of fabric type and weight. Mixing different types of fabrics (think flannel with satin) can create havoc in the dryer, as they respond differently to heat and movement. Keeping similar sheets together will help distribute weight evenly and significantly reduce the risk of tangling. The Unexpected Role of Humidity Believe it or not, the humidity level in your home can greatly affect drying times and fabric behavior. In particularly humid environments, sheets may take longer to dry and are more likely to gather moisture, which can lead to spots and odors if left bunched up. Keeping your laundry room well-ventilated can aid in reducing humidity and ensuring that your sheets dry quickly and efficiently. Storing Sheets for Success Finally, how you store your sheets can impact their longevity and performance. Rather than shoving your sheets haphazardly in a drawer, fold them neatly and store them in an organized manner. Not only does this prevent wrinkles, but it also makes it easy to grab a matching set without having to dig through a chaotic pile. Plus, it’s aesthetically pleasing! Your Gateway to Laundry Liberation With the right approach, your laundry routine doesn’t need to be a perpetual battle. Instead, embrace these tips to transform laundry day into a stress-free experience. So next time you face the dryer, you can confidently anticipate a smooth, wrinkle-free retrieve. Remember, a bit of planning and care can make all the difference! Are you ready to give these laundry techniques a try? You might just find these insights not only enhance your efficiency but also ensure that your sheets are fresh and tidy, eliminating that dreaded balling issue once and for all!

Terms of Service

Privacy Policy

Core Modal Title

Sorry, no results found

You Might Find These Articles Interesting

T
Please Check Your Email
We Will Be Following Up Shortly
*
*
*