Add Row
Add Element
UPDATE
Add Element
  • Home
  • Categories
    • Cleaning & Moving
    • Maintenance / Repairs
    • Remodeling & Construction
    • Landscaping / Outdoor
    • Security & Technology
    • Sustainability, Health & Safety
    • Interiors / Décor
    • Expert Interviews
    • DIY Home Projects
Home Wise News!
Wise Insights, Reliable Contractor Advice & Hands on DIY Know How for Savvy Homeowners
May 05.2025
3 Minutes Read

Transform Your Window Cleaning Routine with Tyroler’s Versatile Squeegee

Tyroler window cleaning tool with flexible head and detachable handle.

Experience Easier Window Cleaning with Tyroler's Innovative Tool

Are you tired of struggling with tall or difficult-to-reach windows that leave you frustrated and exhausted? Tyroler’s 2-in-1 high window cleaning tool may be just what you need. Designed with safety and efficiency in mind, this cleaning tool simplifies the challenge of maintaining your home’s windows, ensuring you can do the job yourself without a hefty bill from professional cleaners.

Why Choose Tyroler for Your Window Cleaning Needs?

For homeowners grappling with the upkeep of hard-to-reach areas, Tyroler has developed a versatile cleaning solution that combines both a squeegee and a microfiber cloth. This dual-functionality makes it easy for you to switch between drying and scrubbing, saving you precious time in your cleaning routine. With decades of experience in providing quality cleaning tools, Tyroler offers a product that stands up to the test of time, ensuring your windows sparkle without the risk of damage.

Durability That You Can Trust

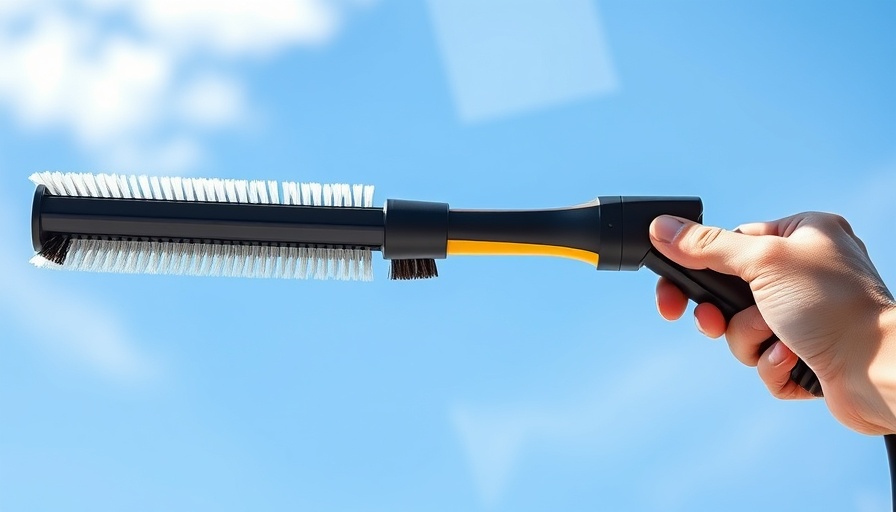
The Tyroler high window cleaning tool boasts a robust design made from 100% high-quality rubber that guarantees durability without compromising safety. Without metal parts around the squeegee, homeowners can confidently use this tool on delicate glass surfaces. You won’t have to worry about scratching or damaging your precious windows. Plus, the 180-degree rotating head adds flexibility, allowing you to navigate those tricky corner windows and curved surfaces effortlessly.

The Benefit of an Extendable Handle

With an extendable telescopic handle that reaches up to an impressive 205 cm, cleaning becomes safe and straightforward. No more climbing on ladders or precarious stools; with Tyroler’s innovative design, reach those high windows safely from solid ground. This feature not only enhances your safety but also boosts your cleaning efficiency.

Cost-Effective and Convenient for Homeowners

Purchasing the Tyroler window cleaner at $27.99 is a small investment when compared to the costs associated with hiring professional cleaners on a recurring basis. It provides immense value, allowing homeowners to take control of their cleaning tasks without breaking the bank. Considering the savings and convenience it offers, the Tyroler window cleaning tool quickly pays for itself.

Use It Beyond Windows: Versatility at Its Best

The Tyroler isn’t just for windows; this practical tool is equally effective on a variety of glass surfaces around your home. It works flawlessly on glass shower doors, mirrors, and even RV windshields. This flexibility makes it an essential addition to your cleaning arsenal, transforming how you think about maintaining your home.

Exclusive Discount for Our Readers

To celebrate the launch of the Tyroler window cleaner, readers can take advantage of an exclusive 15% discount by using the code “1515OFF4U” at checkout on Amazon’s US and Canada marketplaces. Don’t miss this chance to elevate your cleaning experience while enjoying substantial savings!

Empower Your Cleaning Routine

Investing in effective cleaning tools like the Tyroler window cleaning tool not only eases the physical labor associated with home maintenance but also empowers homeowners to take pride in maintaining their spaces. This innovative squeegee combines practicality and style, ensuring you have the best tools for the job. Step away from hiring out cleaning chores and embrace the confidence that comes with maintaining your own home!

Cleaning & Moving

Write A Comment

*
*
Related Posts All Posts
11.15.2025

Transform Your Cooking Space: Clean Your Stove with Vinegar Efficiently!

Update Unleash the Power of Vinegar: Your Secret Weapon Against Grease Cleaning the stove might seem like a mundane chore, but armed with vinegar, it can transform into a pleasant and rewarding experience. Vinegar is not just for salad dressings; its mild acidity breaks down grease and grime, ensuring your stove shines like the day it was installed. A Step-by-Step Guide to Grease-Free Cooking Surfaces Whether you’re battling a gas, electric, or induction stovetop, vinegar's versatility shines through. Here’s a step-by-step guide for using vinegar effectively: For Gas Stoves Allow the stove to cool, then disassemble the removable components. Mix one gallon of hot water with one cup of vinegar and a tablespoon of dish soap in a large container to soak the burner grates and control knobs. In a spray bottle, combine equal parts hot water and vinegar, spray the stovetop surface, and allow it to sit for ten minutes to loosen grease. Wipe it down with a damp cloth, making sure to rinse the cloth frequently to avoid spreading grease around. Once clean, reassemble the stovetop only after everything is completely dry. For Electric Coil Stoves Turn the coils onto high for three minutes to burn off grease, allowing them to cool completely. Remove and clean the coils carefully, ensuring they aren’t submerged in water. Soak the drip pans in a solution of vinegar and dish soap to remove stubborn stains. Wipe the stovetop with vinegar and water solution and let sit before scrubbing. For Induction & Glass Cooktops Make sure the cooktop is cool. Spray it with a mixture of equal parts vinegar and water. Let it sit for 5-10 minutes to break down grease, then wipe away the residue with a damp microfiber cloth. Dry the surface thoroughly to avoid streaks. Going Beyond Basic Cleaning To tackle particularly stubborn grease, combine vinegar with baking soda. When mixed, these two ingredients create a foaming action that can lift even the toughest stains. Simply spray the area with the vinegar solution, sprinkle baking soda, cover with a damp cloth, and let it work its magic for about 15 minutes. Scrub away with a soft cloth to reveal a spotless surface. Why Regular Cleaning Matters Regularly cleaning your stove not only keeps it looking pristine but it also prevents grease buildup that could lead to unpleasant odors and fire hazards. Establish a habit of wiping down after each use and conducting a thorough cleaning every week. Utilizing Other Household Items in Your Cleaning Arsenal Looking for alternatives to just vinegar? Other household items can help bust through grease: Lemon Juice: A natural degreaser due to its citric acid content. Baking Soda: Adds a mild abrasive quality that can help scrub away stubborn stains. Dish Soap: Specifically soaps with degreasing agents can be mixed with water for effective results. Tips for Maintaining a Clean Stove To ensure longevity between cleanings, consider these tips: Use lids when cooking to minimize splatters. Employ a splatter screen for cooking breakfast items like bacon. Regularly clean the grates and burners to avoid smoke and odor issues during cooking. Your Takeaway: Don't Let Grease Win Cleaning your stove with vinegar is not only effective but also eco-friendly, keeping harsh chemicals out of your kitchen. Embrace the power of vinegar, and watch how it not only revives the look of your stove but also reinforces a sense of hygiene in your cooking space. Make cleaning a regular affair, and you’ll find it a breeze! Ready to dive in? Grab your vinegar and give your stove the TLC it deserves. What are you waiting for? A cleaner kitchen is just a spray away!

11.15.2025

How to Wash Microfiber Towels to Maintain Their Cleaning Magic

Update The Secret to Keeping Your Microfiber Towels in Top Shape Microfiber towels have become the unsung heroes of cleaning, boasting an incredible ability to trap dirt, absorb moisture, and leave surfaces streak-free. With their impressive durability, they can withstand hundreds of washes when maintained properly. Yet, many enthusiasts find themselves perplexed by the ideal care practices for these magical cleaning tools. Don't fret! Here’s how to ensure your microfiber towels remain as effective as ever without losing their 'magic.' Why Microfiber? A Brief Overview Microfiber is a fabric made up of extremely fine synthetic fibers. These fibers are split to create many tiny loops that make them highly effective at picking up dust and grime. Unlike traditional materials, microfiber traps particles instead of spreading them around. This leads to superior cleaning results! However, improper washing methods can damage the fibers and reduce their efficiency. Hence, it’s crucial to give these little cloths the tender, loving care they deserve. Washing Microfiber Towels: The Do's and Don'ts To start off right, let’s set some ground rules for washing microfiber towels: Do: Wash separately. Keeping microfiber towels away from other laundry prevents lint transfer, which can clog those tiny fibers. Do: Use warm water—ideally not exceeding 160ºF—to preserve their fiber structure. Don’t: Use bleach or fabric softener. Bleach can degrade microfiber and fabric softeners create a waxy residue that reduces absorbency. Don’t: Overload the washer. Give your towels enough space to move around for a thorough clean. Machine Washing vs. Hand Washing: Which is Better? Machine washing is efficient for a larger number of towels but may be harsher on fibers. Comparatively, hand washing is gentler and a great option for spot-cleaning. For machine washing, consider a gentle detergent, ideally pH-neutral, to protect both your towels and skin. On the other hand, if using the hand-washing method, soak them in a warm soapy solution, gently rub to remove dirt, and rinse thoroughly. Drying Methods: Tips for Optimal Results You can choose to air dry or tumble dry them. But be cautious! Air drying is preferable to maintain the towel’s softness and absorbency. If you opt for the dryer, use the lowest heat setting possible. Never add dryer sheets; they can coat the fibers negatively affecting their cleaning power. Instead, try adding dryer balls to help dislodge hairs and debris. Expert Tips for Long-Lasting Use According to cleaning guru Ashlyn Needham, consistent care is key! To avoid odors and enhance the towels' freshness, consider a vinegar rinse every few washes. Additionally, keep your microfiber towels stored in a cool, dry place, away from humidity, to prevent mildew. When they start to lose their absorbency or develop frays, it’s time for a replacement. On average, with proper care, a good microfiber towel can last a few years, making them a sustainable choice for your cleaning needs! Conclusion: Your Towels Deserve the Best By following these simple yet effective care tips, your microfiber towels can remain the powerful cleaning allies they’re meant to be. Whether you’re a cleaning aficionado or just trying to keep your home tidy, giving your microfiber towels the right care can save you money in the long run while keeping your living environment spick-and-span!

11.13.2025

Cleaning Your Dryer Vents: Keep Your Home Safe and Efficient

Update Why Cleaning Your Dryer Vents Is A Must While many of us take our laundry routines for granted, the importance of dryer vent cleaning often sneaks under the radar. Regular maintenance of our dryer vents is vital—not just for improved efficiency, but more importantly, for preventing hazardous fires. According to experts, lint accumulation in dryer ducts poses a serious fire risk that can easily be avoided with upkeep. Understanding the Risks Let's start with the cold, hard facts: household dryers account for nearly 15,000 fires annually in the U.S., with a significant number attributed to dirty vents. Over time, lint, dust, and debris can build up, creating blockages that restrict airflow. This increased thermal buildup can lead to overheating, potentially sparking a fire. Thus, knowing how to clean your dryer vent can play a crucial role in safeguarding your home. How Often Should You Clean Your Dryer Vent? Experts recommend cleaning your dryer vent at least once a year. However, if you're a laundry enthusiast—perhaps with a large family that washes loads several times a week—you might want to consider cleaning it every six months. Signs that your dryer vent may need immediate attention include longer drying times, a burning smell, or your dryer being excessively hot to the touch. Materials You'll Need for the Task As avowed DIYers, we can take on this task with surprisingly few tools. To clean your dryer vent, gather the following: Vacuum with a hose attachment Lint brush Vent cleaning brush (available at home improvement stores) Screwdriver (if necessary) Flashlight (for spotting hidden lint) Step-by-Step Cleaning Instructions Let’s dive into the how-to: Unplug Your Dryer: Your safety is paramount. Always unplug your dryer before starting any maintenance. Disconnect the Vent Hose: You'll need to detach the vent hose from both the dryer and the exhaust outlet. Sometimes, a screwdriver might be necessary to get it loose. Clear the Hose: Shake out any clumps of lint you can reach and use your vacuum attachment or lint brush to extract deeper debris. Clean Inside the Vent: Get the vent cleaning brush and use a twisting motion to remove any lint buildup deeper down the duct. Final Checks: Look inside the dryer’s vent opening for anything obstructing the airflow. Shine a flashlight in there for a better view. Reconnect Everything: Once everything is clean and clear, reattach the hose, plug your dryer back in, and give it a quick test run. Prolonging Your Dryer’s Lifespan Now that you’ve tackled cleaning your dryer vent, let’s talk maintenance. The best way to keep your vent clean in between purges is to employ a few simple strategies: **Lint Trap Usage:** Always clean the lint trap after every load. This will dramatically reduce the amount of lint entering the vent. **Avoid Overloading:** Resist the urge to cram your dryer full; this can obstruct airflow and create more lint buildup. The Cost-Effectiveness of Cleaning With the rising costs of energy, keeping your dryer vent clean can directly impact your utility bills. A clogged dryer vent forces your appliance to expend more energy by working overtime to dry clothes effectively. Therefore, ensuring your vent is clear is a win-win: not only does it improve safety, but it can also enhance your dryer’s energy efficiency, reducing your monthly bill! When to Seek Professional Help While DIY cleaning can often solve minor issues, remember that certain situations warrant a professional cleaning service. If you find accumulated lint that’s hard to reach or if you suspect deeper issues within your vent system, professional services can ensure thorough cleaning, giving you peace of mind that your home is safe. Conclusion In conclusion, keeping your dryer vent clean should be an essential part of home maintenance. By paying attention to the signs and performing regular cleanings, you will not only enhance your dryer’s efficiency but also drastically reduce the risk of fire hazards. Embrace these practices, and keep your laundry routine running smoothly and safely!

Terms of Service

Privacy Policy

Core Modal Title

Sorry, no results found

You Might Find These Articles Interesting

T
Please Check Your Email
We Will Be Following Up Shortly
*
*
*