Add Row
Add Element
UPDATE
Add Element
  • Home
  • Categories
    • Cleaning & Moving
    • Maintenance / Repairs
    • Remodeling & Construction
    • Landscaping / Outdoor
    • Security & Technology
    • Sustainability, Health & Safety
    • Interiors / Décor
    • Expert Interviews
    • DIY Home Projects
Home Wise News!
Wise Insights, Reliable Contractor Advice & Hands on DIY Know How for Savvy Homeowners
May 15.2025
3 Minutes Read

Transforming Outdoor Waste Management: Simple Steps for a Cleaner Routine

Overflowing outdoor garbage bin in urban area with fallen leaves.

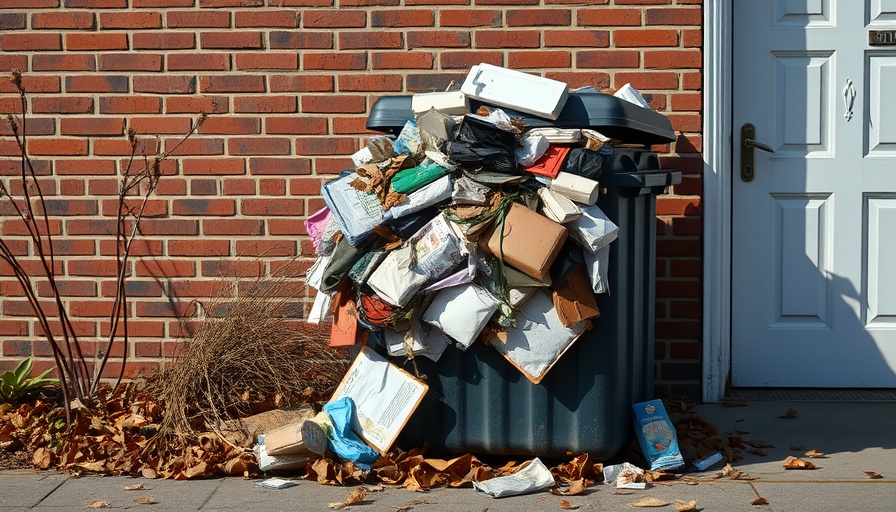
The Importance of Outdoor Waste Management

Effective waste management is crucial for maintaining a clean and healthy living environment. As the warmer months approach, outdoor waste bins become a focal point for odors and pests. Homeowners must adopt effective strategies to manage their outdoor waste, transforming a seemingly tedious task into a well-structured routine. By implementing simple practices, you can enjoy a cleaner, healthier outdoor space while minimizing unpleasant odors and pest issues.

Understanding the Basics: Keeping Bins Clean

One of the simplest yet most effective strategies for waste management is keeping the insides of bins clean. Residue from previous waste items often leads to persistent odors. After your trash collection, take a moment to rinse your bins. Regular rinsing, paired with gentle disinfectants or vinegar sprays, can significantly reduce unpleasant smells and create a more hygienic environment. Adopting a weekly cleaning routine helps prevent larger hygiene problems later, keeping your outdoor space inviting.

The Role of Liners in Waste Management

Using liners in your outdoor bins can be a game-changer. These liners catch spills and residue, preventing them from seeping into the bin and creating mess. It's essential to select liners that are durable enough to hold sharp or heavy items while being simple to tie and remove. When using properly fitted liners, disposal becomes a cleaner task, reducing the time and effort spent on cleaning your bins. This small adjustment can make a big difference.

Natural Solutions for Odor Control

Controlling odors doesn’t always have to rely on chemicals or commercial sprays. Natural options such as baking soda or charcoal can help absorb and neutralize unwanted smells. A few pieces of citrus peel tucked in the bottom of your bin can work wonders too. For regions that experience increased temperatures, these natural methods can be especially beneficial. Proactively managing odors saves time and can make waste disposal a more pleasant experience.

Avoiding Insect Infestations

Unsecured bins are an open invitation for pests like flies, wasps, and rodents. Securing your food waste and ensuring bins are always closed can significantly mitigate these risks. Regularly washing your bins and using reliable plastic liners or sealed covers enhances your defenses against intruding pests. Additionally, specialized bin bags, often referred to as wheelie bin bags, provide an added layer of convenience and protection, making waste management easier.

Creating a Family-Friendly Disposal System

Encouraging your family to participate in waste management is easier when the process is simplified. Designating specific bins for different waste types and labeling them clearly promotes organization and ease of use. Regular reminders to tie off bags and close lids help reinforce good habits among household members, making everyone more accountable. When the routine is mess-free, participation increases, leading to a more organized and clean environment.

Wrapping Up: A Cleaner Routine for Outdoor Waste

By adopting the outlined strategies, you can create an effective and efficient outdoor waste management routine. From maintaining clean bins and utilizing liners to using natural odor control solutions and preventing pest infestations, each practice contributes significantly to a cleaner and healthier outdoor space. Remember, a tidy outdoor bin not only benefits your property; it influences the entire neighborhood's cleanliness. With your new routine, outdoor waste management becomes a simple part of your weekly tasks rather than a dreaded chore. Embrace these changes—not just for your home’s sake but for the world outside it, ensuring a more sustainable lifestyle for everyone.

Cleaning & Moving

Write A Comment

*
*
Related Posts All Posts
11.15.2025

Transform Your Cooking Space: Clean Your Stove with Vinegar Efficiently!

Update Unleash the Power of Vinegar: Your Secret Weapon Against Grease Cleaning the stove might seem like a mundane chore, but armed with vinegar, it can transform into a pleasant and rewarding experience. Vinegar is not just for salad dressings; its mild acidity breaks down grease and grime, ensuring your stove shines like the day it was installed. A Step-by-Step Guide to Grease-Free Cooking Surfaces Whether you’re battling a gas, electric, or induction stovetop, vinegar's versatility shines through. Here’s a step-by-step guide for using vinegar effectively: For Gas Stoves Allow the stove to cool, then disassemble the removable components. Mix one gallon of hot water with one cup of vinegar and a tablespoon of dish soap in a large container to soak the burner grates and control knobs. In a spray bottle, combine equal parts hot water and vinegar, spray the stovetop surface, and allow it to sit for ten minutes to loosen grease. Wipe it down with a damp cloth, making sure to rinse the cloth frequently to avoid spreading grease around. Once clean, reassemble the stovetop only after everything is completely dry. For Electric Coil Stoves Turn the coils onto high for three minutes to burn off grease, allowing them to cool completely. Remove and clean the coils carefully, ensuring they aren’t submerged in water. Soak the drip pans in a solution of vinegar and dish soap to remove stubborn stains. Wipe the stovetop with vinegar and water solution and let sit before scrubbing. For Induction & Glass Cooktops Make sure the cooktop is cool. Spray it with a mixture of equal parts vinegar and water. Let it sit for 5-10 minutes to break down grease, then wipe away the residue with a damp microfiber cloth. Dry the surface thoroughly to avoid streaks. Going Beyond Basic Cleaning To tackle particularly stubborn grease, combine vinegar with baking soda. When mixed, these two ingredients create a foaming action that can lift even the toughest stains. Simply spray the area with the vinegar solution, sprinkle baking soda, cover with a damp cloth, and let it work its magic for about 15 minutes. Scrub away with a soft cloth to reveal a spotless surface. Why Regular Cleaning Matters Regularly cleaning your stove not only keeps it looking pristine but it also prevents grease buildup that could lead to unpleasant odors and fire hazards. Establish a habit of wiping down after each use and conducting a thorough cleaning every week. Utilizing Other Household Items in Your Cleaning Arsenal Looking for alternatives to just vinegar? Other household items can help bust through grease: Lemon Juice: A natural degreaser due to its citric acid content. Baking Soda: Adds a mild abrasive quality that can help scrub away stubborn stains. Dish Soap: Specifically soaps with degreasing agents can be mixed with water for effective results. Tips for Maintaining a Clean Stove To ensure longevity between cleanings, consider these tips: Use lids when cooking to minimize splatters. Employ a splatter screen for cooking breakfast items like bacon. Regularly clean the grates and burners to avoid smoke and odor issues during cooking. Your Takeaway: Don't Let Grease Win Cleaning your stove with vinegar is not only effective but also eco-friendly, keeping harsh chemicals out of your kitchen. Embrace the power of vinegar, and watch how it not only revives the look of your stove but also reinforces a sense of hygiene in your cooking space. Make cleaning a regular affair, and you’ll find it a breeze! Ready to dive in? Grab your vinegar and give your stove the TLC it deserves. What are you waiting for? A cleaner kitchen is just a spray away!

11.15.2025

How to Wash Microfiber Towels to Maintain Their Cleaning Magic

Update The Secret to Keeping Your Microfiber Towels in Top Shape Microfiber towels have become the unsung heroes of cleaning, boasting an incredible ability to trap dirt, absorb moisture, and leave surfaces streak-free. With their impressive durability, they can withstand hundreds of washes when maintained properly. Yet, many enthusiasts find themselves perplexed by the ideal care practices for these magical cleaning tools. Don't fret! Here’s how to ensure your microfiber towels remain as effective as ever without losing their 'magic.' Why Microfiber? A Brief Overview Microfiber is a fabric made up of extremely fine synthetic fibers. These fibers are split to create many tiny loops that make them highly effective at picking up dust and grime. Unlike traditional materials, microfiber traps particles instead of spreading them around. This leads to superior cleaning results! However, improper washing methods can damage the fibers and reduce their efficiency. Hence, it’s crucial to give these little cloths the tender, loving care they deserve. Washing Microfiber Towels: The Do's and Don'ts To start off right, let’s set some ground rules for washing microfiber towels: Do: Wash separately. Keeping microfiber towels away from other laundry prevents lint transfer, which can clog those tiny fibers. Do: Use warm water—ideally not exceeding 160ºF—to preserve their fiber structure. Don’t: Use bleach or fabric softener. Bleach can degrade microfiber and fabric softeners create a waxy residue that reduces absorbency. Don’t: Overload the washer. Give your towels enough space to move around for a thorough clean. Machine Washing vs. Hand Washing: Which is Better? Machine washing is efficient for a larger number of towels but may be harsher on fibers. Comparatively, hand washing is gentler and a great option for spot-cleaning. For machine washing, consider a gentle detergent, ideally pH-neutral, to protect both your towels and skin. On the other hand, if using the hand-washing method, soak them in a warm soapy solution, gently rub to remove dirt, and rinse thoroughly. Drying Methods: Tips for Optimal Results You can choose to air dry or tumble dry them. But be cautious! Air drying is preferable to maintain the towel’s softness and absorbency. If you opt for the dryer, use the lowest heat setting possible. Never add dryer sheets; they can coat the fibers negatively affecting their cleaning power. Instead, try adding dryer balls to help dislodge hairs and debris. Expert Tips for Long-Lasting Use According to cleaning guru Ashlyn Needham, consistent care is key! To avoid odors and enhance the towels' freshness, consider a vinegar rinse every few washes. Additionally, keep your microfiber towels stored in a cool, dry place, away from humidity, to prevent mildew. When they start to lose their absorbency or develop frays, it’s time for a replacement. On average, with proper care, a good microfiber towel can last a few years, making them a sustainable choice for your cleaning needs! Conclusion: Your Towels Deserve the Best By following these simple yet effective care tips, your microfiber towels can remain the powerful cleaning allies they’re meant to be. Whether you’re a cleaning aficionado or just trying to keep your home tidy, giving your microfiber towels the right care can save you money in the long run while keeping your living environment spick-and-span!

11.13.2025

Cleaning Your Dryer Vents: Keep Your Home Safe and Efficient

Update Why Cleaning Your Dryer Vents Is A Must While many of us take our laundry routines for granted, the importance of dryer vent cleaning often sneaks under the radar. Regular maintenance of our dryer vents is vital—not just for improved efficiency, but more importantly, for preventing hazardous fires. According to experts, lint accumulation in dryer ducts poses a serious fire risk that can easily be avoided with upkeep. Understanding the Risks Let's start with the cold, hard facts: household dryers account for nearly 15,000 fires annually in the U.S., with a significant number attributed to dirty vents. Over time, lint, dust, and debris can build up, creating blockages that restrict airflow. This increased thermal buildup can lead to overheating, potentially sparking a fire. Thus, knowing how to clean your dryer vent can play a crucial role in safeguarding your home. How Often Should You Clean Your Dryer Vent? Experts recommend cleaning your dryer vent at least once a year. However, if you're a laundry enthusiast—perhaps with a large family that washes loads several times a week—you might want to consider cleaning it every six months. Signs that your dryer vent may need immediate attention include longer drying times, a burning smell, or your dryer being excessively hot to the touch. Materials You'll Need for the Task As avowed DIYers, we can take on this task with surprisingly few tools. To clean your dryer vent, gather the following: Vacuum with a hose attachment Lint brush Vent cleaning brush (available at home improvement stores) Screwdriver (if necessary) Flashlight (for spotting hidden lint) Step-by-Step Cleaning Instructions Let’s dive into the how-to: Unplug Your Dryer: Your safety is paramount. Always unplug your dryer before starting any maintenance. Disconnect the Vent Hose: You'll need to detach the vent hose from both the dryer and the exhaust outlet. Sometimes, a screwdriver might be necessary to get it loose. Clear the Hose: Shake out any clumps of lint you can reach and use your vacuum attachment or lint brush to extract deeper debris. Clean Inside the Vent: Get the vent cleaning brush and use a twisting motion to remove any lint buildup deeper down the duct. Final Checks: Look inside the dryer’s vent opening for anything obstructing the airflow. Shine a flashlight in there for a better view. Reconnect Everything: Once everything is clean and clear, reattach the hose, plug your dryer back in, and give it a quick test run. Prolonging Your Dryer’s Lifespan Now that you’ve tackled cleaning your dryer vent, let’s talk maintenance. The best way to keep your vent clean in between purges is to employ a few simple strategies: **Lint Trap Usage:** Always clean the lint trap after every load. This will dramatically reduce the amount of lint entering the vent. **Avoid Overloading:** Resist the urge to cram your dryer full; this can obstruct airflow and create more lint buildup. The Cost-Effectiveness of Cleaning With the rising costs of energy, keeping your dryer vent clean can directly impact your utility bills. A clogged dryer vent forces your appliance to expend more energy by working overtime to dry clothes effectively. Therefore, ensuring your vent is clear is a win-win: not only does it improve safety, but it can also enhance your dryer’s energy efficiency, reducing your monthly bill! When to Seek Professional Help While DIY cleaning can often solve minor issues, remember that certain situations warrant a professional cleaning service. If you find accumulated lint that’s hard to reach or if you suspect deeper issues within your vent system, professional services can ensure thorough cleaning, giving you peace of mind that your home is safe. Conclusion In conclusion, keeping your dryer vent clean should be an essential part of home maintenance. By paying attention to the signs and performing regular cleanings, you will not only enhance your dryer’s efficiency but also drastically reduce the risk of fire hazards. Embrace these practices, and keep your laundry routine running smoothly and safely!

Terms of Service

Privacy Policy

Core Modal Title

Sorry, no results found

You Might Find These Articles Interesting

T
Please Check Your Email
We Will Be Following Up Shortly
*
*
*