Add Row
Add Element
UPDATE
Add Element
  • Home
  • Categories
    • Cleaning & Moving
    • Maintenance / Repairs
    • Remodeling & Construction
    • Landscaping / Outdoor
    • Security & Technology
    • Sustainability, Health & Safety
    • Interiors / Décor
    • Expert Interviews
    • DIY Home Projects
Home Wise News!
Wise Insights, Reliable Contractor Advice & Hands on DIY Know How for Savvy Homeowners
August 06.2025
3 Minutes Read

Ultimate Small Appliance Storage Solutions for an Organized Kitchen

Small appliance storage ideas with mixer, coffee maker, toaster.

Decluttering Your Kitchen: The Need for Smart Storage Solutions

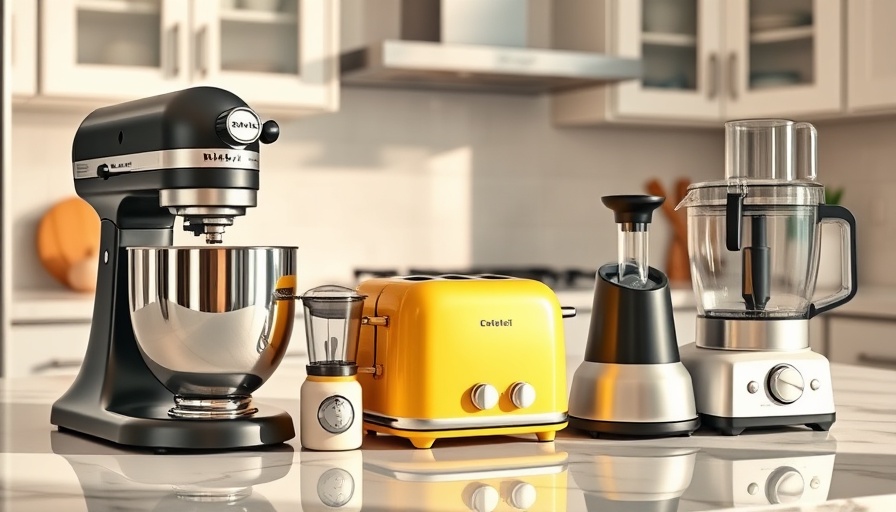
In today’s fast-paced environment, efficiency is crucial, especially in one of the most utilized spaces in our homes: the kitchen. Appliances like toasters, blenders, and coffee machines make cooking easier, yet they can quickly turn countertops into chaotic landscapes. With so many innovative small appliance storage solutions available, it’s easier than ever to restore balance to your kitchen. In consultations with organization expert Melanie Summers, we learn the importance of storing only what you need, where you need it. The goal is simple: concealment for non-essential items, but convenience for daily essentials.

Seven Innovative Storage Solutions for Small Appliances

Here are several practical DIY-inspired tips to organize small appliances and reclaim your kitchen space:

1. Appliance Garage: Conceal and Store

An appliance garage is a fantastic solution to keep your appliances both accessible and out of sight. These countertop cabinets feature pocket doors that slide open for easy access and close to keep your kitchen looking neat. According to kitchen design expert Thomas Borcherding, they come with built-in electrical outlets, allowing you to plug in your devices without having to move them around. This means that everything from your coffee maker to your rice cooker can be easily tucked away until it's needed again.

2. Use a Designated Cabinet: Reuse Existing Space

If an appliance garage is out of reach, transforming a lower cabinet into a small appliance zone is a smart alternative. Miller emphasizes this simple solution saves you the costs associated with renovations. By designating one cabinet for appliances, you’ll find it easier to keep everything organized without compromising your kitchen’s flow.

3. Embrace Kitchen Carts for Flexibility

Another creative option is to utilize a kitchen cart. These movable carts not only house your go-to appliances but can also hold serving dishes and additional items. Perfect for smaller kitchens or apartments, they provide you with flexibility while freeing up your counters. This rolling solution is ideal for renters or anyone looking to maximize their kitchen’s functionality without permanent changes.

4. Organize Accessories for Clarity

In the quest for appliance storage, don’t forget accessories. Investing in acrylic bins or dividers can help keep smaller pieces associated with your appliances organized. By using labeled bins, you save time and energy when looking for a blender attachment or food processor disk. This is especially crucial in keeping similar items tidy, maintaining a clutter-free appearance.

5. Hidden Doors: Out of Sight, Out of Mind

If creating an appliance garage or using a cabinet isn't feasible, consider the clever addition of hidden doors. This system allows you to conceal small appliances behind cabinetry, maintaining an uncluttered space while still providing access to your tools when necessary. It’s a stylish approach to maximizing your kitchen’s potential.

The Rewards of Organized Spaces

Beyond mere aesthetics, a well-organized kitchen can improve your cooking efficiency and time management. When appliances are stored thoughtfully, you’re less likely to waste time searching for them or dealing with clutter. Additionally, a tidy kitchen can significantly reduce stress, making meal preparation a more enjoyable experience.

DIY Projects: Making Storage Work for You

Tackling organization doesn’t have to be overwhelming. Utilize DIY projects to create bespoke storage solutions that fit the unique needs of your kitchen. Building simple shelves or repurposing old furniture can provide additional space for small appliances and their accessories.

Final Thoughts: Streamlining Your Cooking Space

With the right strategies, you can significantly enhance the functionality of your kitchen. Investing in organization not only maximizes your space but also influences how productive, and even creative, your cooking experience will become. Put these ideas into action, and enjoy a clutter-free kitchen that celebrates the art of cooking!

Don't let chaos rule your kitchen. Start implementing these strategies today for improved organization and efficiency!

DIY Home Projects

0 Comments

Write A Comment

*
*
Please complete the captcha to submit your comment.
Related Posts All Posts
04.21.2026

Unlock Your Home’s Potential: DIY Floating Shelves for Every Nook

Update Transform Your Space with Floating Shelves Are you tired of cluttered spaces that lack functionality? Adding floating shelves is a versatile and aesthetic way to enhance the functionality of any nook in your home, particularly one with those built-in characteristics that often feel outdated. Leaving behind the cumbersome cabinet for streamlined floating shelves not only refreshes your space but also breathes new life into it—something we all want in our homes. Why Floating Shelves? Floating shelves offer numerous benefits, including easy accessibility to your favorite decorative items while significantly enhancing your home’s decor. They utilize vertical space and create an illusion of a larger area—a boon for smaller rooms or nooks. Moreover, they can be customized to fit any style, so you can bring your unique flair to any corner of your home. Gather Your Materials and Tools As with any DIY project, your success hinges on having the right materials and tools. For floating shelves, you will need: 1×2 furring strips - Affordable and compact, perfect for building a sturdy support frame. 1/4″ plywood - This will serve as the shelf surface. Construction adhesive - Essential for secure attachment. Tools - A chop saw, drill, level, and nail guns are indispensable for precision work. Choosing quality materials ensures that your shelves withstand the test of time, maintaining both functionality and aesthetics. Measuring and Planning Your Floating Shelves The measurement process is crucial in the installation of floating shelves. Begin by measuring the dimensions of your nook, determining not only the width (e.g., 36 inches) but also the desired shelf depth (e.g., 16 inches). Since you’re aiming for a symmetrical and pleasing aesthetic, lay out your plans clearly, ideally sketching them out beforehand. This step prevents frustration later in the fitting process! Build Your Support Frame Once your measurements are confirmed, proceed to create the supporting frame. Start by cutting your 1×2 furring strips into the necessary lengths based on your computations. Utilizing corner clamps to hold the pieces square while drilling makes the assembly more efficient. Ensuring middle supports will strengthen your shelves and prevent sagging under weight, which is a vital step during the crafting process! Attach Your Shelves With the frame built, it’s time to affix it to your wall securely. Selecting the right wall anchors is imperative, especially if your nook has drywall rather than solid stud framing. Using a level ensures that your floating shelves will be straight, preventing the dreaded “slant”. Securely installing the shelves allows you to arrange your items confidently, knowing that they won't budge. Style and Decorate The fun begins after setting up your shelves. Select decor items that resonate with your personal style. Did you know that the rule of three enhances the aesthetic of any display? Arrange items in clusters of odd numbers to create visual interest. Utilize decorative baskets, plants, or picture frames to give life to your floating shelves and to turn a simple nook into an eye-catching multimedia display. Final Touches: Maintenance Tips Maintaining the integrity of your floating shelves requires minimal effort—simple dusting and avoiding overly heavy items will keep them looking fresh. Additionally, as the seasons change, consider rotating your decor to breathe new life into your displays without needing to redo your entire nook each time! Creating Nooks That Reflect You Ultimately, installing floating shelves can transform the way your nook looks and feels. Not only do floating shelves maximize storage, but they also provide a canvas for self-expression. So, embrace your creativity, tackle this DIY project, and enjoy the results! With a little effort, you can enhance your living space tremendously. Ready to Get Started? Now that you’re equipped with all the tips and tricks, it’s time to grab the materials and tools! Dive into this project to enhance your home’s charm with beautiful floating shelves. Make the space your own, and let your creativity express itself!

04.17.2026

Discover How to Use a DIY Carpet Deodorizer for Hotel-Like Freshness

Update Transform Your Home with a Simple DIY Carpet Deodorizer As a homeowner, keeping your living space smelling fresh can be a real challenge—especially if you have pets or live in a humid climate. While replacing old carpeting might be on your to-do list, there's no need to wait when a quick DIY solution is at your fingertips. The two-ingredient carpet deodorizer is a simple yet effective way to refresh your home and make it smell like a luxury hotel. Essential Ingredients for Freshening Up Your Carpets To make your own carpet deodorizer, all you'll need are two common household items: baking soda and your choice of essential or fragrance oils. Here’s how to whip up this magic mix: Materials Needed: 1 cup of baking soda and 10-20 drops of your favorite essential oils (like lavender, lemon, or eucalyptus). Instructions: Mix the baking soda and essential oil in a bowl until well blended. Sprinkle it evenly over your carpet, focusing on spots that experience the most foot traffic or have lingering odors. Let it sit for 15 minutes to 1 hour to allow the baking soda to absorb any unwanted smells, then vacuum it up. With these simple steps, you can ensure your home smells delightful without spending a fortune on commercial deodorizers or expensive candles. Why Baking Soda Works Wonders on Carpet Odors Baking soda is a powerhouse in the battle against unpleasant smells. Its chemical properties allow it to bind with odor-causing particles, neutralizing them instead of merely masking the odors. Cleaning expert Allen P. Rathey emphasizes that baking soda acts like a sponge for unpleasant smells, particularly those from pets or food spills, making it an ideal choice for pet owners and families. Customizing Your Strategy: Essential Oils and Scent Profiles The versatility of your DIY carpet deodorizer lies in the essential oils you select. For a fresh, uplifting aroma, opt for citrus scents like lemon or lime. If you're after something more cozy and warm, try vanilla or sandalwood. Each scent will contribute to the ambiance of your home, making it welcoming for guests and your own family. Frequently Asked Questions About DIY Carpet Deodorizers What if my carpet still smells after using this deodorizer? If odors persist, it might be time to consider deeper cleaning methods, such as hot water extraction, which is akin to giving your carpet a good shower. Sometimes, professional cleaning services can help you restore the freshness of your flooring more effectively than home remedies. Is this method safe for pets and children? While the ingredients used are generally safe, it's always a good idea to keep pets and children away from freshly treated carpets until the product has been vacuumed up. If you have pets, be cautious with certain essential oils, as some can be harmful to them. Always consult with your veterinarian for suggestions on safe scents. Creating a Healthy Indoor Environment with Natural Cleaning Solutions Using natural ingredients not only keeps your home smelling great, but it also contributes to a healthier living environment. Chemical-laden commercial products can lead to indoor air pollution and trigger allergies. By using this DIY carpet deodorizer, you're making a conscious choice for a more sustainable and eco-friendly home. Conclusion: Take Action for a Fresher Home If you're looking for quick and effective ways to enhance the aroma of your home, this DIY carpet deodorizer is a clever solution. It’s simple, safe, and cost-effective, proving that sometimes less is more. Give it a try next time you prepare for guests or simply want to enjoy a fresher living space!

04.17.2026

Essential Guide to Touching Up Paint on Your Walls

Update Mastering the Art of Touching Up Paint Touching up paint on your walls may seem like a simple fix, but it often proves to be a tricky endeavor. Many homeowners find themselves frustrated when a quick dab of paint turns into an obvious eyesore. With some insider knowledge and a few key techniques, however, you can seamlessly blend those imperfections without the need for a full repaint. Let's dive into how to keep your walls looking fresh and flawless! Understanding Common Pitfalls in Paint Touch-Ups Many touch-ups fail not due to lack of skill but because of common oversights. One major reason paint touch-ups stand out is mismatched color. Over time, even the best paint can fade from sunlight exposure, which may leave your new touch-up looking starkly different from the surrounding area. Additionally, improper technique—like applying too much paint in one spot—can lead to visible texture differences that scream “fix it!” Gathering Your Touch-Up Toolkit Before starting, ensure you have the following essential items: A can of the original paint color A small angled paintbrush or a clean cloth A damp rag for cleaning the area Fine grit sandpaper for rough spots Optional: a small foam roller for larger areas With these tools at your disposal, you’ll be well-prepared to tackle any wall imperfections! Preparation: Cleaning and Sanding Your Workspace Proper preparation is crucial for effective touch-ups. Start by cleaning the area where you will be painting. Dust and grime can hinder paint adhesion, so use a damp cloth to wipe the wall clean. If the surface is particularly rough or has received repairs like spackling, gently sand the area to ensure a smooth finish. This simple step can vastly improve the blend of your touch-up paint. Less is More: The Key to Application One of the most common mistakes during touch-ups is the over-application of paint. Instead of applying a heavy coat, start with a little paint on your brush or cloth. Apply it sparingly and build up as necessary. This helps avoid shiny patches that can draw attention to the repaired area. Remember: dab, don’t brush, and try to feather out the edges to create a seamless look. Assessing and Waiting for Drying Time It’s essential to allow your touch-up paint to dry completely before assessing your work. Fresh paint often appears different when it’s still wet and once it dries. Take your time; patience is key. If necessary, follow up with additional layers until you achieve the desired finish. The Foam Roller Advantage for Larger Areas If the area you are touching up is larger than a simple scuff mark, consider utilizing a small foam roller. This tool mimics the texture of your wall better than a brush, making it especially useful for satin or eggshell finishes. By rolling on the paint rather than brushing, you'll create a more consistent appearance across the surface. Color Matching and Consistency: A Critical Step Successful touch-ups hinge on matching the existing paint color and finish. If you’re unsure about the paint type or color, bring a sample chip to a local hardware store for advice or even a color match. Using the same sheen and texture as your original application is vital for blending touch-ups seamlessly. Make sure to stir any leftover paint well before application to ensure even color distribution. Final Thoughts: Embrace the Process While touching up paint might seem daunting, it can be a rewarding DIY project that revitalizes your walls. By following these techniques, you can overcome the common pitfalls and achieve a polished finish. So, don’t shy away from touching up your walls; instead, embrace the opportunity to enhance your home’s ambiance. If you ever find yourself overwhelmed with home repairs, remember that maintaining your space doesn't have to be a chore. Tune into your creative side, and make those walls shine again!

Terms of Service

Privacy Policy

Core Modal Title

Sorry, no results found

You Might Find These Articles Interesting

T
Please Check Your Email
We Will Be Following Up Shortly
*
*
*