Add Row
Add Element
UPDATE
Add Element
  • Home
  • Categories
    • Cleaning & Moving
    • Maintenance / Repairs
    • Remodeling & Construction
    • Landscaping / Outdoor
    • Security & Technology
    • Sustainability, Health & Safety
    • Interiors / Décor
    • Expert Interviews
    • DIY Home Projects
Home Wise News!
Wise Insights, Reliable Contractor Advice & Hands on DIY Know How for Savvy Homeowners
August 21.2025
3 Minutes Read

Unlock the Hidden Potential of Your Iron: Creative Household Uses

Modern steam iron on ironing board for creative uses

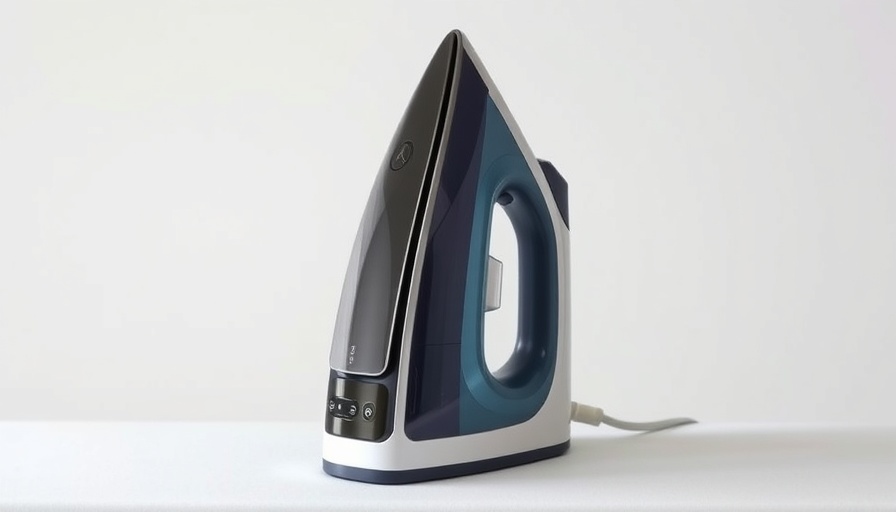
Beyond the Basics: Revamping Your Iron’s Purpose

When you think of an iron, what comes to mind? Most likely, you picture a quick fix for wrinkled clothes. But the humble iron is more versatile than you might think. In the world of home hacks, the iron stands out for its unexpected utility. Let’s explore some intriguing and practical uses that might just change how you view this household staple.

1. Steam Away Stubborn Stains

Many fabric stains can be tricky, but did you know your iron can be a powerful cleaning tool? By using the steam feature, you can tackle stubborn stains on upholstery or carpets. Simply place a damp cloth over the stain and let the steam penetrate. This method is perfect for lifting those annoying, lingering marks without resorting to harsh chemicals!

2. Beautify Your Home with Creative Décor

Who would’ve thought an iron could double as a crafting assistant? If you enjoy DIY projects, use your iron to help create beautiful home décor items like fabric wall art or revitalized pillowcases. Just ensure the fabric is suitable for heat, and use paper or press cloth to avoid sticky situations. With some creativity, you can breathe new life into worn-out items.

3. Perfectly Gloss Your Crafts

Are you an avid scrapbooker or card maker? Your iron can help give your creations a polished finish. For paper crafts, place a sheet of parchment paper over your designs and run the iron over it briefly. This technique can flatten curves and eliminate any embarrassing wrinkles, letting your work shine in all its glory.

4. A Quick Fix for Foggy Windows

Living in a humid climate? Consider using your iron to de-fog those windows! Simply hold a damp cloth against the glass and press it with your iron, allowing steam to clean and clear your view. This method not only provides a clearer pane but also adds a comforting warmth to your home.

5. Reviving Old Clothes and Fabrics

Ironing isn’t just for keeping things wrinkle-free; it can also help in reviving old fabrics. For garments that have soft creases or have lost their shape, a good steam iron can work wonders. The heat relaxes the fibers, allowing them to stretch back to their original form. This can help you get extra life out of older clothes, focusing on sustainability.

6. Remove Infestations from Fabrics

Did you know your iron can help in the war against unwanted pests? Bedbugs and dust mites are notorious for invading our clothes and linens. A hot iron on fabric can help kill these pesky critters. Just be careful and thorough when ironing over affected areas to ensure a safer and pest-free environment.

Practical Insights: Enhanced Cleaning Efficiency

These unique uses not only transform the iron into a multifunctional tool but can also improve the efficiency of your household chores. As innovations in home technology continue to simplify our lives, discovering hidden tools in everyday appliances can lead to a more sustainable and organized approach to home maintenance.

Decisions You Can Make With This Information

Considering the multifunctionality of your iron, think twice before relegating it to the laundry drawer. By leveraging its capabilities for cleaning, crafting, and pest control, you can make your home management more effective and efficient. You might even find yourself reaching for your iron more often than expected!

Conclusion: Unlocking the Iron’s Full Potential

In conclusion, the ordinary iron deserves more credit than just pressing clothes. With these creative insights, you can embrace a more innovative approach to home management. Explore the unexpected possibilities within your household and let your iron shine in new ways!

DIY Home Projects

Write A Comment

*
*
Related Posts All Posts
10.14.2025

Kick Out Those Screws: Simple Steps to Restore Your Hardwood Floors

Update Unlocking the Mystery: How Did Screws End Up on Your Floors? We've all been there: one moment you’re merrily enjoying the woodsy charm of your hardwood floors, and the next, you’re discovering pesky screws dotting the surface like unwanted guests at a party. The reasons behind this mischief can range from questionable renovation attempts to furniture rearrangements that went too far. Understanding the origins of these screws can help you plan the best course of action to restore your beloved floors without diving into a full-scale renovation. Tread Lightly: The Dangers of Ignoring Floor Screws While the temptation to simply leave those screws be is strong, doing so can lead to serious consequences. Over time, these screws can cause the hardwood to crack, splinter, or even create noise when you walk across it. Let’s not forget, your toes will thank you for not risking a surprise encounter with an exposed screw that’s poking out! In addition to dealing with potential hazards, ignoring the problem can hinder the overall aesthetic appeal of your home. Hilton Carter, a renowned interior designer, notes that flooring plays a crucial role in setting the ambiance of a room. Imagine having a beautiful home, only to be marred by a landscape of metal protrusions! DIY Techniques to Remove Screws and Restore Your Floors With high stakes and an eye on aesthetics, it’s time to tackle those intrusive screws head-on. Here’s a step-by-step approach to help you do just that: 1. Gather Essential Tools: Before diving in, ensure you have a Phillips screwdriver, pliers, concrete repair filler (for the inevitable holes), and sandpaper on hand. These tools will make your task significantly smoother. 2. Unscrewing the Culprits: Use the Phillips screwdriver to carefully remove each screw. If they’re stuck, pliers can provide extra leverage. Just make sure not to strip the screws while working your magic. 3. Filling the Void: Once the screws are out, you’ll notice holes left in your hardwood. Try using a concrete repair filler for a seamless patch job. It’s advisable to mix it according to the manufacturer’s instructions and apply it with a putty knife. 4. Sanding and Finishing: After the filler dries, gently sand the areas until they become flush with the rest of the floor. Finally, apply your favorite hardwood floor finish to restore the shine. Future Proofing: Preventing Screw Pests With the screws gone, let’s make sure they don’t come back. A thorough inspection of your furniture can point to any hidden traps where screws might be lurking. It’s also wise to ensure that any renovations you’re considering in the future use secure fixtures that are suited for hardwood applications. Additionally, consider applying a regular maintenance schedule to keep your floors in tip-top shape. Regular check-ups on the integrity of the boards can alert you to issues before they escalate into major disasters. Consulting the Pros: When to Call in the Experts Sometimes the DIY route may feel daunting or time-consuming. In such cases, it’s completely acceptable to seek help from a professional. Experienced floor restorers can assess the damage and suggest the best practices tailored to your specific flooring type. They can also offer refinishing services to restore the luster and character of your hardwood floors, offering an effortless upgrade to your living space. Conclusion: Step Into a Safer, More Beautiful Home Getting rid of screws in your hardwood floors doesn’t have to entail a full-blown renovation. With some simple tools, a bit of elbow grease, and a touch of creativity, you can quickly restore the beauty of your floors and boost the overall aesthetic of your home. Remember to stay proactive about maintenance and don’t hesitate to reach out to professionals if needed. Ready to transform your floors into a masterpiece? Take action today by assessing your hardwood and preparing to unleash its true potential!

10.14.2025

Elevate Your Halloween Table Decor: Simple Ideas to Enchant Guests

Update Transform Your Space with Spooky CharmAs the leaves change and the air gets crisper, homeowners begin to embrace the spooky yet delightful spirit of Halloween. The perfect table décor can set the tone for festive gatherings, whether it’s an intimate dinner with family or a lively party with friends. In this piece, we explore ways to elevate your Halloween table setting, focusing on simplicity and style that anyone can achieve.Simple Yet Effective Decor IdeasCreating a chic Halloween table doesn’t have to involve complicated arrangements or pricey items. The idea is to integrate what you have, sprinkling in holiday-themed touches that resonate with the season. Start by choosing a cohesive color scheme, such as black, white, and gold. This approach not only streamlines your décor but also allows you to creatively repurpose existing items in your home. Using elements like black candlesticks or DIY cauldrons adds flair while keeping it personalized.The Art of Layering: Make Your Table UniqueLayering is a simple trick that can instantly elevate your table design. For instance, incorporating disposable plates with unique Halloween designs can lessen cleanup while providing visual interest. Pairing these with your everyday dishes can create a fun contrast without feeling overdone. Consider layering skeleton plates over classic white plates to add a playful touch that guests will appreciate.Shopping Your House: An Eco-Friendly ApproachOne of the most sustainable practices in home décor is to shop your own home. Look for items you already possess that evoke the Halloween spirit. Things like black and white candles, decorative ghost figures, and even colors from past seasons' décor can be easily integrated into your Halloween table. Try using a DIY disco ball cauldron as a centerpiece – not only will it catch the light beautifully, but it’s also a conversation starter!Why Color Schemes Matter in DecorSticking to a color scheme is not just about cohesiveness; it creates a visual narrative that reflects your personal style. With Halloween, you can mix traditional colors such as orange and purple with chic black and gold to give your table a modern twist. This concept allows creativity while providing structure alongside the spooky vibes of the season.Budget-Friendly FindsTo get into the Halloween spirit without overspending, check out affordable options available online. Items like spider web disposable plates, BOO serving trays, and skull serving bowls can often be found at various price points, allowing you to pick what suits your style and budget. Retailers like Amazon offer a wide variety, enabling you to make quick and cost-effective decisions as you prepare for Halloween festivities.Engaging Your Guests with Themed ElementsAnother element to consider is how your table setting can engage guests. Try introducing interactive dining experiences—like a cauldron filled with candies or a spooky-themed cocktail served in black coupe glasses. These captivating elements don't just adorn your table; they invite your guests into the gathering, offering fun and festive engagement.Final Thoughts: Be Creative, Be FestiveIn conclusion, Halloween table décor can be both festive and functional without overwhelming your space or budget. Whether you're entertaining guests or enjoying a family dinner, the small touches can make a significant impact. Remember to keep it simple, lean into your creativity, and enjoy the process of preparing your home for Halloween. Ready to start decorating? Get into the spirit of the season by curated DIY projects or, simply, by gathering your market finds! Happy decorating!

10.10.2025

Create Your Dream Space: DIY Home Gym Storage Caddie Guide

Update Transform Your Home Gym with a DIY Storage Caddie Are you tired of tripping over dumbbells or digging through clutter to find your yoga mat? A cluttered home gym can hinder your workout motivation, making it vital to maintain an organized space. Fortunately, creating a custom home gym storage caddie can be a straightforward, rewarding DIY project that transforms your workout area. Why You Need a Mobile Storage Solution With a mobile gym storage caddie, you can keep your workout equipment streamlined and accessible. This allows you to focus on your workouts rather than searching for gear or stepping over items. Not only does it enhance your home gym’s aesthetics, but an organized space also promotes safety by minimizing hazards. Materials and Tools Needed for Construction This DIY project requires common materials that are easy to find. You’ll need wood (such as maple or plywood), hardware (like screws and wood glue), and various tools including a miter saw, drill, and angle grinder. Make sure to gather everything before starting to streamline your build process. Step-by-Step Instructions to Build Your Caddie Follow these simple steps to create your own home gym caddie: Step 1: Prepare the MaterialsStart with cutting your wood and angle iron to the prescribed dimensions. Pre-seal the wood with polyurethane for added durability. Step 2: Build the Outer FrameConstruct frames for your caddie's shelves using wood glue and nails for a robust structure. Step 3: Assemble the Legs and ShelvesInstall the legs to support the shelves. Space them evenly to accommodate your equipment efficiently. Step 4: Add Cross SupportsEnhance stability by placing cross supports between the legs on each shelf level. Step 5: Finishing TouchesSand down rough edges and give your caddie a final finish with paint or stain as desired. Common Mistakes to Avoid When Building While embarking on this project, stay away from common pitfalls such as not measuring accurately, rushing through assembly, or neglecting safety by not wearing protective gear while using tools. These mistakes can compromise the quality of your build and may lead to injury. Enhancing Your Home Gym Experience With your new gym storage caddie in place, not only will your space look neater, but you'll also find it easier to stay motivated and focused on your workouts. Having an organized area where you can find everything you need quickly will help maintain your fitness routine. Conclusion: Take Action for a Better Workout Space Don’t let clutter hold you back from achieving your fitness goals. Build this DIY home gym storage caddie and experience the benefits of a well-organized workout environment. Not only will it save you time, but it will also enhance your overall workout experience.

Terms of Service

Privacy Policy

Core Modal Title

Sorry, no results found

You Might Find These Articles Interesting

T
Please Check Your Email
We Will Be Following Up Shortly
*
*
*