UPDATE
  • Home
  • Categories
    • Cleaning & Moving
    • Maintenance / Repairs
    • Remodeling & Construction
    • Landscaping / Outdoor
    • Security & Technology
    • Sustainability, Health & Safety
    • Interiors / Décor
    • Expert Interviews
    • DIY Home Projects
Home Wise News!
Wise Insights, Reliable Contractor Advice & Hands on DIY Know How for Savvy Homeowners
May 20.2025
3 Minutes Read

Unlock the Secret: How to Clean Your Stand Mixer Perfectly

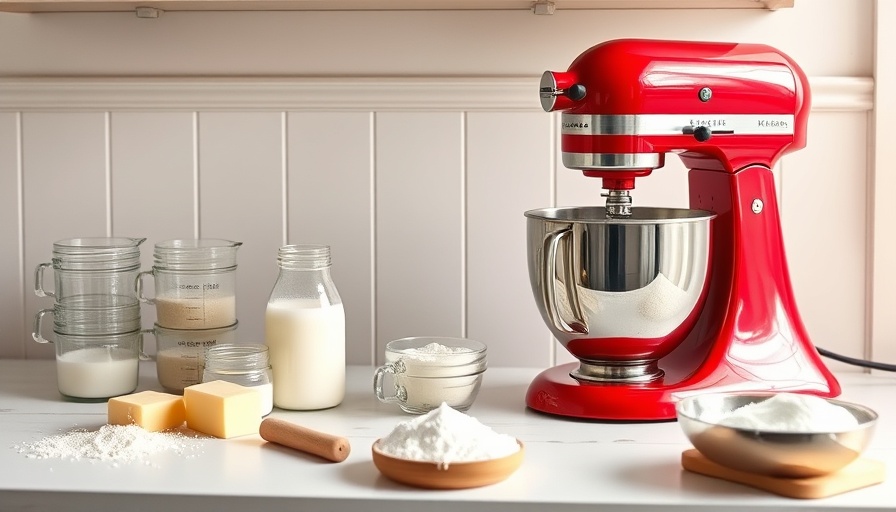
Pristine red stand mixer with baking ingredients on vintage counter.

Perfectly Polished: Unlocking the Secrets to a Spotless Stand Mixer

If you're an avid baker or cook, your stand mixer is probably one of your kitchen's MVPs. However, it can often accumulate grime, flour, and those pesky traces of previous recipes. Fear not, for I'm here to guide you through the art of cleaning your stand mixer, restoring it to its original glory and ensuring it serves you well for years to come.

Why Cleaning Your Stand Mixer Matters

Picture this: you whip up a delicious chocolate cake, only to notice specks of last week's pizza dough stuck beneath the mixer. Not only is this unsightly, but it can also create a breeding ground for bacteria. A properly cleaned stand mixer not only maintains hygiene but also offers performance consistency, ensuring your mixes are smooth and evenly blended.

Supplies You’ll Need for the Ultimate Clean

Before diving into the cleaning process, gather a few essential supplies:

  • Soft sponge or cloth
  • Warm water
  • Dish soap (mild)
  • Microfiber cloths for drying and buffing
  • A soft brush or toothbrush for hard-to-reach areas
  • Cotton swabs for some detailed detail work

Step-by-Step Cleaning Guide

Here’s how to give your stand mixer the TLC it deserves:

1. Unplug and Disassemble

Safety first! Ensure your mixer is unplugged before commencing any cleaning. Remove the mixing bowl, attachments, and any detachable pieces that can be washed separately.

2. Wipe Down the Exterior

Using a damp sponge or cloth, wipe down the mixer’s exterior. Avoid soaking it; just ensure it's damp enough to pick up any dust or splatters. For stubborn spots, a few drops of mild dish soap added to your sponge can work wonders.

3. Clean Attachments and Mixing Bowl

The mixing bowl and attachments can usually be washed in warm soapy water. If they're dishwasher safe, pop them in for a thorough clean. Just like magic!

4. Tackle the Base of the Mixer

The base can gather crumbs and flour. Use a soft brush or toothbrush to dislodge particles from beneath and around knobs or vents. Don't forget the subtle details; cotton swabs can reach places others might overlook!

5. Let It Dry

Once clean, allow all components to dry thoroughly. A damp mixer is not ideal! For the base, wipe it down with a microfiber cloth to leave it shiny.

Future-Proof Your Cleaning Routine

Regular maintenance goes a long way in keeping your mixer in prime condition. Implement a routine cleaning schedule; after every few uses, dedicate time to give it a full clean. This approach can prevent buildup and ensure your culinary companion continues to perform at its best.

Discover Innovative Tools to Simplify Cleaning

Consider investing in tools specifically designed for appliance cleaning. For instance, appliance brushes and specialized nozzles can reach into crevices that your standard sponge can miss. This tech-savvy approach ensures every nook and cranny is immaculate.

No More Cleaning Regrets!

By adopting a thorough cleaning routine for your stand mixer, you’re not just enhancing its performance; you're prolonging its lifespan. Plus, you’ll feel proud knowing your kitchen experience is both hygienic and delightful.

Ready to revitalize your stand mixer? Embrace these steps, keep it shining, and watch as it turns your culinary dreams into a delicious reality!

Cleaning & Moving

0 Comments

Write A Comment

*
*
Please complete the captcha to submit your comment.
Related Posts All Posts
05.25.2026

Discover the Best Scents That Keep Moths Away: Natural Remedies for Your Home

Update Unlock the Secrets: Smells That Banish Moths from Your Home When faced with the delicate challenge of protecting our cherished clothing from moths, one might feel tempted to reach for chemical solutions. However, nature offers a plethora of alternatives that are not only effective but also significantly more eco-friendly. Let's take a deeper dive into the world of delightful fragrances that keep these pesky insects at bay. The Power of Lavender: A Timeless Moth Deterrent Lavender is a popular choice among natural moth repellents, and for good reason. Its fragrant aroma is not only pleasing to humans but also utterly detestable to moths. The chemical compounds in lavender disrupt the lifecycle of these pests, preventing them from laying eggs in your garments. Simply placing dried lavender sachets or cotton balls infused with lavender oil in closets and drawers can create a protective barrier against these unwelcome insects. Additionally, the lovely scent will impart a calming freshness to your wardrobe. Cedarwood: Nature's Bulwark Against Moths Cedarwood doesn’t just make your closet smell divine; it actively confuses moths. The natural oils within cedar disrupt the pheromone trails moths rely on, rendering them lost in a sea of confusion. As one of the strongest natural deterrents, cedar can be utilized in various forms—from cedar blocks to essential oils—each providing effective protection. For long-term results, investing in cedar paneling in your closets is a wise, stylish choice. Cloves: The Spicy Shield Cloves could be another surprise ally in the battle against clothing moths. Their strong, spicy scent is incredibly unpleasant to these pests. Consider using clove essential oil either in cotton balls or as a room spray. Alternatively, you might create sachets filled with dried cloves to hang in your closets. The invigorating aroma serves a dual purpose, leaving your space smelling wonderfully warm while protecting your clothes. Citrus: Brighten Up Your Moth Defense Citrus scents, such as lemon and orange, have a fresh and vibrant quality that moths simply can't stand. Not only does this smell energize the room, it also serves as a potent repellent. Creating a simple natural moth repellent spray with citrus peels alongside a few drops of citrus essential oils is a great way to protect enclosed spaces, ensuring your clothing and textiles remain untainted. Beyond Smells: Comprehensive Moth Prevention Strategies While natural scents provide an effective deterrent, they should not be used in isolation. Combine these aromatic defenses with best practices for moth prevention. Always maintain cleanliness in your stored clothing areas; moths are attracted to organic material and food residues. Implementing airtight storage solutions for clothes and fabrics is essential, as is removing any potential food sources that could attract moths. Regular vacuuming, especially in closets and areas where clothes are stored, further reinforces your defenses against these unwelcome guests. Conclusion: A More Sustainable Approach to Pest Control By embracing natural scents like lavender, cedarwood, cloves, and citrus, you not only protect your clothing but also contribute positively to your home's environment. The shift towards these eco-friendly options reflects a growing awareness of sustainable living practices, urging us to consider the long-term impacts of our pest control choices. Thanks to these nature-inspired strategies, your wardrobe can remain moth-free without compromising your health or the planet.

05.25.2026

Master the Art of Reducing Humidity at Home: Your Essential Guide

Update How to Combat High Humidity and Musty Odors at Home High humidity in your home can take a toll not only on your comfort but also on the structural integrity of your living space. Unsightly condensation, unsettling musty odors, and potential mold issues may arise when humidity levels exceed 50%. Let's dive into effective strategies to lower humidity and improve the air quality in your home, ensuring a relaxing environment. Why You Should Care About Humidity Levels Beyond mere discomfort, high humidity can lead to serious structural problems and health concerns. Moisture-laden air fosters an environment where mold thrives, posing respiratory risks to inhabitants. Furthermore, excess humidity can damage furnishings, lead to peeling paint, and create unwanted odors. Addressing humidity isn't just about comfort; it’s about maintaining a healthy home. Practical Tips to Reduce Humidity Reducing humidity isn’t a one-size-fits-all solution; it often requires implementing several strategies simultaneously. Here are some effective methods: Utilize Exhaust Fans: Whether you're cooking or showering, running exhaust fans for at least five minutes can effectively expel moisture-laden air from your home. Keep Your Air Conditioner Running: Air conditioning units naturally dehumidify the air. Make sure it’s well-maintained with regular filter changes for optimal performance. Cover Cooking Pots: Covering pots while boiling can significantly reduce the amount of steam released into your home. Seal Windows and Doors: Installing weather stripping helps prevent humid air from seeping in, maintaining a drier interior. Invest in Dehumidifiers: These devices are specifically designed to remove moisture from the air. Depending on your needs, consider whole-home units for sustained results. The Role of Ventilation Good ventilation is key to moisture control in a home. Improve airflow by keeping interior doors open, using ceiling fans, and ensuring attic ventilation. Without adequate airflow, humidity can become trapped, leading to unhealthy air quality. A well-ventilated home will both dry out damp surfaces and even out humidity levels across rooms. Counteracting Moisture Sources It’s essential to identify and tackle moisture sources around your home: Fix Leaky Pipes: Address any leaking faucets or plumbing as soon as possible to prevent water from accumulating. Manage Crawl Space Moisture: Ensure proper ventilation in crawl spaces, and consider installing vapor barriers to keep moisture at bay. Inspect Foundations: Look for cracks or unstable areas around your foundation that could allow moisture seepage. The Humidity Measurement Debate Want to accurately monitor your home's humidity? Invest in a hygrometer. Ideal indoor humidity levels range from 30% to 50%. Regular checks will help you stay ahead of potential issues and keep your home comfortable. Simple DIY Humidity Hacks You Can Try Not ready to buy new gadgets? Try these DIY methods: Baking Soda Bowls: Place bowls of baking soda around humid areas in your home, allowing them to absorb excess moisture. Charcoal Briquettes: These work great as natural dehumidifiers. Place them in small containers in damp areas to soak up moisture. Conclusion: Take Action for Your Comfort With these methods, you can significantly reduce humidity levels, banish musty odors, and create a comfortable haven in your home. Regular maintenance and attention to potential moisture sources will help safeguard your home against future humidity-related issues. Whether you’re using simple hacks or investing in advanced technology, controlling humidity is within your reach. Don't let high humidity take over your space—act now!

05.24.2026

Transform Your Shower: Effective Ways to Remove Hard Water Stains

Update Your Guide to Sparkling Glass Shower Doors As a homeowner, maintaining the pristine look of your glass shower doors can feel daunting, especially when hard water stains and soap scum start to take hold. Don't worry; achieving crystal-clear doors is entirely possible with the right methods and everyday items found in your home. This guide will walk you through the most effective ways to remove hard water stains and keep your shower doors looking as good as new. Understanding Hard Water Stains Hard water stains occur due to mineral deposits left behind when water evaporates. As taps run and showers flow, water droplets land on your glass doors, and over time, these minerals can create unsightly streaks and spots that are hard to ignore. Identifying these stains early on and tackling them right away can save you from intensive cleaning efforts later. Essential Tools for Cleaning Before diving into the cleaning process, gather your arsenal of cleaning tools: Microfiber Cloth: These are gentle on glass and effective for wiping away residue without scratching the surface. Squeegee: A vital tool for preventing water stains from occurring in the first place. Spray Bottle: To hold your cleaning solution for easy application. Soft Brush or Sponge: For scrubbing off stubborn stains without damaging the glass. Top Methods for Removing Hard Water Stains There are plenty of methods to remove hard water stains from your glass shower doors. Here are some that homeowners have sworn by: 1. Vinegar and Water Solution This old-time favorite is simple yet effective. Mix equal parts white vinegar and water in a spray bottle. Spray the solution on the affected areas and let it sit for 15-20 minutes. The acidity of the vinegar helps break down those pesky deposits. Afterwards, scrub gently with a microfiber cloth or sponge, then rinse thoroughly. 2. Baking Soda Paste Baking soda is another powerful ally in your cleaning arsenal. To use this method, create a paste by mixing baking soda with a little water. Apply the paste to the stained areas of the glass, allowing it to sit for 15-20 minutes before scrubbing with a non-abrasive sponge. Rinse well after. 3. Dish Soap and Vinegar Combining dish soap, vinegar, and water yields fantastic results. Mix 1/4 cup of dish soap, 1 cup of water, and 1/2 cup of vinegar in a spray bottle. Generously apply to the shower doors, let it soak for a while, scrub gently, and rinse. Unique Tips for Maintaining Glass Shower Doors After you have cleaned your shower doors, keeping them sparkling can be effortless: Daily Squeegee: Use a squeegee after every shower to minimize buildup. Weekly Wipe Down: Spend a few minutes doing a quick clean with a damp cloth to prevent dirt accumulation. Improve Ventilation: Enhance air circulation in your bathroom to reduce moisture and evaporation, which contributes to hard water staining. When to Seek Professional Help Sometimes, despite your best efforts, hard water stains can persist, or you might notice deeper issues like scratches or deterioration in the glass. If regular cleaning isn’t yielding results and the look of your shower is becoming disheartening, it might be time to consult a professional. They can offer solutions ranging from extensive cleaning techniques to glass replacement options. Final Thoughts: The Beauty of a Clean Shower Regular maintenance doesn’t just keep your shower attractive; it enhances your entire bathroom's appeal. Use these simple methods and tips to turn your glass shower doors from cloudy to clear, ensuring your bathing experience is as refreshing and enjoyable as it should be. Ready to take on the challenge? Your sparkling shower awaits! Embrace your inner DIY expert, share your favorite cleaning tips with friends, and let's collectively elevate our homes to new levels of cleanliness and brilliance!

Terms of Service

Privacy Policy

Core Modal Title

Sorry, no results found

You Might Find These Articles Interesting

T
Please Check Your Email
We Will Be Following Up Shortly
*
*
*