Add Row
Add Element
UPDATE
Add Element
  • Home
  • Categories
    • Cleaning & Moving
    • Maintenance / Repairs
    • Remodeling & Construction
    • Landscaping / Outdoor
    • Security & Technology
    • Sustainability, Health & Safety
    • Interiors / Décor
    • Expert Interviews
    • DIY Home Projects
Home Wise News!
Wise Insights, Reliable Contractor Advice & Hands on DIY Know How for Savvy Homeowners
May 27.2025
3 Minutes Read

Unlock the Secret to Microfiber Towels: Proper Washing Techniques

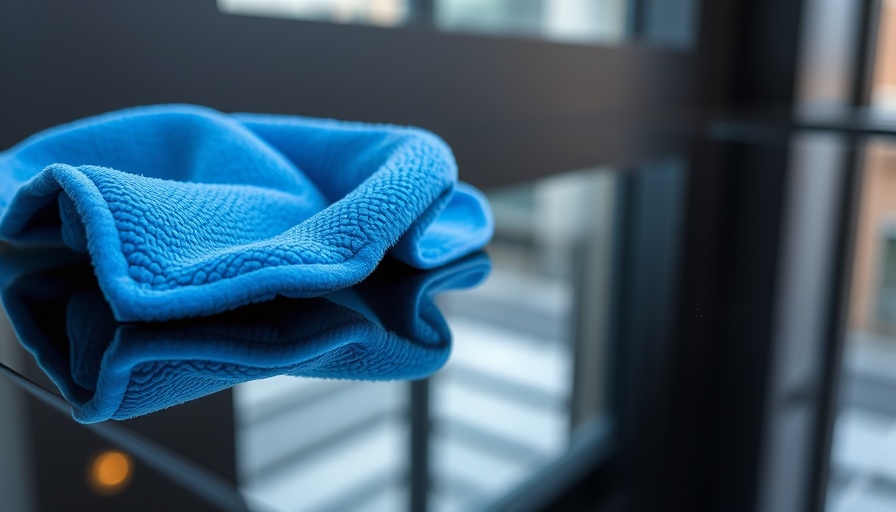
Close-up of hand using blue microfiber towel on black surface, demonstrating cleaning technique.

The Importance of Microfiber Towels: A Cleaning Essential

Microfiber towels have become household staples for their effectiveness and eco-friendliness. Unlike traditional towels, their unique fibers capture dirt, dust, and grime like a magnet, making them superior for all types of cleaning, from drying dishes to scrubbing car interiors. Understanding how to properly care for these versatile tools not only prolongs their life but also maximizes their cleaning capabilities.

What Makes Microfiber So Magical?

The secret behind microfibers lies in their structure. Made of tiny polyester and polyamide fibers, these towels are incredibly absorbent—capable of holding seven times their weight in water! Their split fibers create a larger surface area, enhancing their ability to trap dirt particles effectively. However, improper washing can disrupt this magic, leaving you with less-than-ideal cleaning supplies. Without the right care, they can lose their absorbency and effectiveness over time.

The Right Washing Technique: Step-by-Step

To keep your microfiber towels performing at their best, follow this foolproof washing guide:

  1. Separate the Colors: Just like with regular laundry, separating colored and white towels will prevent dye transfer, which can ruin the effectiveness of your microfiber.
  2. Use the Correct Detergent: Opt for a mild detergent without additives. Scented or fabric-softener-enhanced detergents can coat the fibers, reducing their efficacy.
  3. Washer Settings Matter: Wash on a warm cycle; hot water can damage the fibers over time, while cool water may not clean them thoroughly.
  4. Avoid Bleach and Conditioners: These products can break down the fibers and their ability to absorb effectively.
  5. Drying Tips: Air drying is ideal; however, if using a dryer, set it on low heat. High temperatures can melt the fibers.

Your Microfiber Towels: Get the Most Out of Them

When maintained properly, microfiber towels can last for years, serving various functions throughout your home. From detailing your vehicle to shining kitchen surfaces, these towels are incredibly versatile. Periodic washes, with care taken to follow the correct process, can preserve their effectiveness, saving you money and reducing waste.

Common Myths About Microfiber Care

There’s a lot of misinformation concerning how to wash and care for microfiber towels. Here are a couple of myths debunked:

  • Myth 1: Microfiber towels can be washed with regular laundry. Fact: This can lead to lint and residue buildup that diminishes their cleaning power.
  • Myth 2: You can use any detergent. Fact: Harsh detergents and additives can coat the fibers and ruin them. Stick to gentle, additive-free options.

Future Thoughts on Eco-Friendly Cleaning

As concerns about sustainability grow, using towels like microfiber that promote reusability and waste reduction is increasingly vital. Cleaning is an essential chore, but it doesn’t have to come at the expense of our planet. By properly maintaining microfiber towels, we can extend their lifecycle while contributing to a more sustainable future.

Understanding the proper care of microfiber towels is crucial for maintaining their magical cleaning properties. With a little knowledge and adherence to these guidelines, you'll ensure your cleaning routines are both effective and eco-friendly. So go ahead, grab those microfiber towels with confidence, and let them work their magic!

Cleaning & Moving

Write A Comment

*
*
Related Posts All Posts
10.15.2025

Discover 7 Ingenious Ways To Use Rubbing Alcohol Around The House

Update Unleashing the Power of Rubbing Alcohol: A Household Essential That little bottle of rubbing alcohol lurking in your cabinet might seem modest, but it holds a treasure trove of cleaning possibilities. While many recognize isopropyl alcohol for disinfecting cuts, it’s time to expand your horizons and see how versatile an ally it can be in household cleaning. Below, we explore several innovative and practical ways to utilize rubbing alcohol beyond just the medicine cabinet. 1. The Stain-Busting Hero Got a stubborn permanent marker stain on your child’s homework or your beautiful countertop? Rubbing alcohol can save the day! Simply soak a cloth or cotton ball in alcohol, dab it onto the stain, and watch it disappear like magic. The key here is to start from the outside of the stain and work inward, preventing further spreading of the ink. 2. A Window to the World Cleaning windows can be a daunting task, but with rubbing alcohol, you can make streak-free glass a reality. Combine one cup of rubbing alcohol with one cup of distilled water and a tablespoon of white vinegar in a spray bottle. Give it a shake and use it with a microfiber cloth or even an old newspaper for an eco-friendly clean that leaves your windows crystal clear. 3. Sanitize Your Technology Your smartphone and computer keyboard are breeding grounds for germs. Surprisingly, a simple mixture of equal parts rubbing alcohol and water can tackle this problem. Dampen a microfiber cloth with the solution, thoroughly wipe your devices, and say goodbye to bacteria without worrying about damage to screens and keys. 4. Degrease Your Kitchen Like a Pro Sick of greasy residues on your stovetop or countertops? Rubbing alcohol’s solvent properties can cut through that grime without leaving harmful chemical traces. Mix equal parts of hot water and rubbing alcohol in a bowl, dip in a clean cloth, and wipe surfaces until they shine. 5. Eliminate Odors Have a less-than-pleasant scent wafting through your kitchen? Create your own air freshener by combining 75% water with 25% rubbing alcohol. Add a few drops of your favorite essential oil, and spritz your living space with a fragrant uplift! 6. The DIY Upholstery Cleaner If your furniture is looking a bit worse for wear, make an upholstery cleaner with rubbing alcohol! Mix two cups of alcohol in a spray bottle, lightly spritz onto the fabric, and use a soft-bristled brush to lift the dirt away for a refreshed look. 7. The Household Ice Pack Rubbing alcohol isn’t just for cleaning; it can also soothe pain! Mix water and alcohol in a watertight zip-top bag (3 parts water, 1 part rubbing alcohol). Freeze it to create a flexible ice pack that molds to your body. When to Avoid Rubbing Alcohol While the advantages of rubbing alcohol are plentiful, it’s crucial to remember that it’s not suitable for everything. Avoid using it on wood, leather, or any delicate fabrics, as the harsh solvent can strip away finishes or degrade materials. Always conduct a spot test when trying it on new surfaces. Future-Proofing Your Cleaning Routine As we continue to embrace eco-friendly and efficient cleaning methods, rubbing alcohol stands as an affordable and adaptable solution for many of our home care needs. Its ability to act as both a solvent and disinfectant makes it invaluable in today’s cleaning crusade. Conclusion: The Unsung Cleaning Champion Incorporating rubbing alcohol into your cleaning routine can transform how you tackle everyday messes, disinfect objects, and keep your home fresh and sparkling. So grab that bottle, and give it a whirl—you might just discover it’s the unsung hero of your household!

10.14.2025

7 Things You Should Never Clean With a Sponge: The Hidden Risks

Update Understanding the Dangers of Sponges: A Cleaning Paradox Sponges are the quintessential cleaning tool found in almost every kitchen and bathroom. However, have you ever considered that these seemingly innocuous tools might be harboring more germs than they're helping to eliminate? Let's explore why some areas are better off without the sponge and what alternative cleaning methods can keep your home spotless and safe. 1. The Cutting Board Conundrum Your cutting board is a workhorse in your kitchen, especially if you prepare raw meats. Experts caution against using sponges on cutting boards as they can trap juices and bacteria like salmonella and E. coli. Instead, Scott Schrader, a cleaning expert, recommends using disposable paper towels or washable disinfecting cloths along with hot, soapy water to eliminate harmful pathogens effectively. 2. The Germs of the Bathroom Bathrooms are notorious for harboring germs, making it essential to choose the right cleaning tools. Toilets, sinks, and tubs can easily transfer bacteria to your sponge, which is then spread onto other surfaces. For these high-germ areas, opt for a designated scrub brush or disposable disinfecting wipes instead. 3. Nurturing Your Nonstick Cookware Cleaning nonstick pans with a sponge might seem convenient, but doing so can damage their delicate coatings. The abrasive side of a traditional sponge can scratch and wear down the surface over time. Instead, a gentle cloth or a soft sponge can effectively clean up caked-on food without ruining your pan. 4. Keep Electronics Spotless with Care Your electronics deserve a special touch! Moisture and abrasiveness can be disastrous for screens and sensitive components. Use a microfiber cloth slightly dampened with water or a vinegar-water solution, avoiding sponges at all costs. 5. Glassware: The Unseen Scratches Even seemingly harmless glass surfaces can suffer damage from sponges. Micro-scratches caused by the sponge can accumulate and degrade the appearance over time. Instead, opt for a non-abrasive pad or a microfiber cloth to maintain that pristine shine. 6. Caring for Cast-Iron Cookware Cast-iron skillets have a unique polymerized oil layer that can be stripped away by harsh scrubbing. Instead of a sponge, a non-abrasive brush should be used to cleanse your skillet gently, followed by a touch of oil to protect it afterward. 7. Smelly Spills: Avoid the Sponge! When accidents happen and spills occur, particularly smelly ones like fish or egg, resist the urge to grab your sponge. Not only will it absorb those odors, but it will also transfer them elsewhere. Reach for disposable towels or rags that can be washed regularly to keep your space fresh. Cleaning Tools That Get the Job Done Substituting sponges with other cleaning tools can provide better sanitation and a more effective cleaning experience. Investing in a few high-quality, specialized tools can save you time and hassle, ensuring your cleaning routine is both efficient and pleasant. From microfiber cloths to disinfecting wipes, having the right tools at your side is crucial for a germ-free environment. Rethinking the Sponge While sponges have been the go-to cleaning tool for decades, reassessing their usage is essential for maintaining a more hygienic home environment. If you love your sponge, consider limiting its use to non-critical areas and always ensure it’s sanitized regularly. Ultimately, cleanliness and safety should always come first in your home. Final Thoughts: Your Cleaning Toolbox Awaits! As you navigate your cleaning spaces, remember that knowledge is your best ally. Embrace a healthy cleaning routine that prioritizes sanitation by ditching the sponge in favor of better alternatives. Find joy in discovering new cleaning practices, and elevate your home's freshness! Call to Action: Why not take some time today to reassess your cleaning tools? Understanding the right way and right materials to clean your home will not only help you maintain cleanliness but keep your family safe. Explore new, effective products that fit your cleaning needs!

10.11.2025

Discover Expert Tips to Safely Degrease Wood Kitchen Cabinets

Update Mastering the Art of Degreasing Kitchen Cabinets Safely Have you ever attempted to clean your wood kitchen cabinets only to end up with a cloudy finish or, even worse, scratches? You're not alone. Cleaning wooden cabinets can be a delicate operation, especially in a kitchen where grease and grime seem to appear out of nowhere. In this guide, we'll explore effective methods to degrease wood kitchen cabinets while preserving their beautiful finish. Understanding Your Wood Cabinets The first step in any cleaning adventure is to understand the materials involved. Most wood cabinets are finished with a protective coating that helps shield them from moisture and stains. However, if this finish is compromised, even gentle cleaning can cause lasting damage. Always do a patch test in an inconspicuous area before applying any cleaner to ensure compatibility with your cabinet's finish. Effective Degreasing Techniques The best way to combat grease buildup is with a mix of science and common household ingredients. A popular homemade solution involves mixing equal parts of white vinegar and warm water along with a few drops of liquid dishwashing detergent. This concoction acts like a superhero against grease, breaking it down without harming the wood beneath. Steps to Degrease: Pour your mixture into a spray bottle for easy application. Spray the solution on the cabinet surface, allowing it to sit for a minute to work its magic. Wipe down the surface with a soft microfiber cloth, being sure to follow the grain of the wood to avoid scratches. For stubborn spots, consider using a soft toothbrush to gently scrub, but be careful not to overdo it! Stubborn Stains? No Problem! If your cabinets have stubborn stains, like grease splatters cooked on from a late-night frying session, consider using a paste made from baking soda and water. Apply the paste directly to the stain, let it sit for a few minutes, then scrub gently with a soft brush and rinse thoroughly. This method can effectively remove tough spots without damaging the finish. Routine Maintenance is Key Prevention is always better than cure. Regular cleaning can help maintain the beauty of your wood cabinets and keep grease from building up. Aim for a thorough cleaning every month with weekly touch-ups, especially if you're an avid cook. You'll thank yourself later when your cabinets remain pristine and beautiful! Best Practices for Protecting Your Cabinets After cleaning, consider applying a protective layer like natural wood furniture wax every six months. This will help repel grime and create a lovely shine that enhances the wood's natural beauty. Be sure to choose a wax that doesn't contain harmful chemicals, as these could pose risks in a kitchen setting. Common Misconceptions About Cleaning Wood Cabinets Many believe that the more product you use, the cleaner your cabinets will be. However, using too much cleaner or water can warp wood and dull the finish. Strive for moderation—less is more when it comes to cleaning solutions! Your Cleaning Arsenal: Tools to Keep Handy A well-equipped cleaning toolbox makes the task less daunting. Here are some essentials you should have on hand: Microfiber cloths: These are soft and great at trapping dirt without scratching surfaces. Soft-bristled brushes: Perfect for reaching into grooves and corners. Spray bottles: For easy and even application of cleaners. Protective gloves: Always smart when dealing with cleaning solutions to protect your skin. Final Thoughts and Actionable Tips Cleaning wood kitchen cabinets doesn’t have to be an exhausting chore. With the right techniques and regular maintenance, you can keep your cabinets sparkling and significantly extend their lifespan. Remember to always check your cleaning solutions, maintain a routine, and don’t let grease get the upper hand. Happy cleaning! If you’re looking for more ways to maintain your kitchen’s beauty, consider subscribing to our cleaning tips newsletter for regular updates and advice.

Terms of Service

Privacy Policy

Core Modal Title

Sorry, no results found

You Might Find These Articles Interesting

T
Please Check Your Email
We Will Be Following Up Shortly
*
*
*