Add Row
Add Element
UPDATE
Add Element
  • Home
  • Categories
    • Cleaning & Moving
    • Maintenance / Repairs
    • Remodeling & Construction
    • Landscaping / Outdoor
    • Security & Technology
    • Sustainability, Health & Safety
    • Interiors / Décor
    • Expert Interviews
    • DIY Home Projects
Home Wise News!
Wise Insights, Reliable Contractor Advice & Hands on DIY Know How for Savvy Homeowners
May 05.2025
3 Minutes Read

Unlocking the Benefits of Downsizing: Insights After Nearly Five Years

Charming small house with cozy porch showcasing benefits of downsizing.

Reflecting on the Downsizing Journey: Insights After 4.5 Years

In November of 2020, my family and I made the life-changing decision to downsize from a spacious 3,150 sq. ft. house to a much cozier 1,400 sq. ft. home near the Gulf of Mexico. Fast forward to today, nearly five years later, we have gathered valuable insights and reflections that might help others considering a similar leap into smaller living quarters. Our motto has been to 'live with less & be outside more,' which has powered our downsizing journey and shaped our lifestyle.

The Freedom of Minimalism: More Time and Money

One of the most remarkable outcomes of downsizing has been the significant reduction in the time and money devoted to home maintenance. Our previous home felt like a constant project with extensive cleaning, renovation, and upkeep. In contrast, our current home, with its compact size and limited outdoor space, demands far less energy. We’ve even documented our savings since the move, finding that our smaller house is much easier to heat and cool, ultimately leading to lower utility bills.

Two Contradictory Realities: Forgetting and Remembering

Another fascinating aspect of our downsizing adventure lies in the psychological adjustment to this new way of living. On one hand, it’s surprising how easily you can forget about the larger space you once thought you needed. Living in our downsized home has become our norm; we feel no lack in our quality of life or daily experience. Conversely, I find there are days when the transition reminds me directly of our past life. Discussions with neighbors who have also made this jump often reveal similar feelings, leading to the interesting thought that downsizing carries both a sense of familiarity and a touch of nostalgia.

The Psychological Benefits of Downsizing

This seemingly dual experience manifests itself in various ways. Firstly, the adjustment phase proves to be temporary. Initially, the clutter and adjustments can feel overwhelming, but with time, you naturally adapt and realize how little space you truly need. The mental freedom that comes with decluttering is profound; it pushes you to focus on what truly matters and enables you to live a more intentional life.

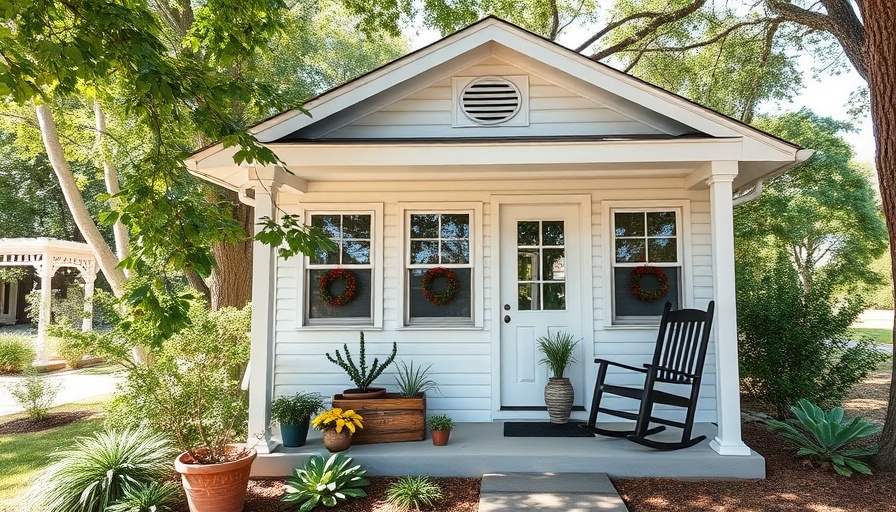
Creating an Inviting Home in Limited Space

In a smaller living space, every item must serve a purpose. After almost five years, we've perfected the art of selecting multifunctional furniture that suits our needs without sacrificing style. From clever storage solutions to utilizing outdoor space for leisure activities, we have combined comfort with practicality. This also encourages creativity in interior design and landscaping, as every inch counts! You might be surprised by how inviting a small home can feel when it reflects your personality and lifestyle.

Final Thoughts: Downsizing is a Journey

As we celebrate nearly five years of living in our downsized home, we can confidently say that this lifestyle change has significantly improved our quality of life. We spend less time cleaning and more time enjoying outside activities, contributing to a balance we never anticipated before transitioning. Perhaps the most empowering lesson we've learned is that living with less can indeed lead to living more fully.

If you're considering a downsizing journey or simply searching for ways to streamline your life, know that the initial challenges are just a phase. Embrace the adventure, find joy in your decisions, and enjoy the freedom that comes from embracing a simpler, more mindful lifestyle.

Cleaning & Moving

0 Comments

Write A Comment

*
*
Please complete the captcha to submit your comment.
Related Posts All Posts
03.14.2026

Why You Should Not Use Glass Cleaner on Your Cell Phone Screen

Update Why Glass Cleaner Is a No-Go for Your Cell Phone ScreenMany smartphone users are unaware that their device screens, while looking like glass, require specialized care that traditional cleaning agents can damage. Glass cleaners typically contain ingredients like ammonia or alcohol, which can strip away the essential coatings on screens, leaving them dull and more susceptible to dirt accumulation. According to experts, this invisible damage can lead to a frustrating experience as users find themselves cleaning more often, contributing to the wear and tear of their devices.Understanding the DamageFergal Glynn from Mindgard explains that while the immediate effects may not be visible, the long-term consequences of using glass cleaner can be severe. "Once those coatings are gone, you won't just see smudges; you'll be fighting a losing battle against fingerprints and grime," he states. Additionally, any moisture can find its way into ports—a recipe for internal damage and potential corrosion. Preferred Cleaning TechniquesSo, what’s the best way to keep your smartphone clean without causing damage? For a quick clean, use a dry microfiber cloth or one lightly dampened with distilled water. Unlike tap water, distilled water lacks minerals that could leave deposits on the screen. If you’re looking to invest in cleaning products, consider purchasing pre-moistened wipes or sprays specifically labeled as safe for electronic devices. These should ideally be pH-neutral to ensure safety without risk of deterioration.Step-by-Step Guide to Safe CleaningTurn Off and Unplug: Ensure your phone is turned off and disconnected from any cables to prevent electrical damage.Prepare Your Cleaning Cloth: Get a microfiber cloth and moisten it slightly with distilled water to begin gently wiping the screen.Avoid Excessive Pressure: Use a circular motion without applying too much pressure; this lessens the risk of scratches.Allow to Air Dry: Once cleaned, let your device air dry completely before turning it back on or placing it back into its case.By taking these precautionary steps, you can maintain your phone’s screen in excellent condition without risking the integrity of its protective features.What If You've Been Unwittingly Using Glass Cleaner?If recent cleaning antics involved glass cleaner, don’t panic just yet! A few cleanings may not have done irreversible damage. However, you might start to notice a difference in how your screen feels or looks. If it feels consistently greasy or dirty, it might be a sign that the necessary coatings have been compromised.Repair and Protect StrategiesOne way to mitigate this issue is by applying a matte screen protector, which can help mask any surface damage and reduce smudging. It’s a relatively inexpensive solution that can significantly enhance your user experience. Always remember that prevention is key; safeguarding your screen from scratches and maintaining cleanliness will prolong its lifespan.Conclusion and Call to ActionMaintaining the cleanliness and integrity of your smartphone screen is essential for optimal performance and lifespan. By heeding these tips and avoiding glass cleaners, you can ensure that your device remains as good as new. Empower yourself with the right knowledge to tackle your home repairs and maintenance effectively. Dive into our other DIY projects to discover even more handyman tips that will help you create a safer and cleaner environment!

03.13.2026

Transform Your Trash: How Dishwasher Tablets Can Deep Clean Smelly Cans

Update The Dirty Truth About Trash Cans Let’s face it: trash cans are both vital and vile household items. From the scraps of last night’s dinner to the packaging from that ‘too-good-to-pass-up’ online shopping spree, your trash can absorbs all kinds of refuse. And the result? A sometimes-stinky bin that can quickly turn your kitchen into a less-than-inviting space. Why You Should Care About Your Trash Can's Cleanliness Beyond the unpleasant smell, a filthy trash can can be a breeding ground for bacteria and pests. Foodborne bacteria from waste can create health risks, not only for you but for your pets as well. Thus, maintaining not just a clean environment but a safe one is essential. Luckily, one ingenious cleaning hack can make the process a breeze: dishwasher tablets! Unlocking the Power of Dishwasher Tablets These powerful little tablets are designed to tackle grease and grime in your dishwasher, but they have versatile cleaning capabilities that extend far beyond the appliance. When it comes to cleaning trash cans, they can break down sticky stains, eliminate unpleasant odors, and leave your can looking as good as new. Step-by-Step Guide to Cleaning Your Trash Can Ready to learn how to deep clean that smelly trash can? Here’s a simple yet effective step-by-step process that brings together the expert tips from various sources to ensure you get the best results: Gather Your Supplies: You will need a dishwasher tablet, hot water, rubber gloves, a long-handled scrub brush, and a microfiber towel. Pre-cleaning Steps: Empty the trash can and remove any lingering debris. Put on your gloves to protect your hands from any sticky remnants. Soak Ritual: Place the trash can in a sink or tub, fill about two-thirds full with hot water, and drop in the dishwasher tablet. Allow it to soak for 15-30 minutes. Scrubbing Power: After soaking, use the nylon brush to scrub away any remaining residue. Rinse thoroughly with clean water. Dry and Store: Wipe the inside of the can with a microfiber cloth and leave it to dry completely before putting the liner back in. Make Your Trash Can Last Longer Cleaning is just the beginning. To put your newly cleaned trash can to lasting use, try these tips: Utilize Liners: Using the right liner can prevent leaks and spills from festering at the bottom. Avoid Overfilling: Keep your trash can from overflowing, which can cause breakage and mess. Immediate Disposal: Dispose of messy or foul-smelling trash immediately into an outdoor bin to keep odors at bay. Beyond Dishwasher Tablets: Additional Hacks If the odor persists like an unwanted guest, try combining dishwasher tablets with other household staples. A mixture of vinegar and baking soda can fight lingering odors. After a soak and scrub with dishwasher tablets, spray the interior with this vinegar-baking soda blend, let it sit, and then rinse. Baking soda sprinkled in the bottom afterwards will give it a fresh smell. Conclusion: Keep Your Kitchen Fresh By integrating these easy cleaning methods into your routine, you can significantly improve the smell and appearance of your trash can, contributing to a more pleasant kitchen environment. Make cleaning your trash can a monthly ritual, and don’t shy away from using those trusty dishwasher tablets; they’re more than just a pretty cleaning product in your cupboard! Are you ready to revolutionize the way you think about cleaning your trash can? Give these tips a try!

03.12.2026

Practical Tips for Keeping Your Grout Looking New and Clean

Update The Struggles of Grout: Why We Need to Care Cleaning grout can often feel like a never-ending battle. It's a chore that most homeowners dread, recently identified as one of the most hated household tasks according to a Yelp survey. With its porous nature, grout easily absorbs dirt, moisture, and stains, changes that can detract from the beauty of any tiled surface. If you're embracing DIY projects and home maintenance, understanding how to preserve that grout between cleanings is vital not only for aesthetics but also to prevent more costly repairs down the line. Expert-Backed Grout Care Tips Fortunately, experts like John Gelfusa from HomeWorks and Mariya Podeyko of :AM Cleaning have offered invaluable advice that can help you maintain clean, beautiful grout. Starting with sealers and pH-neutra cleaning products, let's dive into some tried-and-true methods for keeping grout looking fresh: 1. Seal Regularly to Protect Your Grout The first step to pristine grout is sealing it. A high-quality grout sealer fills in microscopic pores in grout, making it more stain-resistant and easier to clean. Podeyko recommends sealing grout just a few days after installation and continuing to seal it annually. This practice not only maintains cleanliness but also enhances durability. 2. Use Proper Cleaning Solutions When it comes to cleaning grout, always opt for low or neutral-pH cleaning agents. Products designed specifically for grout, such as degreasers or dish soap, will aid in removing dirt without harming the grout itself. Avoid using bleach, as it can break down the surface over time, leading to more dirt accumulation. 3. Keep Wet Areas Dry Post-shower maintenance can extend the lifespan of your grout. Make it a habit to squeegee surfaces after each use to minimize water pooling in shower corners, which can foster mold growth. As Mariasol Rivera from Sparkly Maid Austin emphasizes, a simple towel wipe-down can stop mold at its source and keeps your grout looking fresh. 4. Sweep and Vacuum Regularly Sticking to a sweeping and vacuuming routine will prevent dirt from settling into grout lines. This practice not only keeps grout cleaner for longer but reduces the frequency of extensive cleaning. It’s a proactive way to manage what can feel like an overwhelming chore. 5. Implement a No-Shoe Policy One of the simplest ways to maintain clean floors is by adopting a no-shoe policy in your home. Dirty shoes can transfer significant grime onto tile surfaces. Marisol Rivera recommends this practice, especially if you wish to keep your grout cleaner between cleanings and reduce the labor involved in upkeep. Building Long-Term Cleaning Habits Establishing a regular cleaning schedule can make the daunting task of maintaining grout manageable. Wipe spills promptly, conduct routine cleanings, and incorporate blotting techniques when dealing with liquid stains. Taking consistent steps can dramatically reduce the fight against discoloration. Exploring Different Cleaning Methodologies To find the ideal solution for the unique messiness of your home, consider testing various cleaning methods. For those stubborn stains, Shifrah Combiths, an experienced home cleaner, tested five specific cleaning solutions and ranked them based on effectiveness. Zep Grout Cleaner & Brightener: Highly effective for lifting dirt quickly (rated 5/5). Hydrogen Peroxide and Baking Soda: A practical DIY method for minor cleaning (rated 3/5). Vinegar, Baking Soda, and Lemon Juice: Combining these ingredients can yield impressive results (rated 4/5). While some methods were effective, remember to take care with strong products. Always ensure your space is well-ventilated and follow safety guidelines. The Emotional Connection to a Clean Home A clean home often leads to a more relaxed mindset. As we navigate the ups and downs of our daily lives, it becomes increasingly important to create spaces that invite tranquility. Maintaining clean grout contributes to that sense of peace, allowing spaces such as kitchens and bathrooms to feel wholly welcoming. In conclusion, keeping your grout looking new involves a combination of proactive maintenance, appropriate cleaning techniques, and a bit of commitment. While it may still feel like a tedious chore, your efforts can yield significant benefits, ensuring a more pleasant living environment for you and your family. Want to simplify your grout cleaning methods or delve deeper into DIY home projects? Join our community for more insightful tips on home maintenance.

Terms of Service

Privacy Policy

Core Modal Title

Sorry, no results found

You Might Find These Articles Interesting

T
Please Check Your Email
We Will Be Following Up Shortly
*
*
*