Add Row
Add Element
UPDATE
Add Element
  • Home
  • Categories
    • Cleaning & Moving
    • Maintenance / Repairs
    • Remodeling & Construction
    • Landscaping / Outdoor
    • Security & Technology
    • Sustainability, Health & Safety
    • Interiors / Décor
    • Expert Interviews
    • DIY Home Projects
Home Wise News!
Wise Insights, Reliable Contractor Advice & Hands on DIY Know How for Savvy Homeowners
May 07.2025
3 Minutes Read

Unlocking the Secrets of Custom Brown Paint for DIY Projects

Mixing brown paint on a palette with palette knife.

Mastering the Art of Mixing Custom Brown Paint

Creating your own custom brown paint can be a rewarding task, whether you're a DIY enthusiast or simply tackling a home maintenance project. Understanding the fundamentals of color mixing lays the groundwork for achieving the perfect shade of brown, suitable for furniture, walls, or crafts.

Why Creating Custom Colors Matters

On many occasions, you might find yourself running low on a specific paint color just as you embark on your project. Knowing how to mix your brown paint opens up a world of creative possibilities. Not only does this technique help save time and money, but it also allows you to tailor colors to fit your unique vision. This is especially true for homeowners looking to maintain a consistent aesthetic throughout their living spaces.

The Basics of Color Mixing

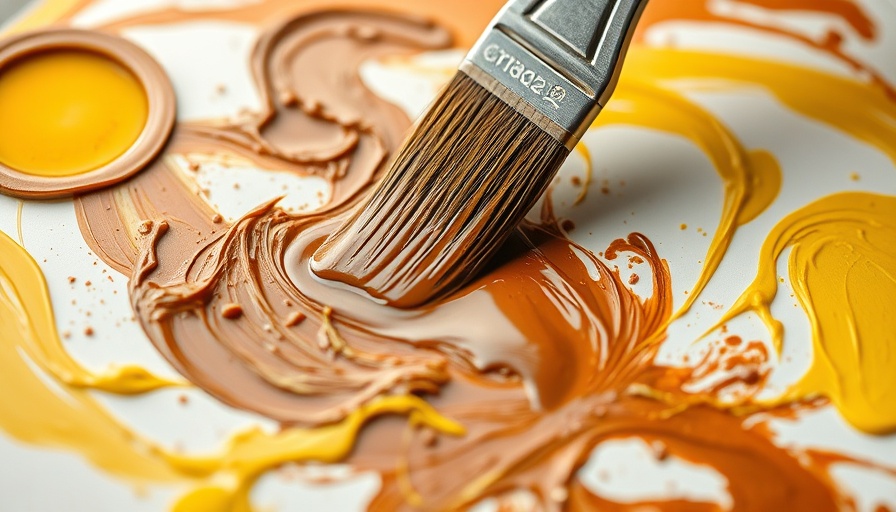
To mix brown, you'll need to combine primary colors—red, yellow, and blue. Remember, a fundamental understanding of color theory is essential, as the mix of these basic pigments creates the neutral and earthy tones that define brown. By adjusting the proportions of each color, you can create a variety of brown shades ranging from soft taupe to deep chocolate.

Tools and Materials Needed

For a successful DIY paint mixing experience, gather the following items: a mixing board palette, a painting or putty knife, a plastic spoon, and your selection of paints including red, yellow, blue, black, and white. Having these tools at hand makes the painting process smoother and saves you from making multiple trips to the store.

Step-by-Step Guide to Mixing Brown Paint

  1. Step 1: Gather Your Primary Colors
    Begin with red, yellow, and blue. Use equal parts of each color to start achieving a balanced brown tone.
  2. Step 2: Measure and Mix
    Pour each color into your mixing palette using the plastic spoon, ensuring that each color is in equal proportions. This consistency is key in finding the right balance.
  3. Step 3: Adjust for Desired Shades
    If the brown appears too warm, consider adding a bit of blue to cool it down. Conversely, if it seems too dark, a touch of white can lighten the mix.
  4. Step 4: Test Your Mixture
    It's important to test your blended paint on a small section of your project. This ensures that the resulting color aligns with your expectations before committing to a larger area.

Understanding Color Terms

Familiarity with terms like hue, tint, tone, and shade can significantly enhance your painting experience. A hue is the pure color itself, while a tint is created by mixing in white, making the color lighter. Adding gray creates a tone, and incorporating black yields a shade. These concepts will help you refine your custom brown paint recipes.

Incorporating Handyman Tips for a Better Experience

As you embark on your DIY projects, combining basic handyman tips can elevate your outcomes. Use a proper approach to mixing paints, and don't hesitate to experiment with different base colors. Remember, the goal is to create a uniform and pleasing result suited to your project's needs.

Conclusion: Embrace the DIY Spirit!

Now that you’re equipped with the knowledge to make your own custom brown paint, take on your projects with confidence. Mix and match different shades to find the exact color that will elevate your home or craft project. Don't shy away from being creative!

DIY Home Projects

0 Comments

Write A Comment

*
*
Related Posts All Posts
01.21.2026

Unleash Your Child's Imagination: Designing With Field Trip by Clare Paint

Update Embracing Your Kids’ Creativity: Why Design Matters When it comes to redecorating a child’s room, the stakes can feel surprisingly high. As homeowners, we must balance our desire for a beautifully designed space with our kids’ unique personalities. In my recent experience with painting my tween’s room using Field Trip by Clare Paint, I came to appreciate the value of letting children express themselves in their own spaces. The Artistic Process: A Collaboration This journey began with my son, Jackson, who has always shown a keen interest in the aesthetics of his room. This time around, I decided to take a different approach than in previous homes, where I often masked his preferences in the name of adult sensibilities. Instead, we explored colors together, and he ultimately chose a rich, deep green for the walls—the same hue he loved in our past home. The color Field Trip resonated with him, bringing a sense of warmth and personality to his space. The Emotional Value of Personalized Spaces While painting Jackson’s room, I found myself reflecting on the significance of the clutter strewn across his surfaces—his beloved collection of art projects, LEGO minifigures, and trophies. Instead of viewing them as mere chaos, I came to see them as a gallery of his interests and achievements. This lesson in letting go of perfection echoed sentiments from prominent interior design discussions, such as those shared by design experts Annie Elliott and Chris of Chris Loves Julia. They emphasize the importance of honoring a child’s desires and personality when creating their living spaces. Diving Deeper into Design Philosophy A key takeaway that resonated with me—and one echoed consistently across various design blogs—is that a balance must be struck between enabling a child’s creative freedom and ensuring functionality and longevity in design. Chris highlights how choice can sometimes overwhelm children, advising parents to provide options rather than overwhelming them. Thus, it’s beneficial to guide children in selecting elements that express their individuality while maintaining harmony with the overall home design. Future Plans: More Than Just Paint After settling on the wall color, Jackson expressed interest in repainting a yellow dresser black. This dresser has a history, transitioning from a changing table to various rooms as our family grew. It represents his journey and personality, cementing the emotional ties to his space that we often overlook in adult-centric decor choices. Transforming Spaces: The Power of a Fresh Coat Reflecting on our painting journey, I realized how transformative even a simple color change can feel. Jackson’s bedroom now radiates warmth and individuality, becoming a true sanctuary for him. It serves as a constant reminder that our homes should reflect the lives and personalities of those who inhabit them, a belief that has become foundational in the conversations surrounding children's spaces. Practical Tips for Personalizing Kids' Spaces Here are some actionable insights based on my experience: Involve your kids in the decision-making process: Start by showing them color swatches and asking for their input on design elements; it creates a sense of ownership. Be mindful of trends: While some aspect of your child's room should reflect their personality, resist the urge to follow fleeting trends that may not age well. Encourage creativity: Allow space for personal items, as they can foster creativity and a sense of identity in their environment. In conclusion, as we navigate the potentially chaotic waters of designing kid-friendly spaces, we should remember that fostering creativity in our children leads to richer experiences and emotional connections within our homes. See your child's room not just as a personal space but as a canvas for their individuality. Ready to transform your child’s room into a true reflection of them? Head to your local paint store and explore options like Field Trip by Clare Paint—your child might just find a color that resonates with their creative spirit!

01.14.2026

Why White Dominates: Unpacking the Most Popular Car Colors in 2024

Update Understanding the Color of Your Ride: A Trend Analysis When it comes to car buying, the color of a vehicle is a significant factor for many buyers. A recent report from Edmunds broke down the most and least popular car colors in the U.S. for 2024, drawing attention to the fact that color choices reflect not only personal preferences but also broader societal trends. Top Car Colors to Look Out For White remains the king of car colors, dominating the market with 25% of new individual vehicle registrations. Black follows closely behind at 22%, and gray stands at a respectable 20%. These colors have become staples in car ownership, with buyers indicating a preference for sleek, neutral tones that are associated with class and elegance. Interestingly, while the national top colors remain consistent, certain states showcase unique preferences. For example, Alabama through Wyoming often include red in their lists, hinting at regional variations in consumer behavior. Such insights can help aspiring car buyers know what to expect in their local markets, informing their choices. What Are the Least Popular Car Colors? On the flip side, it’s noteworthy that some colors simply don’t resonate with car buyers. According to the report, colors like brown, orange, and yellow are generally the least favored across the nation. However, some unique preferences arise at a state level; for instance, green colors rank lower in popularity in places like South Dakota and Wyoming. Understanding these trends can be handy for buyers looking for bargains. For example, purchasing a less popular color could mean getting a great deal. The Psychology Behind Color Choice Color preferences can be deeply rooted in psychology. Neutral colors like black and white tend to be perceived as more sophisticated, ideal for professional environments. On the other hand, vibrant colors often indicate a driver’s desire to express individuality. As car manufacturers acknowledge these trends, they have developed marketing strategies that cater to varying buyer needs, which can also be beneficial for potential sellers looking to capitalize on certain color choices. Impact of Color on Resale Value Car color not only influences initial purchase decisions but also impacts resale value. Most buyers opt for commonly favored colors like white and black, ensuring that cars in these shades retain their value over time. If you’re looking to buy, it may be wise to consider this as you choose your ideal vehicle. This can be particularly relevant for DIY enthusiasts who may want to repaint an older car, knowing that classic colors could fetch better resale prices. Regional Variations in Color Preferences Regional differences can also shed light on broader cultural and social trends. For instance, while white dominates in northern states, states where warmer climates prevail—like Florida—might show differences in preferences. Understanding these regional variations can be beneficial not just when buying a car but also when considering DIY projects on your vehicle. Different colors can invoke different feelings and appeal to specific demographics. Planning Your Next DIY Project: Color Considerations If you’re considering a DIY project, understanding color psychology can play a crucial role. Whether you are sprucing up your car or working on interior home improvements, the colors you choose can profoundly affect mood and perception. Consider neutral colors for a timeless look in home décor or vehicle shades that stand out for a personal touch. Engaging with car color trends can arm you with knowledge, whether for purchasing a new vehicle or choosing the right hue for your DIY projects. Join the conversation: What color do you feel best represents your style? Discuss it with friends or community members and see how your opinions align with national preferences. In Conclusion: Make Informed Choices Understanding the car color trends for 2024 can provide invaluable information whether you're making a purchase, planning a DIY project, or simply following industry shifts. Keep an eye out for these trends and make informed decisions that reflect your style, while also considering practicality and future resale value.

01.14.2026

Effortlessly Clean Your Leather Car Seats with This DIY Guide

Update Your Guide to Pristine Leather Car Seats Cleaning leather car seats might seem daunting, especially when you see the wear and tear caused by kids, pets, and daily use. However, with the right tools and methods, you can effortlessly restore your leather seats to their original shine. This guide breaks down the cleaning process into simple steps, ensuring not just cleanliness but also preservation of the leather's integrity. Gather Essential Tools and Materials Before diving into the cleaning process, prepare your workspace by gathering the necessary tools and materials. You will need: A vacuum cleaner with appropriate attachments Leather cleaner and conditioner Microfiber towels A soft-bristled boar hair brush (optional for deeper cleaning) These items can typically be acquired for a budget-friendly cost of $15 - $80, making this DIY project both economical and efficient. Step-by-Step Cleaning Process Step 1: Vacuum ThoroughlyStart by vacuuming not just the seats, but the entire interior of the car. This action removes dirt, crumbs, and pet hair that could scratch the leather during cleaning. Pay close attention to seams and crevices. If your seats have any tears, consider placing a piece of tape behind them to keep them flat while cleaning. Step 2: Apply CleanerTo clean the seats, spray a moderate amount of leather cleaner onto a microfiber towel. Wipe down the seats using circular motions, making sure to concentrate on seams and crevices. Helpful Tip: Using the edge of a credit card wrapped in the towel can help reach deeper areas. Step 3: Deep Clean with a Brush (Optional)For a more thorough approach, utilize a boar hair brush to agitate the cleaner while applying it to the seats. This technique will lift dirt and grime more effectively, providing a deeper clean. Step 4: Condition the LeatherOnce cleaned, it’s crucial to condition your leather seats. A quality leather conditioner replenishes moisture, preventing cracks and maintaining suppleness. Make sure your conditioner is compatible with the type of leather in your vehicle—whether synthetic or genuine. Why Regular Cleaning Matters Regular cleaning and conditioning not only improve the aesthetic appeal of your car but also extend the life of your leather seats. By periodically following these steps, you can maintain that new-car look and feel. Additionally, clean leather is healthier, as it reduces allergens and particles that accumulate in the car. Common Misconceptions About Leather Cleaning Many people mistakenly believe that soap and water are sufficient for cleaning leather. However, using harsh detergents can strip leather of its natural oils, leading to dryness and cracking. Always opt for products specifically designed for leather care. Top Benefits of DIY Leather Seat Cleaning Cost-Effective: Hiring a professional can be pricey. DIY cleaning saves money while allowing you to take care of your car on your own schedule. Enhanced Knowledge: Engaging in this task educates you about your vehicle and helps spot early signs of wear that could need professional attention. Immediate Results: There’s a satisfying aspect to seeing immediate results after putting in the hard work. Utilizing these tips and taking the time to care for your vehicle will ensure that you enjoy a clean, polished ride for years to come. So go ahead, grab those cleaning supplies and give your leather seats the care they deserve! For more DIY projects and handyman tips that empower homeowners, stay tuned and follow our future articles. Maintaining your home and belongings can be a fulfilling endeavor, especially when you see your efforts pay off!

Terms of Service

Privacy Policy

Core Modal Title

Sorry, no results found

You Might Find These Articles Interesting

T
Please Check Your Email
We Will Be Following Up Shortly
*
*
*