UPDATE
  • Home
  • Categories
    • Cleaning & Moving
    • Maintenance / Repairs
    • Remodeling & Construction
    • Landscaping / Outdoor
    • Security & Technology
    • Sustainability, Health & Safety
    • Interiors / Décor
    • Expert Interviews
    • DIY Home Projects
Home Wise News!
Wise Insights, Reliable Contractor Advice & Hands on DIY Know How for Savvy Homeowners
July 11.2025
3 Minutes Read

What Does the Boat Symbol on Your Dashboard Mean? Find Out Here!

Red coolant temperature warning light icon on black background.

Understanding Dashboard Warning Lights: The Boat Symbol Explained

As car owners, we often glance at our dashboard and see a variety of warning lights. Among these symbols, the boat icon can particularly evoke confusion. While it may initially look like it references nautical elements, the truth is much more to the point—it actually signifies coolant temperature issues in your vehicle.

What Does the Boat Symbol Actually Mean?

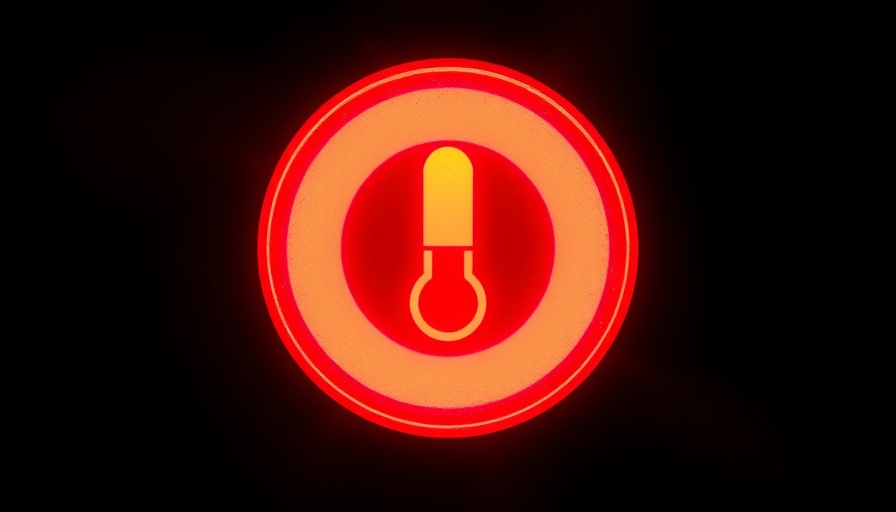
At first glance, the boat symbol might mislead some to think of maritime themes; however, this symbol indicates a thermometer positioned above a fluid level. This light serves as both a coolant temperature low indicator and a coolant temperature high warning light. If you spot this warning light glowing after the initial startup, it's imperative that you pay attention as it pertains to your engine's well-being. Ignoring it could lead to severe damage down the line.

Decoding the Variants of the Warning Light

The behavior of the boat symbol varies, which can help you diagnose potential engine problems:

  • Blue Light: A solid blue light suggests that your engine hasn't warmed up sufficiently, an indication to potentially take it easy on acceleration until it reaches optimal operating temperature.
  • Alternating Red and Blue Light: This flashing signal points to an electrical system malfunction, meriting a visit to your dealer for further inspection.
  • Blinking Red Light: A blinking red light is a serious alert, warning that your engine is at risk of overheating. Immediate action is required!

Steps to Take When the Symbol Illuminates

Seeing the boat symbol activate can be startling, but it shouldn’t lead to panic. Here’s what you should do:

  1. If the Light is Alternating: Seek assistance from a dealership for a thorough inspection.
  2. If the Light Is Blinking Red: This is an emergency. Safely pull over and turn off the engine immediately. Allow it to cool before inspecting the engine compartment.

It’s crucial not to ignore this warning. Continued driving under these conditions can result in complete engine failure and hefty repair costs.

Why Ignoring Warning Lights is a Bad Idea

The boat symbol serves as a reminder that cars are complex machines requiring constant monitoring. When you see this light, think of it not just as an annoyance, but as an opportunity to ensure your vehicle remains reliable and safe. Allowing your engine to overheat can cause significant damage and, in some cases, render the vehicle inoperable.

Understanding the Importance of Routine Maintenance

In tandem with being vigilant about dashboard warnings, regular maintenance is essential for vehicle longevity. Performing routine checks on coolant levels, hoses, and cooling system components can prevent such warnings from surfacing altogether. Investing time in your vehicle’s routine can be one of the best DIY projects you undertake.

Actionable Tips for DIY Vehicle Maintenance

1. **Regular Coolant Checks**: Make it a habit to evaluate coolant levels at least once a month. Low coolant can trigger the warning light.

2. **Monitor Temperature**: Keep tabs on your engine temperature gauge. If you notice fluctuations, seek professional help.

3. **Stay Informed**: Utilize online resources, manuals, and even apps to familiarize yourself with all vehicle symbols—empowerment comes before emergencies!

Conclusion: Make Your Vehicle Work for You

Dashboard warning lights, such as the boat symbol, are indicators designed to keep drivers informed about their vehicle's condition. By understanding their significance, you can mitigate risks and be proactive rather than reactive regarding car maintenance. Regularly inspecting your car and acting swiftly on these warnings can save time and ensure your vehicle remains a reliable source of transport.

If you found this guide helpful, consider implementing some of the DIY tips shared here in your household maintenance routine. You may find it not only empowers you but also saves you money in the long run.

Maintenance / Repairs

0 Comments

Write A Comment

*
*
Please complete the captcha to submit your comment.
Related Posts All Posts
06.15.2026

Discover How to Get Rid of Dishwasher Odors for Good

Update Understanding Your Dishwasher's Odor Problem Few home appliances are as comforting as a well-functioning dishwasher, tirelessly scrubbing away the remnants of last night’s dinner. However, when that trusty machine starts emitting unpleasant odors, it can quickly turn from helpful to a health hazard. Knowing the root causes of those funky smells is key to addressing them and keeping your kitchen fresh. What Causes Dishwasher Odor? Your dishwasher is a breeding ground for odors for a variety of reasons. Common culprits include: Clogged Filter: Food particles and other debris can accumulate here, creating a smelly mess. Mold and Mildew: Damp areas, particularly around the door seals, can foster mold growth. Blocked Drain: If water isn’t draining properly, it can back up and leave your dishwasher smelling worse than a neglected fish market! Buildup of Soap Scum: Hard water minerals and soap residue can cling to the interior surfaces, entrapping odors. A Step-by-Step Guide to Deodorizing Your Dishwasher To banish those pesky odors, follow these steps to restore your dishwasher’s freshness and performance: 1. Empty the Dishwasher Start by removing any dishes or utensils. This ensures you have complete access to clean the dishwasher’s interior without obstructions. 2. Clean the Filter The filter is often the source of unpleasant smells. Remove it according to your dishwasher's manual, rinse it under warm water, and scrub gently with a soft brush to dislodge stubborn bits of food. 3. Run a Vinegar Cycle Pour two cups of white vinegar into a dishwasher-safe bowl and place it in the bottom rack. Run a hot water cycle with an air-dry feature to neutralize odors and disinfect the interior. 4. Scrub the Gasket Seals Use a sponge soaked in warm, soapy water to clean around the door seals where grease and grime can accumulate. This area often goes ignored but is crucial for a stink-free machine. 5. Check the Drain Hose If odors persist, inspect the drain hose for blockages or kinks that could be causing a backup. Clogs here can limit drainage and lead to lingering smells. Preventing Future Odor Issues Now that your dishwasher is back to smelling fresh, how can you keep it that way? Regular maintenance is crucial: Clean the filter monthly to prevent food build-up. Always scrape off excess food from dishes before loading them. Run a wash cycle with vinegar monthly as part of your routine maintenance. If you're washing items with strong odors—like fish or garlic—consider running a rinse cycle immediately after for good measure. Closing Thoughts on Dishwasher Maintenance A well-maintained dishwasher doesn’t just save your nose from foul odors; it also ensures your dishes come out sparkling clean. By understanding how to tackle odor issues and prevent them, you safeguard both your appliance and the health of your kitchen area. After all, in the realm of household chores, a clean dishwasher is a happy dishwasher. Ready to take control of your kitchen freshness? Start by scheduling regular maintenance and remember, a little vigilance goes a long way in ensuring your machine remains odor-free!

06.12.2026

Unlock the Secret to Cleaning Your Stand Mixer—Don’t Miss These Spots!

Update Understanding Your Stand Mixer: Keeping It Sparkling Stand mixers have become essential kitchen companions, especially for those who love baking or cooking. However, many users overlook how important it is to keep them clean. Regular cleaning ensures not just longevity but also optimal performance. Unfortunately, people often forget specific areas that require cleaning, leading to hidden grime. Here, we will explore effective ways to clean your stand mixer, including often-neglected spots that deserve attention. Step-by-Step Guide to Cleaning Your Stand Mixer The process of cleaning might seem daunting, but it can be broken down into simple steps: Unplug the Mixer: Safety first! Always unplug your mixer before cleaning. Detach and Wash Attachments: Remove attachments like the whisk and dough hook and soak them in soapy water before washing them with a sponge. Wipe Down the Base: Use a damp cloth with mild soap to clean the mixer’s base. Make sure to get into any crevices. Focus on the Planetary Mixing Action Area: This part often collects residue and batter, so don’t neglect it. A toothbrush can help remove stubborn bits. Pay Attention to the Control Knob: This area traps grease. A simple wipe with a damp cloth should suffice. Commonly Overlooked Areas When Cleaning While most people know to clean the surfaces, it’s those hidden nooks that often get missed: Underneath the Mixer: Debris can accumulate here. Use a soft brush or a clean cloth to gently dust this area. Beneath the Bowl Lift: This is often a catch-all for flour, sugar, and crumbs. A quick inspection can save you from future mess. Why Cleanliness Matters Aside from hygiene, there are practical reasons to keep your stand mixer clean: Flavor and Quality: Residues can impact the taste of your ingredients if left unchecked. Device Longevity: Regular cleaning can significantly extend the life of your mixer, allowing you to enjoy its benefits for years to come. Efficient Mixing: A clean mixer works better—ensure that your culinary masterpieces turn out just as planned! Tips to Make Cleaning Easier Cleaning doesn’t have to feel like a chore. Here are some tips that can simplify the process: Use Microfiber Cloths: These are excellent for trapping dust and grime without scratching surfaces. Designate Cleaning Days: Set aside specific days just for cleaning your kitchen appliances. Make it Fun: Put on your favorite playlist or podcast, turning the cleaning routine into an enjoyable activity. Enhancing Your Kitchen Experience Through Cleanliness Cleaning your stand mixer not only enhances its performance, but it also adds joy to your cooking experience. Keeping your appliances in top shape means you can focus on what you love—creating delicious dishes. Invest time in proper maintenance to enjoy new gastronomic adventures each day! Wrapping Up: Your Mixer Deserves Some TLC To sum it up, frequent cleaning of your stand mixer is essential for various reasons—hygiene, efficiency, and longevity. By tackling hidden areas and establishing a cleaning routine, you’ll ensure that your kitchen remains a delightful and productive space. So, grab those cloths and let’s get scrubbing! Your stand mixer will thank you with the delightful outcomes of cooking and baking without the worry of hidden grime!

06.12.2026

Why Homeowners Are Switching to Ductless Mini-Split Systems Now

Update Understanding the Rise of Ductless Mini-Split Systems As the demand for energy-efficient and adaptive heating and cooling solutions soars, ductless mini-split systems have emerged as a top contender in residential HVAC options. Homeowners are increasingly turning to these innovative systems not just for comfort, but also to curb energy costs and tackle unique challenges presented by their homes. With a 221% growth rate in the U.S. mini-split market over the past seven years, it's clear that the trend isn't just a passing fad but a reflection of evolving homeowner priorities. Energy Efficiency: The Core Advantage One key reason for the popularity of ductless mini-split systems is their enhanced energy efficiency. Traditional HVAC systems often rely on ductwork to transport air, which can leak over time, leading to substantial energy waste. Ductless systems, as the name suggests, eliminate the need for ducts altogether, allowing for direct air delivery to individual rooms or zones. This targeted approach significantly improves energy conservation. According to the Department of Energy, duct losses can account for over 30% of HVAC energy consumption—an issue mini-splits effectively bypass. Flexible Installation Options The physical design of mini-splits—with an outdoor compressor and one or more indoor air-handling units—provides remarkable installation flexibility. Homeowners can enjoy cooling or heating in spaces where traditional ductwork is impractical. This includes areas like garages, attics, or rooms added onto the home, where extending existing HVAC systems might be cost-prohibitive or simply impossible. Personalized Comfort Through Zoning Ductless mini-splits offer the significant benefit of zoning, enabling customized temperature settings for different areas of the home. Each indoor unit operates independently, catering to diverse heating and cooling preferences among family members. For instance, one family member may prefer a cooler bedroom, while another opts for a warmer home office. This individualized approach goes a long way in enhancing the overall comfort of the household. The Quiet Advantage Noise is another factor where mini-split systems excel compared to traditional HVAC systems. Generally, indoor air handlers produce less noise, making them ideal choices for bedrooms, nurseries, or home offices. As noise can be a considerable distraction, especially in quiet spaces, the discreet operation of mini-splits can significantly improve the quality of life in these environments. Improved Indoor Air Quality Indoor air quality is a growing concern for homeowners, and ductless systems shine in this arena as well. Without ducts that can accumulate dust, mold, and other allergens, mini-splits help maintain a cleaner living environment. Additionally, many mini-split models come equipped with advanced air filtration systems that further enhance air quality, benefiting residents’ health. Cost Considerations: Balancing Initial Expense with Long-Term Savings While ductless mini-split systems may come with a higher upfront cost than some traditional options, homeowners often find that the long-term savings justify the initial investment. Factors such as reduced energy bills and lower maintenance needs can lead to significant financial benefits over time. It becomes increasingly evident that these systems are a forward-looking investment, particularly as energy costs continue to rise. Stepping into the Future of Home Comfort The trend towards ductless mini-split systems reflects a broader shift in homeowner preferences—prioritizing energy efficiency, comfort, and indoor air quality. As these systems become more prominent, future advancements are expected, offering even better customization and energy savings. Homeowners embarking on renovations or simply seeking more efficient heating and cooling methods are encouraged to explore this flexible option. Conclusion: Embracing Change for a Comfortable Home With a growing base of satisfied customers, ductless mini-split systems have proven their worth in providing energy-efficient, personalized comfort solutions. As the market for these systems continues to expand, homeowners stand to benefit significantly by embracing the change in how we approach home heating and cooling. If you're pondering a mini split installation or simply wish to learn more, don’t hesitate to consult professionals who can guide you through the options available tailored to your specific needs.

Terms of Service

Privacy Policy

Core Modal Title

Sorry, no results found

You Might Find These Articles Interesting

T
Please Check Your Email
We Will Be Following Up Shortly
*
*
*