Add Row
Add Element
UPDATE
Add Element
  • Home
  • Categories
    • Cleaning & Moving
    • Maintenance / Repairs
    • Remodeling & Construction
    • Landscaping / Outdoor
    • Security & Technology
    • Sustainability, Health & Safety
    • Interiors / Décor
    • Expert Interviews
    • DIY Home Projects
Home Wise News!
Wise Insights, Reliable Contractor Advice & Hands on DIY Know How for Savvy Homeowners
May 08.2025
3 Minutes Read

Why Toronto is Called The Six: Unpacking the Cultural Phenomenon

Vibrant Toronto skyline with CN Tower, Why is Toronto called The Six text.

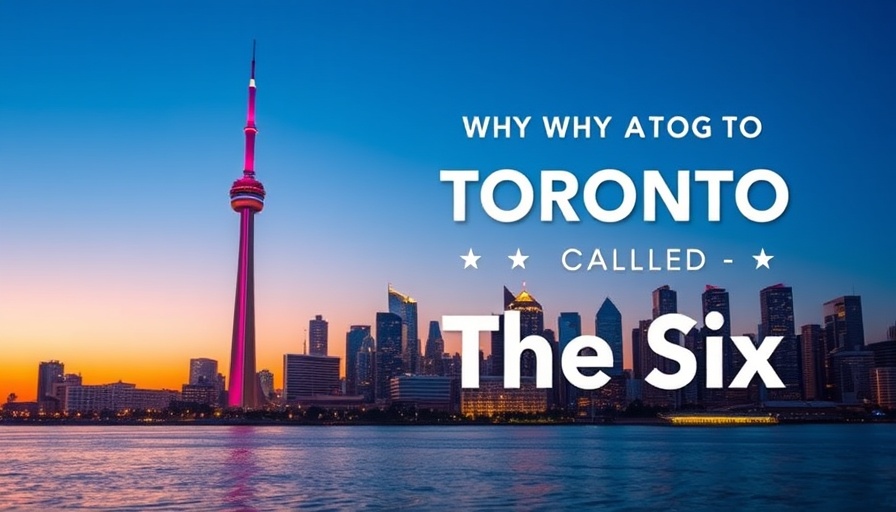
Understanding Toronto’s Unique Identity

Have you ever found yourself pondering why Toronto, the bustling metropolis of Canada, is often affectionately dubbed “The Six”? This nickname has rapidly gained traction, especially in music, sports, and the vibrant tapestry of pop culture that Toronto embodies. To fully grasp the depth of this catchy moniker, we must peel back the layers of Toronto's history and its cultural significance.

Originating from the Streets: Drake’s Influence

The roots of the nickname “The Six” can be traced back to the internationally renowned rapper Drake, who is widely credited with bringing the term into mainstream conversation. His 2016 album, “Views from the 6,” acts as a love letter to the city, using “The Six” to evoke a sense of pride and belonging among Torontonians. Many listeners curious about the meaning of this phrase began exploring the city’s rich legacy, which further solidified its place in the cultural zeitgeist.

The Significance of Toronto’s Area Codes

So, what does “The Six” actually refer to? It intricately relates back to Toronto's area codes, an essential element of the city’s geographical identity. Toronto is served by six primary area codes: 416, 647, 437, 905, 289, and 365. Notably, area code 416 covers the downtown core of the city and was originally the only area code prior to the expansion necessitated by the increasing population. Drake’s nickname cleverly links these area codes, symbolizing the interconnectedness of the diverse and vibrant communities within Toronto. No matter which area code you hail from, being part of The Six is about a collective acceptance and unity.

The Historical Backbone of “The Six”

The landscape of Toronto was significantly reshaped in 1812 due to the War of 1812, framing the cities we recognize today. This wasn’t the last of the transformations; in 1967, the original seven municipalities were reorganized into what we know as the six municipalities today: Scarborough, Old Toronto, Etobicoke, East York, North York, and York. This restructuring not only changed the administration of the city but also forged a sense of camaraderie that residents hold dear.

A Community Embracing Its Nickname

Since its popularization, The Six has been embraced wholeheartedly by both locals and visitors. It’s more than just a moniker; it serves as a badge of honor for Torontonians, who take immense pride in their heritage and the cultural diversity that the city represents. From sporting events where fans proudly refer to themselves as “Sixers” to merchandise proudly displaying the motto, The Six has become synonymous with Toronto’s identity.

The Contemporary Resonance of “The Six” in 2025

Fast forward to the year 2025, and “The Six” has cemented its role as an integral facet of Toronto's cultural identity. The nickname has transcended its original context, now appearing in tourism marketing campaigns and city branding. A quick glance at Google Trends reveals that the popularity of searches surrounding “Why is Toronto called The Six” surges during high-profile events, such as new album releases from Drake or critical playoff runs by the Toronto Raptors. This enduring curiosity showcases how deeply ingrained the nickname has become within the collective cultural experience.

Decisions and Actions You Can Take

Understanding the significance of The Six can inspire you in various aspects, whether you’re a homeowner looking to imbue your space with a sense of Toronto’s unique vibe or a contractor interested in the cultural nuances that may affect your work in the city. Remember that when you engage with The Six, you’re tapping into a legacy that blends community pride, history, and identity.

How Does This Impact Homeowners?

For homeowners exploring cleaning and maintenance projects, consider incorporating elements that reflect Toronto’s diversity and character. Simple home repairs can carry the spirit of The Six if executed with an intention to honor the city's community. Understanding your creative potential can empower you to tackle tasks that may seem daunting.

In summary, the intricate narrative behind why Toronto is called The Six not only encapsulates a geographical reference but also embodies community, pride, and the spirit of unity that takes this great city forward. As homeowners, contractors, or curious minds, embracing The Six inspires creativity in ways that resonate with Toronto’s rich history and dynamic spirit.

DIY Home Projects

0 Comments

Write A Comment

*
*
Please complete the captcha to submit your comment.
Related Posts All Posts
04.21.2026

Unlock Your Home’s Potential: DIY Floating Shelves for Every Nook

Update Transform Your Space with Floating Shelves Are you tired of cluttered spaces that lack functionality? Adding floating shelves is a versatile and aesthetic way to enhance the functionality of any nook in your home, particularly one with those built-in characteristics that often feel outdated. Leaving behind the cumbersome cabinet for streamlined floating shelves not only refreshes your space but also breathes new life into it—something we all want in our homes. Why Floating Shelves? Floating shelves offer numerous benefits, including easy accessibility to your favorite decorative items while significantly enhancing your home’s decor. They utilize vertical space and create an illusion of a larger area—a boon for smaller rooms or nooks. Moreover, they can be customized to fit any style, so you can bring your unique flair to any corner of your home. Gather Your Materials and Tools As with any DIY project, your success hinges on having the right materials and tools. For floating shelves, you will need: 1×2 furring strips - Affordable and compact, perfect for building a sturdy support frame. 1/4″ plywood - This will serve as the shelf surface. Construction adhesive - Essential for secure attachment. Tools - A chop saw, drill, level, and nail guns are indispensable for precision work. Choosing quality materials ensures that your shelves withstand the test of time, maintaining both functionality and aesthetics. Measuring and Planning Your Floating Shelves The measurement process is crucial in the installation of floating shelves. Begin by measuring the dimensions of your nook, determining not only the width (e.g., 36 inches) but also the desired shelf depth (e.g., 16 inches). Since you’re aiming for a symmetrical and pleasing aesthetic, lay out your plans clearly, ideally sketching them out beforehand. This step prevents frustration later in the fitting process! Build Your Support Frame Once your measurements are confirmed, proceed to create the supporting frame. Start by cutting your 1×2 furring strips into the necessary lengths based on your computations. Utilizing corner clamps to hold the pieces square while drilling makes the assembly more efficient. Ensuring middle supports will strengthen your shelves and prevent sagging under weight, which is a vital step during the crafting process! Attach Your Shelves With the frame built, it’s time to affix it to your wall securely. Selecting the right wall anchors is imperative, especially if your nook has drywall rather than solid stud framing. Using a level ensures that your floating shelves will be straight, preventing the dreaded “slant”. Securely installing the shelves allows you to arrange your items confidently, knowing that they won't budge. Style and Decorate The fun begins after setting up your shelves. Select decor items that resonate with your personal style. Did you know that the rule of three enhances the aesthetic of any display? Arrange items in clusters of odd numbers to create visual interest. Utilize decorative baskets, plants, or picture frames to give life to your floating shelves and to turn a simple nook into an eye-catching multimedia display. Final Touches: Maintenance Tips Maintaining the integrity of your floating shelves requires minimal effort—simple dusting and avoiding overly heavy items will keep them looking fresh. Additionally, as the seasons change, consider rotating your decor to breathe new life into your displays without needing to redo your entire nook each time! Creating Nooks That Reflect You Ultimately, installing floating shelves can transform the way your nook looks and feels. Not only do floating shelves maximize storage, but they also provide a canvas for self-expression. So, embrace your creativity, tackle this DIY project, and enjoy the results! With a little effort, you can enhance your living space tremendously. Ready to Get Started? Now that you’re equipped with all the tips and tricks, it’s time to grab the materials and tools! Dive into this project to enhance your home’s charm with beautiful floating shelves. Make the space your own, and let your creativity express itself!

04.17.2026

Discover How to Use a DIY Carpet Deodorizer for Hotel-Like Freshness

Update Transform Your Home with a Simple DIY Carpet Deodorizer As a homeowner, keeping your living space smelling fresh can be a real challenge—especially if you have pets or live in a humid climate. While replacing old carpeting might be on your to-do list, there's no need to wait when a quick DIY solution is at your fingertips. The two-ingredient carpet deodorizer is a simple yet effective way to refresh your home and make it smell like a luxury hotel. Essential Ingredients for Freshening Up Your Carpets To make your own carpet deodorizer, all you'll need are two common household items: baking soda and your choice of essential or fragrance oils. Here’s how to whip up this magic mix: Materials Needed: 1 cup of baking soda and 10-20 drops of your favorite essential oils (like lavender, lemon, or eucalyptus). Instructions: Mix the baking soda and essential oil in a bowl until well blended. Sprinkle it evenly over your carpet, focusing on spots that experience the most foot traffic or have lingering odors. Let it sit for 15 minutes to 1 hour to allow the baking soda to absorb any unwanted smells, then vacuum it up. With these simple steps, you can ensure your home smells delightful without spending a fortune on commercial deodorizers or expensive candles. Why Baking Soda Works Wonders on Carpet Odors Baking soda is a powerhouse in the battle against unpleasant smells. Its chemical properties allow it to bind with odor-causing particles, neutralizing them instead of merely masking the odors. Cleaning expert Allen P. Rathey emphasizes that baking soda acts like a sponge for unpleasant smells, particularly those from pets or food spills, making it an ideal choice for pet owners and families. Customizing Your Strategy: Essential Oils and Scent Profiles The versatility of your DIY carpet deodorizer lies in the essential oils you select. For a fresh, uplifting aroma, opt for citrus scents like lemon or lime. If you're after something more cozy and warm, try vanilla or sandalwood. Each scent will contribute to the ambiance of your home, making it welcoming for guests and your own family. Frequently Asked Questions About DIY Carpet Deodorizers What if my carpet still smells after using this deodorizer? If odors persist, it might be time to consider deeper cleaning methods, such as hot water extraction, which is akin to giving your carpet a good shower. Sometimes, professional cleaning services can help you restore the freshness of your flooring more effectively than home remedies. Is this method safe for pets and children? While the ingredients used are generally safe, it's always a good idea to keep pets and children away from freshly treated carpets until the product has been vacuumed up. If you have pets, be cautious with certain essential oils, as some can be harmful to them. Always consult with your veterinarian for suggestions on safe scents. Creating a Healthy Indoor Environment with Natural Cleaning Solutions Using natural ingredients not only keeps your home smelling great, but it also contributes to a healthier living environment. Chemical-laden commercial products can lead to indoor air pollution and trigger allergies. By using this DIY carpet deodorizer, you're making a conscious choice for a more sustainable and eco-friendly home. Conclusion: Take Action for a Fresher Home If you're looking for quick and effective ways to enhance the aroma of your home, this DIY carpet deodorizer is a clever solution. It’s simple, safe, and cost-effective, proving that sometimes less is more. Give it a try next time you prepare for guests or simply want to enjoy a fresher living space!

04.17.2026

Essential Guide to Touching Up Paint on Your Walls

Update Mastering the Art of Touching Up Paint Touching up paint on your walls may seem like a simple fix, but it often proves to be a tricky endeavor. Many homeowners find themselves frustrated when a quick dab of paint turns into an obvious eyesore. With some insider knowledge and a few key techniques, however, you can seamlessly blend those imperfections without the need for a full repaint. Let's dive into how to keep your walls looking fresh and flawless! Understanding Common Pitfalls in Paint Touch-Ups Many touch-ups fail not due to lack of skill but because of common oversights. One major reason paint touch-ups stand out is mismatched color. Over time, even the best paint can fade from sunlight exposure, which may leave your new touch-up looking starkly different from the surrounding area. Additionally, improper technique—like applying too much paint in one spot—can lead to visible texture differences that scream “fix it!” Gathering Your Touch-Up Toolkit Before starting, ensure you have the following essential items: A can of the original paint color A small angled paintbrush or a clean cloth A damp rag for cleaning the area Fine grit sandpaper for rough spots Optional: a small foam roller for larger areas With these tools at your disposal, you’ll be well-prepared to tackle any wall imperfections! Preparation: Cleaning and Sanding Your Workspace Proper preparation is crucial for effective touch-ups. Start by cleaning the area where you will be painting. Dust and grime can hinder paint adhesion, so use a damp cloth to wipe the wall clean. If the surface is particularly rough or has received repairs like spackling, gently sand the area to ensure a smooth finish. This simple step can vastly improve the blend of your touch-up paint. Less is More: The Key to Application One of the most common mistakes during touch-ups is the over-application of paint. Instead of applying a heavy coat, start with a little paint on your brush or cloth. Apply it sparingly and build up as necessary. This helps avoid shiny patches that can draw attention to the repaired area. Remember: dab, don’t brush, and try to feather out the edges to create a seamless look. Assessing and Waiting for Drying Time It’s essential to allow your touch-up paint to dry completely before assessing your work. Fresh paint often appears different when it’s still wet and once it dries. Take your time; patience is key. If necessary, follow up with additional layers until you achieve the desired finish. The Foam Roller Advantage for Larger Areas If the area you are touching up is larger than a simple scuff mark, consider utilizing a small foam roller. This tool mimics the texture of your wall better than a brush, making it especially useful for satin or eggshell finishes. By rolling on the paint rather than brushing, you'll create a more consistent appearance across the surface. Color Matching and Consistency: A Critical Step Successful touch-ups hinge on matching the existing paint color and finish. If you’re unsure about the paint type or color, bring a sample chip to a local hardware store for advice or even a color match. Using the same sheen and texture as your original application is vital for blending touch-ups seamlessly. Make sure to stir any leftover paint well before application to ensure even color distribution. Final Thoughts: Embrace the Process While touching up paint might seem daunting, it can be a rewarding DIY project that revitalizes your walls. By following these techniques, you can overcome the common pitfalls and achieve a polished finish. So, don’t shy away from touching up your walls; instead, embrace the opportunity to enhance your home’s ambiance. If you ever find yourself overwhelmed with home repairs, remember that maintaining your space doesn't have to be a chore. Tune into your creative side, and make those walls shine again!

Terms of Service

Privacy Policy

Core Modal Title

Sorry, no results found

You Might Find These Articles Interesting

T
Please Check Your Email
We Will Be Following Up Shortly
*
*
*