Add Row
Add Element
UPDATE
Add Element
  • Home
  • Categories
    • Cleaning & Moving
    • Maintenance / Repairs
    • Remodeling & Construction
    • Landscaping / Outdoor
    • Security & Technology
    • Sustainability, Health & Safety
    • Interiors / Décor
    • Expert Interviews
    • DIY Home Projects
Home Wise News!
Wise Insights, Reliable Contractor Advice & Hands on DIY Know How for Savvy Homeowners
September 06.2025
3 Minutes Read

Reviving Hardwood Floors Without Sanding: Your Easy Guide

Revive hardwood floors without sanding method on polished wooden surface.

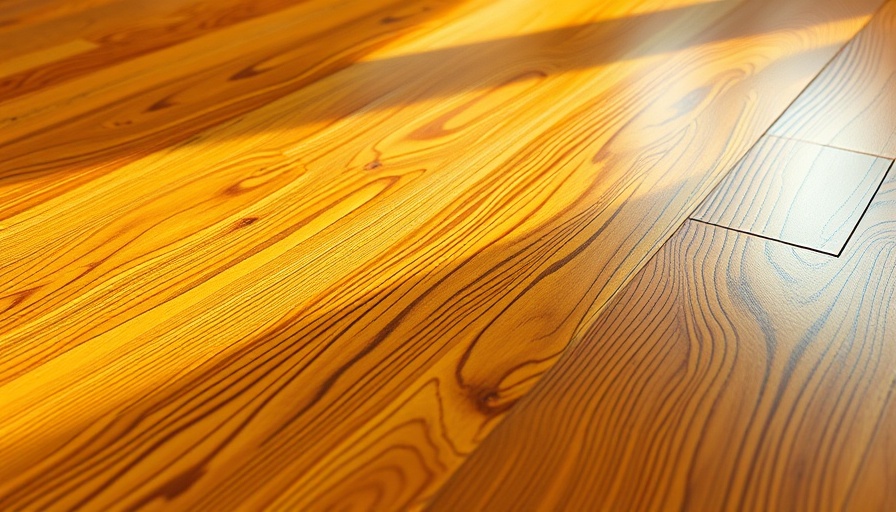
Save Your Floors: Easy and Effective Ways to Revive Hardwood Without Sanding

The beauty of hardwood floors is timeless, but wear and tear can take their toll. However, many homeowners shy away from traditional sanding methods due to the mess and complications involved. Fortunately, there are smarter, quicker approaches to restore the luster of hardwood without the sweeping aftermath of dust and debris. Here’s your guide to revive those floors effortlessly!

The Power of Cleaning Solutions

First on our list is a simple yet effective cleaning solution. Regular cleaning matters; it preserves the finish of your hardwood. A mixture of gentle dish soap and warm water goes a long way. Utilize a soft mop to ensure dirt and grime are removed without scratching the surface. Avoid soaking the floor, as excessive water can lead to damage. For stubborn stains, consider using a vinegar and water solution, but do so sparingly. Remember, humidity is not a hardwood's friend!

Introducing Refinishing Products

If your hardwood still looks dull after cleaning, it might be time for a refinishing product. Refinishing solutions can restore shine without heavy-duty sanding. Look for reputable brands like Howard or Bona that offer floor polish specifically designed for hardwood. Just apply the product according to the manufacturer's instructions, usually by buffing it into the floor with a microfiber cloth or applicator pad. Instant gratification!

Exploring the Benefits of DIY Treatments

DIY treatments can prove to be effective without compromising quality. Consider using a mineral oil treatment, which not only nourishes the wood but enriches the color as well. Just be sure to test any product in a small hidden area first to ensure compatibility with your hardwood type. This step can prevent any unforeseen hiccups; after all, the last thing you want is a patch that looks different from the rest of your lovely floors.

Why Regular Maintenance is Essential

A key aspect of keeping your hardwood floors in top shape is regular maintenance. Every season, reevaluate the finish of your floors. If scratches or dull spots appear, treat them sooner rather than later. This practice reduces the need for extensive repairs down the road, saving you time and money in the long run. You wouldn’t want your hardwood floors to look like a scene from a horror movie when a simple treatment could have revived their appeal!

The Role of Humidity Monitors and Their Magic

Incorporating a humidity monitor in your home is a tech-savvy solution worth considering. Keeping humidity levels between 30-50% ensures that your hardwood remains stable. High humidity can lead to swelling, while low humidity can cause cracks. The savvy homeowner can avoid these pitfalls with the help of a simple device, ultimately preserving the quality and appearance of their flooring.

Future Trends: Smart Technology Meets Flooring

As smart home technology becomes more integrated into daily living, it’s exciting to see the evolution of products that overlap into flooring care. Automated humidity control systems, paired with sensor technology, will soon provide homeowners with proactive solutions to manage their hardwood flooring environment. Imagine being alerted to low humidity levels on your smartphone or adjusting your home environment with a quick tap. It’s a game-changer for hardwood lovers.

Conclusion: Take Action Today!

With these tips in mind, there’s no reason to keep living with dull hardwood floors. Restoring your floors doesn’t require a hefty investment of time or money. Start with the simple cleaning solutions, explore refinishing products, and stay proactive with humidity management to keep your hardwood floors looking their best. Dive into these solutions today and see how easy it is to bring life back to your home!

DIY Home Projects

Write A Comment

*
*
Related Posts All Posts
09.04.2025

Discover 13 Ingenious Everyday Uses for Your Swiss Army Knife

Update Unleashing the Power of Your Swiss Army Knife: Beyond the ObviousSwiss Army Knives (SAKs) have long been hailed as the quintessential multi-tool, combining practicality with ingenuity. While many are familiar with the common tasks they can handle—like opening bottles or removing splinters—this versatile tool offers a plethora of creative uses that can simplify our daily lives beyond these typical scenarios.Aiden Freeborn, a senior editor for The Broke Backpacker, emphasizes that Swiss Army Knives serve as multi-solution life hacks, often overlooked until they are desperately needed. Key to their functionality is their design; each tool represents a compact solution to many typical problems, making them a homeowner's best friend.The Ultimate Moving CompanionMoving day can be notorious for its chaos, but a Swiss Army Knife can ease some of that burden. Ryan Carrigan, a real estate expert, suggests using the knife to cut open taped boxes, utilize the can opener for stubborn crates, and even rely on the screwdriver to ensure everything is securely closed. Want to get a grip on those boxes? The awl function is perfect for punching holes that make handling easier, addressing the nagging issue of flimsy packaging.Cooking CreativityImagine walking into your kitchen armed with nothing but your trusty Swiss Army Knife. You might be surprised at how many culinary challenges it can conquer. Victorinox, the maker of these iconic knives, offers several suggestions: the small blade can deftly peel fruits and vegetables, while the flathead screwdriver can be a clever helper for opening clams. Employ the tweezers to safely remove bones from fish or the magnifying glass to decipher hard-to-read expiration dates. And if you use the multipurpose hook as a phone stand, following your favorite recipe becomes a breeze. Even scrubbing out the dirt from between the counter and stove can be done with the right tool from your SAK, making it an essential companion for both novice and seasoned chefs.Unlocking Potential: More Than Just a ToolPicking locks may seem like a task reserved for locksmiths, but Carrigan shares a jaw-dropping hack that caught him by surprise: with the right technique, it’s possible to use a Swiss Army Knife to pick a lock! Armed with the toothpick and tweezers, turning the tumblers proved both a vivid demonstration of the SAK’s versatility and a practical solution for those forgotten keys.Coconuts: ConqueredFor those who have ever attempted to crack open a coconut, you understand the struggle. Fortunately, Seymen Usta provides an innovative solution using the Swiss Army Knife. The eyelet tool can puncture the tough exterior without causing a mess, while the knife's body can help pry it open. Just ensure stability to avoid mishaps—this is a clever path to enjoying a fresh coconut directly!Quick Fixes for Your Tech LifeIn today’s tech-savvy world, your Swiss Army Knife can assist with mobile device issues as well. Usta highlights the utility of the tweezers or pin tool for extracting a stuck SIM card. To safely do this, turn off your device and use these tools gently to avoid damage, offering a simple yet effective tech hack.Conclusion: The Multi-Function Life SaverThe Swiss Army Knife is more than a handy gadget; it’s an invaluable tool that exemplifies versatility. From cooking creative meals to performing emergency repairs, the invention proves its worth in countless scenarios at home or on the go. As a savvy homeowner, consider how you can incorporate such a multi-functional tool into your daily practices to tackle DIY projects with confidence and creativity.

09.03.2025

Transform Your Porch with Fall and Winter Decor Ideas: Expert Tips

Update Embrace Seasonal Transitions with Timeless Porch Ideas As the crisp air of fall gives way to winter's chill, homeowners face the dilemma of constantly updating their outdoor decor. However, with thoughtfulness in design and color choice, you can create a charming porch aesthetic that transitions seamlessly across the seasons. Below are six expert-backed ideas for decorating your porch, allowing you to enjoy an inviting space without the continuous effort of redecorating. A Classic Wreath: A Seasonal Staple No porch is complete without a stunning door wreath, which can be a beautiful representation of the changing seasons. Designer Tom Yates advises starting with a natural-looking base made from branches and greenery. This allows for easy customization; for fall, accent with rustic elements, while for winter, switch to deeper, richer colors like burgundy or forest green. This adaptability not only enhances the visual appeal but also enriches your home's exterior across various holidays. Neutral Color Palettes: The Versatile Choice When setting your porch decor, consider adopting a neutral color palette that can span both fall and winter. Brandon McCormick, a landscape designer, suggests earthy tones mixed with deep greens for an elegant look. By incorporating accents in warm bronze or copper for autumn, and transitioning to sleek blacks and creams for winter, you maintain a cohesive and seasonally appropriate appearance. Planters that Defy the Seasons The utility of kale and cabbage planters extends beyond their culinary appeal. These hardy plants provide lively color and texture, surviving through both fall and winter. Interior designer Andrea Sinkin recommends clustering these planters and mixing in seasonal elements as you transition. Pumpkins can accompany colorful cabbages in October, while berries and pine can elevate your winter decor. Illuminate with Cozy Lighting Lighting is critical for creating a welcoming ambiance as daylight hours diminish. Oversized lanterns filled with flameless candles or twinkling lights offer both functionality and beauty. Joyce Huston, an interior designer, emphasizes the comfort these lights bring to your porch. Easy to integrate into your existing decor, DIY lanterns can help you avoid high costs while still achieving that perfect cozy glow. Textured Fabrics Add Warmth In colder months, adding texture can enhance the warmth of your porch. Think about decorative pillows or soft throw blankets that invite coziness. Layer fabrics in your chosen color scheme for not only comfort but also adding a rich visual in both fall and winter designs. As seasons change, a simple swap of patterns or colors can refresh the look without the need for major changes. Use Natural Elements to Connect with Nature Organic materials like wood, stone, and dried flowers make a porch feel inviting. Incorporating organic textures can connect your home to the surroundings regardless of the season. Whether it’s twine-wrapped planters or wooden crates filled with seasonal fruits, natural elements are timeless, and they bring the essence of the outdoors inside your home. Final Thoughts: Simplifying Seasonal Decor In summary, designing a porch that transitions smoothly from fall into winter doesn’t have to be an overwhelming task. By incorporating classic elements like wreaths, a neutral color palette, hardy planters, soft textiles, and ambient lighting, you create an inviting space that can be enjoyed all season long. Embrace these tips to ensure your porch remains a beautiful and welcoming sight, no matter the season.

09.03.2025

DIY Walk-in Pantry: A Step-by-Step Comprehensive Guide

Update Transform Your Kitchen with a DIY Walk-in Pantry Building a walk-in pantry is a pragmatic way to boost storage in your home without hiring professionals. With careful planning and commitment, you can craft a space that enhances your kitchen's functionality while keeping it stylish. Assessing Your Space: The First Step to a Functional Pantry To kick off your pantry project, start by evaluating where you want it to go. Look for underutilized spaces, like old coat closets or corners by the kitchen where a pantry can fit seamlessly. Measuring these areas is essential—overshadowing the layout elements with precise measurements can ensure your pantry meets your storage needs. Think about ample access and select a layout that caters to the size of your room. Designing Your Ideal Pantry Layout Next, plan the design according to your usage requirements. Visualize how many shelves you need, their depths, and the specific zones within your pantry. Assign areas for items like dry goods, snacks, and cleaning supplies. This zoning will help you stay organized. Create a sketch or use digital tools to visualize your layout, making sure to indicate important features like electrical outlets and lighting. Selecting the Right Materials for Longevity and Aesthetics Choosing the right materials is crucial for both durability and design appeal. When it comes to shelving, consider wood for sturdiness, melamine for easy cleaning, or wire for budget-conscious options. Don’t forget about flooring—a resilient, easy-to-clean material holds up best in pantries. Implement effective lighting choices, such as LED strip lights or recessed fixtures, to create a well-lit, inviting environment. Final Touches for Your Walk-in Pantry As you embark on this DIY journey, remember that patience and precision are key. Installing the pantry according to your plan not only transforms kitchen storage but also adds a unique touch to your home. At the end of your project, you’ll enjoy a beautifully organized and functional pantry that enhances the cooking experience. Starting a DIY pantry project not only improves home efficiency but also empowers you with skills and confidence for future projects. So, roll up your sleeves and transform your kitchen space!

Terms of Service

Privacy Policy

Core Modal Title

Sorry, no results found

You Might Find These Articles Interesting

T
Please Check Your Email
We Will Be Following Up Shortly
*
*
*