Add Row
Add Element
UPDATE
Add Element
  • Home
  • Categories
    • Cleaning & Moving
    • Maintenance / Repairs
    • Remodeling & Construction
    • Landscaping / Outdoor
    • Security & Technology
    • Sustainability, Health & Safety
    • Interiors / Décor
    • Expert Interviews
    • DIY Home Projects
Home Wise News!
Wise Insights, Reliable Contractor Advice & Hands on DIY Know How for Savvy Homeowners
September 07.2025
3 Minutes Read

The Ultimate Guide to Cleaning Your Stained Corian Sink

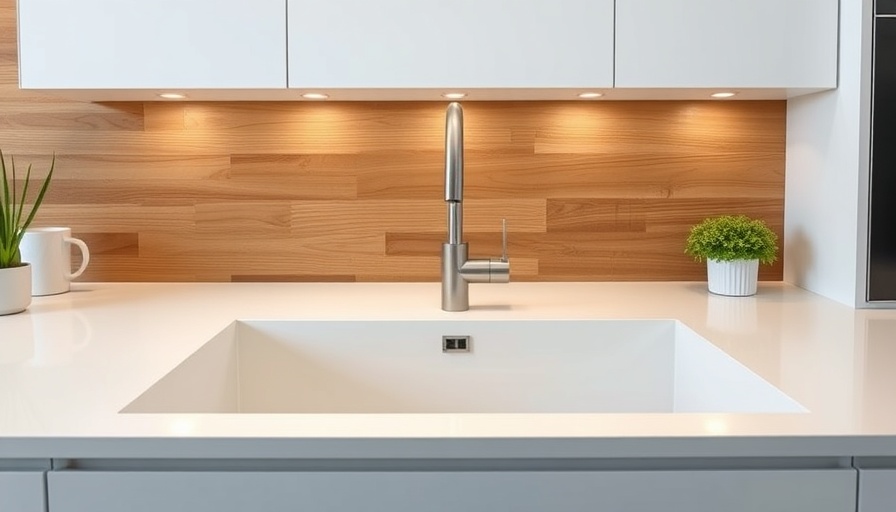
Spotless Corian sink in a modern kitchen setting.

Reclaiming the Beauty of Your Corian Sink

Corian sinks are renowned for their durability and aesthetic appeal. Despite their non-porous nature, these stylish features in your home can still fall victim to everyday stains from food, hard water, cooking oils, and even rust. Thankfully, with the right cleaning techniques, you can restore your sink to its original lustrous state.

Understanding Corian: Why It Matters

Corian is not just a brand name; it represents a solid surface material crafted from a blend of acrylic polymer and alumina trihydrate. This unique composition provides not only resistance to stains but also eliminates bacterial growth, making it a favored choice for kitchens in both residential and commercial settings.

The Usual Suspects: What Causes Stains in Corian?

Stains can arise from various sources:

  • Food and Drink: Items like coffee, tea, red wine, and various food dyes can leave unsightly marks unless promptly addressed.
  • Hard Water: Especially in regions with high mineral content, hard water can create a white, chalky build-up over time.
  • Cooking Oils: Residues from oils and grease attract dirt, leading to a dingy appearance.
  • Metal Rust: Rust from metal pots and pans can cause unsightly marks, particularly if pooled water surrounds them.

Essential Supplies for Cleaning

To start fresh, gather these items—most are staples in any home:

  • Mild dish soap
  • Baking soda
  • White vinegar
  • Non-abrasive sponge or cloth
  • Soft-bristle brush
  • Spray bottle
  • Non-abrasive household cleaner (optional)

Step-by-Step Guide: How to Clean a Stained Corian Sink

Follow these thorough yet straightforward steps to begin revitalizing your Corian sink:

  1. Start with Gentle Cleaning: Begin the cleaning process by filling your sink with warm water mixed with a few drops of mild dish soap. This simple action removes loose debris and starts breaking down initial stains.
  2. Utilize Baking Soda Paste: For those stubborn spots, create a paste using baking soda and water. Apply it to the stain and let it sit for 5-10 minutes before gently scrubbing with a non-abrasive sponge.
  3. Vinegar for Hard Water Stains: Hard water stains can be tackled with white vinegar. Spray it on the affected areas and let it sit for about 10 minutes to dissolve mineral deposits.
  4. Non-Abrasive Cleaner: If stains persist, consider a non-abrasive cleaner specifically designed for solid surfaces. Always ensure the cleaner is safe for Corian.

Long-Term Care Tips to Maintain Your Corian Sink

To keep your sink looking its best, here are some ongoing maintenance tips:

  • Wipe Regularly: Make it a habit to wipe down your sink daily with a soft cloth to prevent stains from setting.
  • Avoid Harsh Chemicals: Stay away from strong abrasive cleaners that could damage the finish.
  • Promptly Clean Up Spills: The sooner you clean up spills, particularly from staining substances, the easier they will be to tackle.

When to Call in Professional Help

Sometimes, despite your best efforts, some stains may seem unyielding. In cases like these, it might be wise to consider professional cleaning services. They possess tools and expertise that can restore your sink effectively, saving you time and labor.

Making the Most of Your Corian Experience

Your Corian sink is more than just a functional item in your kitchen; it’s a centerpiece that enhances your home’s aesthetic. By implementing these cleaning techniques and maintenance tips, you’ll not only extend the life of your sink but also retain the beauty that drew you to it in the first place.

In Conclusion

Cleaning a stained Corian sink may seem daunting at first, but with a bit of knowledge and the right tools, you can revitalize its look effortlessly. Embrace proactive maintenance, and when in doubt, seek professional assistance to restore your sink's pristine charm.

Book online with a professional cleaning service today and take the first step towards a spotless kitchen.

Cleaning & Moving

Write A Comment

*
*
Related Posts All Posts
09.07.2025

Learn How to Clean Oak Cabinets to Shine Like New Again!

Update Unlocking the Secret to Sparkling Oak Cabinets Ever glanced at your oak cabinets and wondered how to make them shine like new? Fear not, because cleaning oak cabinets is not just a chore; it can be an enlightening journey into the realm of home maintenance. In this guide, we decode the steps, secrets, and hacks to get your oak cabinets looking pristine, fresh, and ready to impress. Historical Context: The Timeless Appeal of Oak Before we dive into the cleaning techniques, it's important to appreciate why oak has remained a favorite among homeowners for centuries. Its resilience and natural beauty lend warmth and character to kitchens and living spaces, making it a staple in both modern and traditional designs. But with great beauty comes great responsibility; maintaining that shine requires more than just a swipe with a dish rag. Practical Insights: The Cleaning Process Unveiled To clean your oak cabinets effectively, you’ll need a few essential items: a soft cloth, a gentle wood cleaner, a sponge, and mineral oil or beeswax. Here’s a simple step-by-step process to bring out the wood’s natural luster: Dust First: Begin with a dry microfiber cloth to remove surface dust and debris. Apply Wood Cleaner: Using a gentle wood cleaning solution, spray it on a cloth rather than directly on the wood to avoid excess moisture. Wipe in Direction of the Grain: This technique helps avoid scratches and effectively lifts grime. Use Mineral Oil: For an added shine, applying mineral oil or beeswax helps seal in moisture and provides a protective barrier against future stains. Future Predictions: Surprising Trends in Home Cleaning As we look toward the future, a notable trend is the incorporation of smart cleaning gadgets in our homes. Imagine a cleaning robot specifically designed for cabinets, programmed to recognize wood stains and apply the appropriate cleaning solution. While this technology may still be on the horizon, it highlights a growing interest in smart home integrations that simplify and enhance the cleaning process. Already, products like smart vacuums are revolutionizing how we maintain our living spaces. Emotional Connection: The Heart of the Home Your kitchen is often considered the heart of the home. It’s where family gathers, and memories are made. Taking the time to ensure your oak cabinets are clean and shiny is more than just a task; it’s a way to show appreciation for the spaces you inhabit daily. A clean kitchen can foster a welcoming atmosphere, encouraging gatherings over shared meals and conversations. Counterarguments: Embracing the Weathered Look While many strive for shining surfaces, some may find charm in the patina of aging wood. The weathered look signifies warmth, history, and a style all its own, which contrasts sharply with high-gloss finishes found in modern homes. This perspective invites a broader conversation about personal style in home decor, emphasizing that beauty sometimes lies in imperfection. Actionable Insights: Beyond Just Cleaning Once you’ve cleaned your oak cabinets, consider regular maintenance to sustain their beauty. A monthly dusting and biannual deep cleaning can prevent buildup and prolong the life of the wood. Additionally, investing in proper storage solutions can ensure that items are not carelessly tossed around, protecting the surfaces from scratches and dents. Moreover, considering the use of green products aligns with sustainable living trends and is friendlier to both the environment and your home. Conclusion: A Call to Action for Homeowners Cleaning your oak cabinets isn’t just about aesthetics; it’s an opportunity to invest in your home’s longevity. The next time you feel overwhelmed by the task, remember that you’re enhancing the heart of your home and potentially creating a space where memories will flourish. Grab your cleaning supplies and put these tips into action! Your cabinets—and your family—will thank you. Transform your cleaning routine into a bonding experience with loved ones, as you all come together for a refreshing endeavor.

09.06.2025

Banish Hard Water Stains From Glass: Your Ultimate Cleaning Guide

Update Understanding Hard Water Stains: The Unwanted Guests on Your Glass Hard water stains can seem like an unavoidable nuisance when it comes to maintaining the pristine look of your glass surfaces. These unsightly marks are primarily caused by minerals such as calcium and magnesium left behind after water has evaporated. Not only do they mar the beauty of your windows, shower doors, or glassware, but they can also be tough to remove if left untreated for too long. In this guide, we’ll explore various effective methods to banish those stubborn hard water stains for good, ensuring your glass stays sparkling clear. Why Hard Water Stains Matter: The Hidden Impact on Your Home While you may think of hard water stains as merely unsightly blemishes, they can have more than just an aesthetic impact on your home. Over time, these mineral deposits can etch and scratch glass surfaces, leading to costly repairs or replacements. This is particularly true for shower doors which, if left untreated, may require more than just traditional cleaning methods. Therefore, acting quickly and efficiently is key to preserving both the look and longevity of your glass. Choose Your Weapon: Different Techniques for Removing Hard Water Stains Addressing hard water stains can be tackled with several household items and methods. Here are a few that stand out: Vinegar and Baking Soda: An age-old remedy, a mixture of vinegar and baking soda can effectively dissolve mineral deposits. Simply mix them into a paste and apply to the affected area, then wipe clean with a damp cloth. Lemon Juice: The citric acid in lemon juice acts similarly to vinegar. Apply fresh lemon juice to the stains, let it sit, and then scrub gently with a soft cloth for sparkling results. Commercial Products: For those who prefer a quick-fix, various commercial hard water stain removers are available. Just be sure to choose one that is safe for glass and follow the manufacturer's instructions. Prevention: Simple Tips to Keep Hard Water Stains at Bay Prevention is always better than cure! Here are some practical tips to minimize hard water stains from appearing in the first place: Wipe Down Surfaces Regularly: After using your shower or washing dishes, quickly wipe down the glass surfaces to remove excess moisture. Invest in a Water Softener: If hard water is a continuous problem in your area, consider installing a water softener for your home to reduce mineral deposits from the get-go. Use Squeegees: For glass shower doors, keep a squeegee handy to swipe away water after each use, helping to cut down on stains from the start. Alternative Methods: Exploring Eco-Friendly Solutions If you're inclined towards eco-friendly solutions, there are natural alternatives you can try: Baking Soda Paste: Mix baking soda with a little water to create a paste that can be scrubbed onto stains without harsh chemicals. Essential Oils: Some essential oils, like tea tree or eucalyptus, possess properties that can help dissolve mineral deposits while leaving a pleasant scent. When DIY Is Not Enough: Knowing When to Call in the Professionals While numerous DIY methods exist to tackle hard water stains, there may be instances where it’s best to call in professionals. If hard water stains are exceptionally stubborn, or if they have etched into the glass, professional cleaning services can provide deeper cleaning without risking damage to your surfaces. The Takeaway: Enjoying Cleaner Glass Surfaces in No Time Removing hard water stains can seem daunting, but with the right approach and tools at your disposal, it becomes a manageable task. Incorporate some of the prevention tips into your routine, and you’ll enjoy clearer glass surfaces in no time. Remember, consistency is key; a little effort each day can save you from dealing with stubborn stains in the future!

09.06.2025

Transform Your Dusty Attic: Comprehensive Cleaning Guide Inside!

Update Why Attic Cleaning Should Top Your Home Maintenance List Attic cleaning isn't just about eliminating the clutter out of sight; it's a crucial step in maintaining the overall health of your home. Many homeowners underestimate the importance of this space, thinking that as long as they can't see the mess, it doesn't matter. However, neglecting this area can lead to severe consequences for both air quality and structural integrity. Dust, mold, and pests are common issues found in attics and can quickly become a family health hazard. Regular cleaning can help reduce these risks, ensuring that the air circulating in your home is fresh and clean. An organized attic can contribute significantly to the curb appeal of your home when you're ready to sell! Preparing for a Successful Attic Clean-Out Preparation is essential for a successful attic cleaning endeavor. Before climbing up into that dimly lit area, gather the appropriate safety gear and cleaning supplies. Make sure to wear an N95 respirator mask and safety goggles to protect yourself from dust and potential allergens. Thick gloves and long clothing are also necessary to guard against irritants that might be lurking amongst the insulation and stored items. Begin by inspecting the attic for any signs of pest infestations, leaks, or structural damage. Identify areas that might require professional help before proceeding with your cleaning. Once prepared, you’ll be ready to tackle the task at hand! The Step-by-Step Guide to Attic Cleaning Cleaning your attic doesn’t have to be overwhelming. Here’s a simple step-by-step guide for getting it done efficiently: Remove Stored Items: Start by taking everything out of your attic. This will give you a clearer view of the space and allow you to clean more effectively. Vacuum and Dust: Use a vacuum with a HEPA filter to remove dust and debris from all surfaces. Don’t forget to wipe down surfaces afterward for thorough cleanliness. Treat Stains and Mold: If you come across stains or mold, treat them immediately. Use mold removal solutions and ensure there’s proper ventilation during this process. It's crucial to safeguard your health. Organize and Declutter: As you put items back, consider what you need to keep, donate, or throw away. An organized attic is easier to maintain! Dispose of Waste Properly: Make sure to dispose of any waste according to local regulations. You want to leave your attic clean, but also responsible. The Importance of Routine Attic Maintenance Just cleaning your attic once isn’t enough to ensure its long-term health. Make it a habit to check and tidy your attic at least once a year. Frequent inspections can help detect problems before they escalate, prolonging the life of your roof and insulation and minimizing the risk of health issues caused by indoor air pollution. Additionally, regular cleaning can stave off pests that thrive in undisturbed environments, ensuring that your attic remains a safe storage space that won’t jeopardize your home’s integrity. Embracing the DIY Spirit Cleaning your attic can be more than just a chore; it can be an opportunity to reconnect with your home! Embrace the DIY spirit, where the challenges become achievements. As you sort through your belongings, revisit memories tied to old holiday decorations or family heirlooms, and appreciate the things worth keeping. By following this attic cleaning guide, you take a proactive step towards enhancing your home’s overall environment. Share your experiences with friends or join a community group focused on DIY home improvement. Not only will this encourage you, but it can inspire others as well. As you finish your attic project, enjoy your newly-organized space knowing you've contributed to a healthier home. If you found this guide helpful and you're looking for more tips on DIY projects or home maintenance, consider exploring additional resources and inspiring ideas to elevate your home care routine.

Terms of Service

Privacy Policy

Core Modal Title

Sorry, no results found

You Might Find These Articles Interesting

T
Please Check Your Email
We Will Be Following Up Shortly
*
*
*