Add Row
Add Element
UPDATE
Add Element
  • Home
  • Categories
    • Cleaning & Moving
    • Maintenance / Repairs
    • Remodeling & Construction
    • Landscaping / Outdoor
    • Security & Technology
    • Sustainability, Health & Safety
    • Interiors / Décor
    • Expert Interviews
    • DIY Home Projects
Home Wise News!
Wise Insights, Reliable Contractor Advice & Hands on DIY Know How for Savvy Homeowners
July 26.2025
3 Minutes Read

Why Switching to an Old-Fashioned Upright Vacuum Changed My Cleaning Game

1950s woman using an old-fashioned upright vacuum in vintage living room.

Making the Switch: Why I Chose an Upright Vacuum

In a world filled with futuristic gadgets boasting Wi-Fi connectivity and robotic vacuums that practically clean your home while you sip on your morning coffee, I recently did something that may seem utterly counterintuitive: I traded my sleek, high-tech stick vacuum for a trusty old-fashioned upright. Yes, the kind that comes with a hefty cord and a design that hasn't changed much since the 1950s. However, what I discovered during this transition was surprisingly liberating.

The Unexpected Joy of Simplicity

After years of being lured by the latest advancements in cleaning technology, I often found my stick vacuum lacking in suction power. It was lightweight and easy to handle, but cleaning my carpeted floors felt like using a feather duster on a chalkboard. The upright vacuum, in contrast, utilizes an older yet reliable technology: suction powered by a strong motor, often leading to cleaner carpets in a single pass.

Healthier Living: Allergens Beware!

Not only did I find increased cleaning efficiency, but switching to an upright vacuum also has health benefits. Traditional vacuums usually come equipped with HEPA filters that capture finer dust and allergens more effectively than many modern stick vacuums. With them, people like me—who suffer from allergies—can breathe a little easier. As homes become more energy-efficient and sealed, the dust we’re living with just keeps circulating. An upright vacuum not only picks it up, it helps ensure it doesn’t land back on our floors.

The Nostalgic Factor: Rediscovering Cleaning

There’s also something charming about using an upright vacuum. Unlike the streamlined, futuristic designs of stick vacuums, the upright feels solid and dependable. It's like returning to a simpler time, where a tool's purpose was straightforward: to clean. I found myself taking a little more time to enjoy the cleaning process rather than rushing through it, induced by the rubbery lightness of my previous stick vacuum.

Countering the Myths: Technology Isn't Always Better

Many people cling to the notion that advanced technology leads to superior results. Yet, sometimes it's about the fundamentals. While tech advancements are impressive, similar to how smartphones have made communication easier, they haven’t always added value to our cleaning experience. My upright vacuum reminded me of this; simplicity could be the key to not just cleaning, but enjoying the task.

Looking Ahead: The Future of Cleaning

Will this be my last vacuum purchase? Only time will tell! However, as technology continues to evolve, I’ve learned to remain open-minded about new gadgets while embracing the strength of timeless designs. Perhaps one day I’ll add an automated robotic vacuum into the mix, primarily for those busy days. But for now, the nostalgic chug and rumble of my upright vacuum is music to my ears.

In this tech-driven era, it’s easy to forget the joy of elemental tools. Knowing when to embrace modernity and when to step back into the past can lead to innovation and satisfaction in our homes. Perhaps you, too, might consider dusting off that old vacuum from the corner of the garage—there might be charm and effectiveness waiting within it.

Maintenance / Repairs

Write A Comment

*
*
Related Posts All Posts
09.09.2025

Master the Art of House Wrap Installation with These Essential Tips

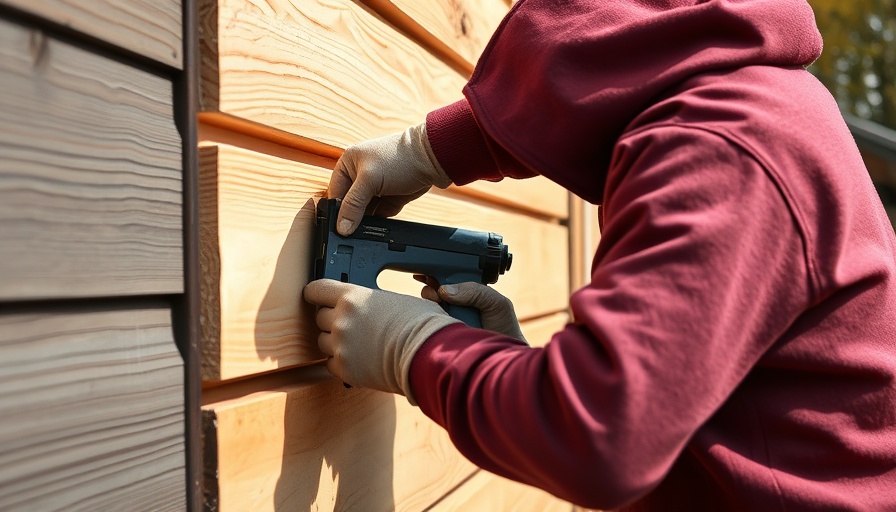
Update The Importance of Proper House Wrap Installation Installing house wrap may not seem like the most exciting part of home improvement, but its significance cannot be overstated. Proper house wrap installation is vital for creating an energy-efficient barrier in your home that protects against the elements. Without it, you risk serious water damage, mold growth, and costly repairs down the line. This article aims to provide essential tips sourced from industry best practices and expert opinions to simplify this crucial task. 1. Choose Quality House Wrap When embarking on your house wrap project, selecting the right product is the first step to success. Avoid cheap alternatives that have low perm ratings, typically around eight to twelve. These can lead to moisture issues as they allow vapor to build up, which can condense and result in dampness within your walls. Instead, opt for high-quality wraps like Tyvek, rated at approximately 54 perm, that enhance moisture control while optimizing energy efficiency. 2. Utilize Cap Nails for Secure Fastening Modern construction standards have evolved, and so have fastening methods. Gone are the days of hammer tackers; instead, today’s house wraps are best installed using cap nails or cap staples. This might seem cumbersome, but the benefits outweigh the drawbacks. Cap fasteners secure the wrap 25 times better than staples alone, ensuring it stays put during severe weather conditions. 3. The Efficiency of The Stinger Tool Hand-nailing cap fasteners might work in a pinch, but it’s not the most efficient method for DIYers. Consider using a tool like the Stinger® Cap Staple Hammer. This innovative tool is designed for the task, allowing you to drive cap nails easily, speeding up installation while maintaining the high standards necessary for effective water and wind protection. 4. Create a Wind-Tight Seal with Overlapping Proper overlap is essential in maintaining a wind-tight seal. When installing the house wrap, ensure that every vertical application overlaps by at least six inches. This allows water to shed properly, directing it away from vulnerable spots. Following this practice can prevent leaks and prolong the life of your walls. 5. Wrapping Around Windows and Doors Special attention should be paid to windows and doors. Wrap these areas thoroughly, making sure to cut slits that allow the wrap to fit snugly around the frames. This tight seal will prevent air from leaking in or out, ensuring maximum efficiency and comfort inside your home. 6. The Aftermath of Installation After successfully installing your house wrap, it’s crucial to inspect your work before moving onto siding or other exterior finishes. Check for gaps, loose sections, or any areas that may need revisiting. This diligence saves money and time in the long run by averting potential damage. 7. The Role of House Wrap in Energy Efficiency Understanding the impact of house wrap on your home's overall energy efficiency can encourage homeowners to take this installation seriously. By preventing air leaks, house wrap enhances your homes' insulation, leading to lower heating and cooling costs. It's a straightforward improvement that pays dividends in comfort and cost savings. 8. Planning for Different Climatic Conditions Not all homes require the same approach to house wrap. Depending on your geographic location, consider the local climate when selecting materials. Areas with high moisture levels may require additional moisture barriers, while dry climates can focus more on vapor barriers for insulation. Tailoring your approach ensures the best performance. 9. Adhering to Building Codes Always consider local building codes and regulations when installing house wraps. Compliance is essential not just for legal compliance but for ensuring your work meets safety standards. This practice helps avoid problems during inspections and ensures the longevity of your installation. 10. Common Misconceptions About House Wraps Many homeowners believe that all house wraps are created equal, but that couldn't be further from the truth. Understanding the differences in material types, perm ratings, and installation techniques can shift your perspective and motivate you to invest wisely in materials. In conclusion, equipping yourself with these handyman tips and DIY projects knowledge regarding house wrap installation not only boosts your skills but also preserves the quality of your home. For safe and effective home repairs and maintenance projects, always prioritize quality materials and practices. By investing time and effort in these essential preparations, your home will be well-guarded against the elements for years to come.

09.08.2025

Avoid This Common Mistake: Why You Should Never Pour Boiling Water Down Your Kitchen Sink

Update Crucial Insights: The Dangers of Pouring Boiling Water We've all been there – a clogged sink, that temptation to grab the kettle and set your plumbing woes straight with a steaming pour of boiling water. But before you leap into action, let's unpack why that seemingly harmless action could lead to some serious plumbing problems. Understanding the Mechanics of Your Pipes Your kitchen sink's plumbing is quite the intricate system. Comprised of various materials – from PVC to metal – each section of piping has its thermal threshold. When boiling water courses through these pipes, especially those made of plastic, it can cause them to warp, weaken, or even crack. Experts urge caution as temperatures exceeding 140°F can significantly damage plastic pipes. Long-Term Consequences of Right Now Fixes Sure, pouring boiling water might seem like a quick fix, but consider the long-term implications. Those temporary clogs may evolve into more significant plumbing issues. According to home repair specialists, introducing boiling water consistently can lead to a cascade of issues, stretching from damaged pipes to potential leaks and costly repairs. Safer Alternatives for Unclogging If boiling water is off the table, what can you do? There are several safer, more effective methods to unclog your sink: The Baking Soda and Vinegar Combo: This dynamic duo can effectively clear out minor clogs. Pour half a cup of baking soda down the drain, followed by a half cup of vinegar. Cover the drain for 15 minutes, then flush with hot water. Use a Plunger: A plunger is a straightforward, yet effective, tool you'll want to keep handy. Ensure you have a good seal around the drain and apply upward and downward pressure to clear the obstruction. Consider a Snake: Drain snakes are cost-effective and help reach deeper clogs. This tool can help remove hair, food particles, or debris stuck further down the line that simply won't budge with standard methods. Environmental Implications: A Sustainable Approach Aside from damaging your plumbing, pouring boiling water down the sink can have an environmental impact. Hot water may lead to a change in temperature at your local wastewater treatment facilities, raising concerns about energy usage and ecological consequences. By practicing safer unclogging methods, you become part of the solution, reducing your carbon footprint while still addressing your plumbing needs. Future Predictions: Plumbing Technology Innovations The world of plumbing technology is evolving. With smart home systems on the rise, more homeowners are investing in tools that can monitor and notify about plumbing issues before they escalate into costly repairs. Innovations like smart leak detectors and automated drain cleaners can significantly reduce incidences of clogs without the need for boiling water. Common Misconceptions about Plumbing Repairs A prevalent belief is that strong heat is the best method to eliminate clogs. This notion disregards the varying materials in plumbing systems which react differently to temperature changes. Remember, not every blockage can or should be met with hot water! Relying on tried-and-true methods and tools can save you from developing future plumbing headaches. The Emotional Drain of DIY Fails Picture this: you’re in your PJs, freshly poured coffee in hand, only to find yourself knee-deep in water because your DIY boil-and-pour has gone wrong. The stress and time involved in fixing a simple plumbing issue that snowballed due to damaging your pipes can be exhausting. Taking a moment to analyze before jumping right into boiling solutions can save you not just plumbing woes but also your sanity! Always remember, your kitchen sink is not a pot. With patience, knowledge, and a bit of humor, you can steer clear of boiling water mishaps and keep your plumbing in its best shape. Happy unclogging!

09.08.2025

Revamp Your Cleaning Routine: Avoid These Common Hardwood Mistakes

Update Why Your Cleaning Routine Matters Maintaining the pristine shine of your hardwood floors is not just about aesthetics; it's about preservation. Many homeowners underestimate the impact of their cleaning techniques on the longevity of their floors. With wood being a natural material, even the most thorough mop may contain hidden factors that can lead to irreversible damage. Common Missteps That Wreak Havoc on Hardwood When it comes to cleaning hardwood floors, certain mistakes can turn your cleaning efforts from noble to a nightmare. One major mistake is using too much water during mopping. Excessive moisture can seep into the seams, warping and damaging your flooring over time. Additionally, using the wrong type of cleaning solution—especially those containing ammonia—can discolor your wood and erode finishes. A dull floor is often a crying signal for wrong cleaner usage! The Dangers of Neglecting Dust and Dirt Neglect is another silent killer of wood floors. Even if you think a quick clean will do the trick, dirt and dust can act like sandpaper, grinding down the protective layers of your wood. Regular sweeping or vacuuming (with a floor-safe attachment) ensures your floors remain unscathed. Remember, prevention is key! Your Tools Could Be Doing More Harm than Good Many homeowners reach for a traditional mop and bucket, believing they’re giving their hardwood floors the TLC they deserve. Unfortunately, this approach might be counter-productive. Consider switching to microfiber mops, designed specifically for hardwood care, or a hardwood-safe cleaning robot that can adapt its cleanig schedule based on foot traffic and dirt accumulation. Alternative Cleaning Methods Worth Trying For those seeking an environmentally-friendly approach, consider vinegar and water solutions. However, make sure to dilute right; too much vinegar can lead to dullness or even damage. Using a solution of olive oil and vinegar can also impart a natural shine that illuminates your wood floors while preserving the finish. Future Trends in Floor Care: Smart Cleaning Solutions As technology advances, the cleaning of hardwood floors is benefiting from smart solutions. Imagine floor sensors that alert you when a surface needs a clean or robotic systems that not only vacuum but can also monitor humidity levels to avoid damage from excess moisture. These innovations are paving the way for hassle-free maintenance of hardwood floors without sacrificing their integrity. Final Thoughts and Actionable Insights Understanding proper cleaning technique techniques and tools is essential for preserving the beauty and longevity of hardwood floors. Avoiding common mistakes and embracing smarter cleaning technology can make a world of difference. Embrace the challenge with diligence—your floors will thank you for it! Now that you know how to care for your hardwood floors, it’s time to take action and revamp your cleaning routine for better results!

Terms of Service

Privacy Policy

Core Modal Title

Sorry, no results found

You Might Find These Articles Interesting

T
Please Check Your Email
We Will Be Following Up Shortly
*
*
*